We need to create an Azure AD application to connect to a Microsoft 365 (Exchange Online) organization using Modern Authentication. After creating the Azure AD app, obtain the Tenant ID, Client ID, and Client Secret Value from Azure.
Step 1: Create & Register a new app in Azure AD
Sign into the Microsoft 365 Admin Center and go to the Azure Active Directory admin center. Under the App registrations section, select New registration.

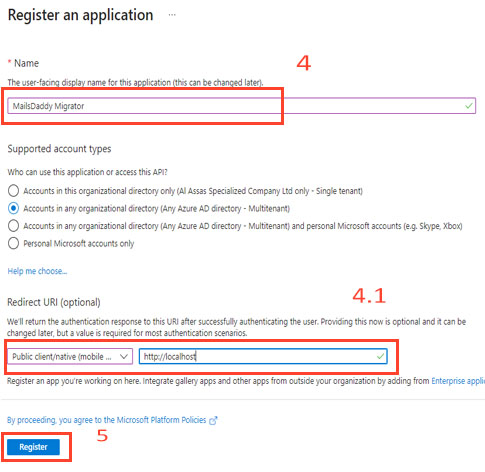
Enter the application name in the Name field, select who can use this application or access the API, specify the Redirect URI, and then click the Register button.
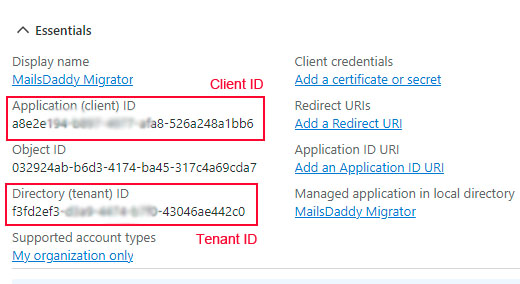
Your application ID (Client ID) and Directory (tenant) ID are now available in the Overview section. Copy them to a safe location.
Step 2: Create and Configure Client secrets
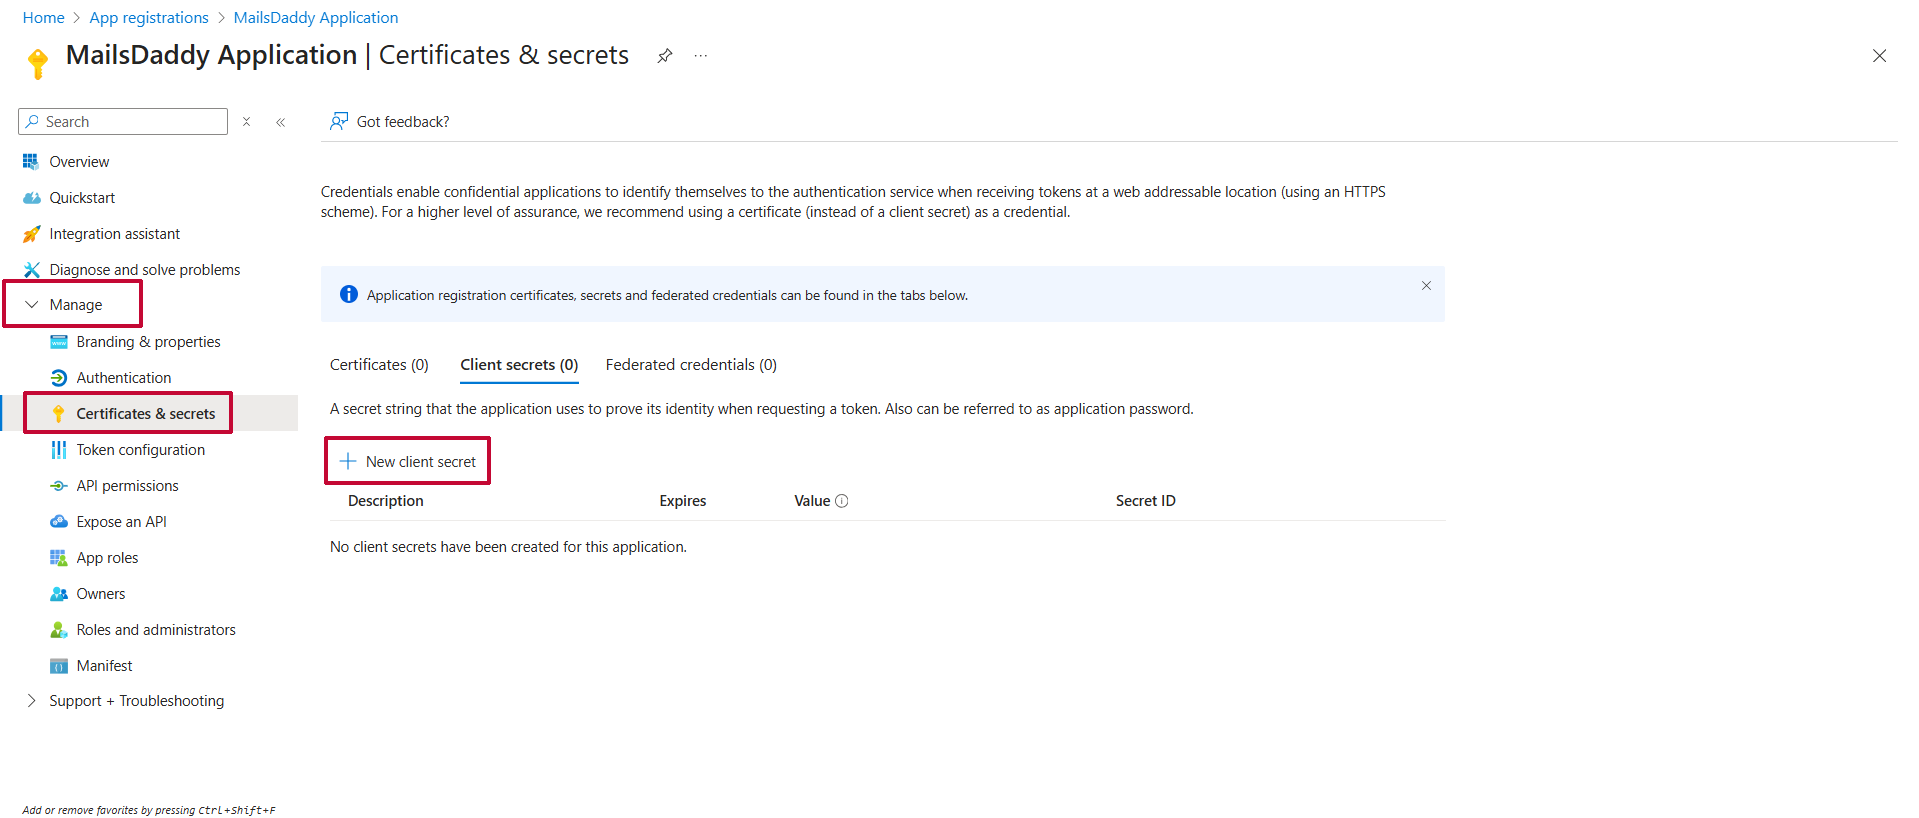
Now click Certificates & secrets from the Manage section, and then click New Client Secret.
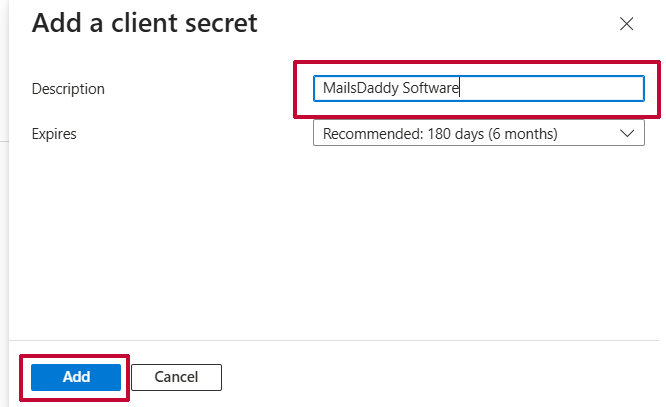
Enter the Description, select the expire period, and click the Add button.
Copy the Client Secret value to a safe location.

Step 3: Grant Required Permissions
Now we have to allow certain permissions to export or import mailbox, contact, calendar, etc.
Click on the API permissions option, then click on "Add a permission".
Now click on "Microsoft Graph" under Microsoft APIs.

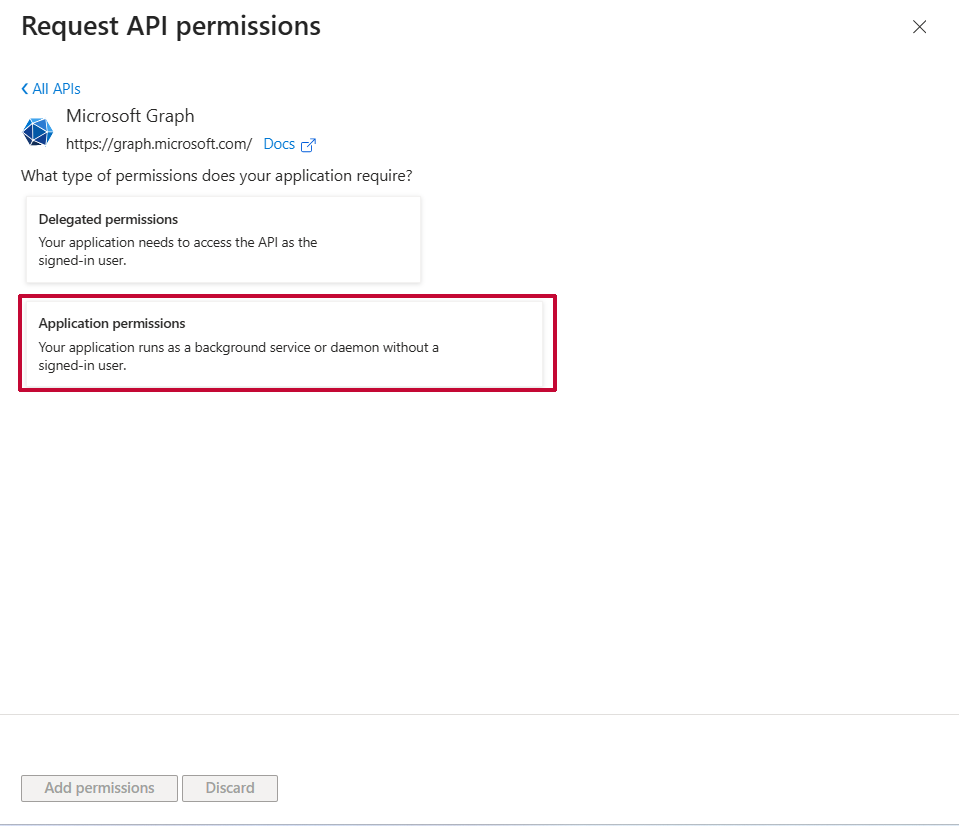
Click on "Application Permission"
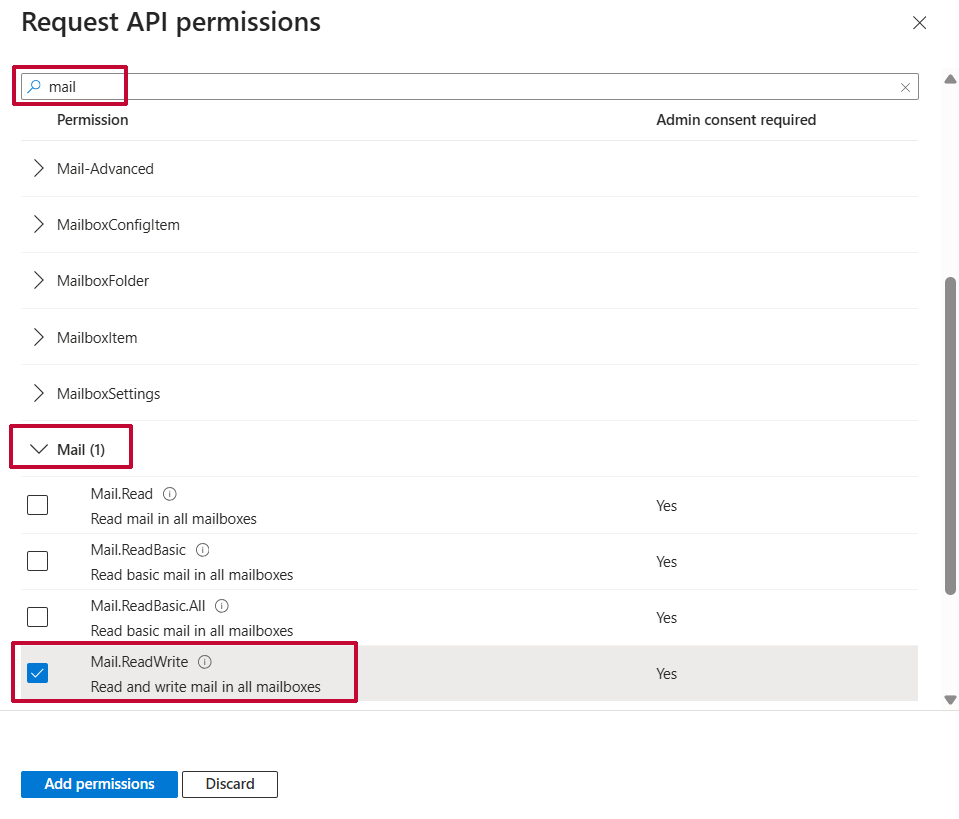
Search for "Mail" and enable "Mail.ReadWrite".
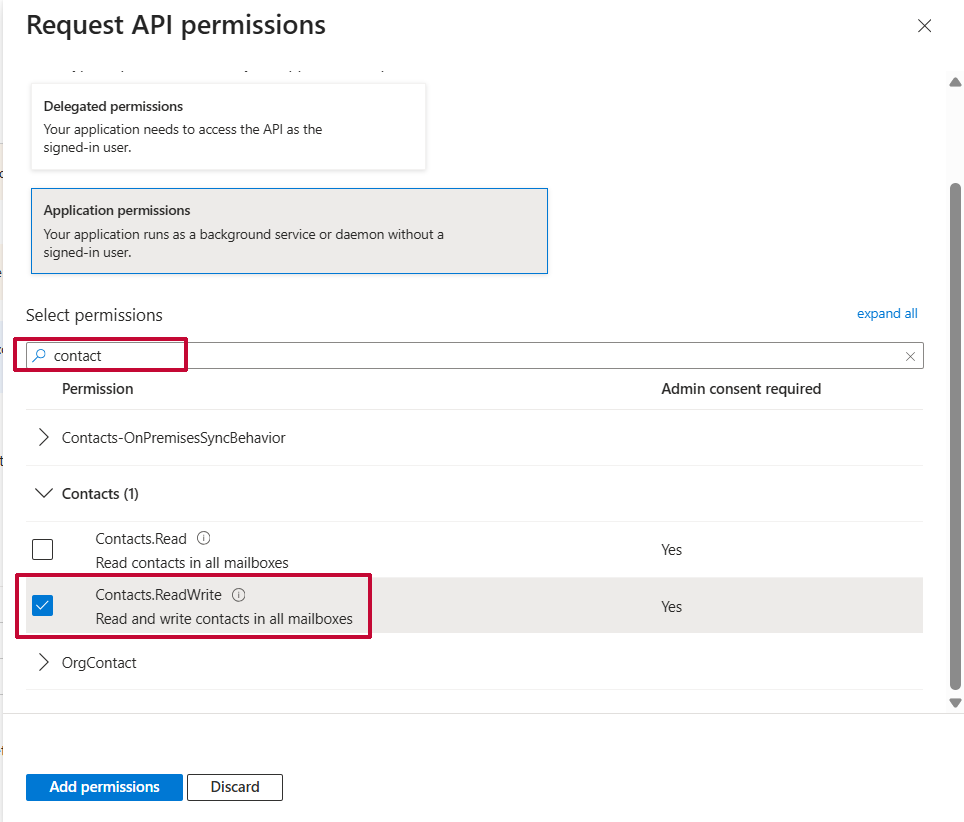
Search for "Contact" and enable "Contact.ReadWrite".
Search for "Calendar" and enable "Calendar.ReadWrite".

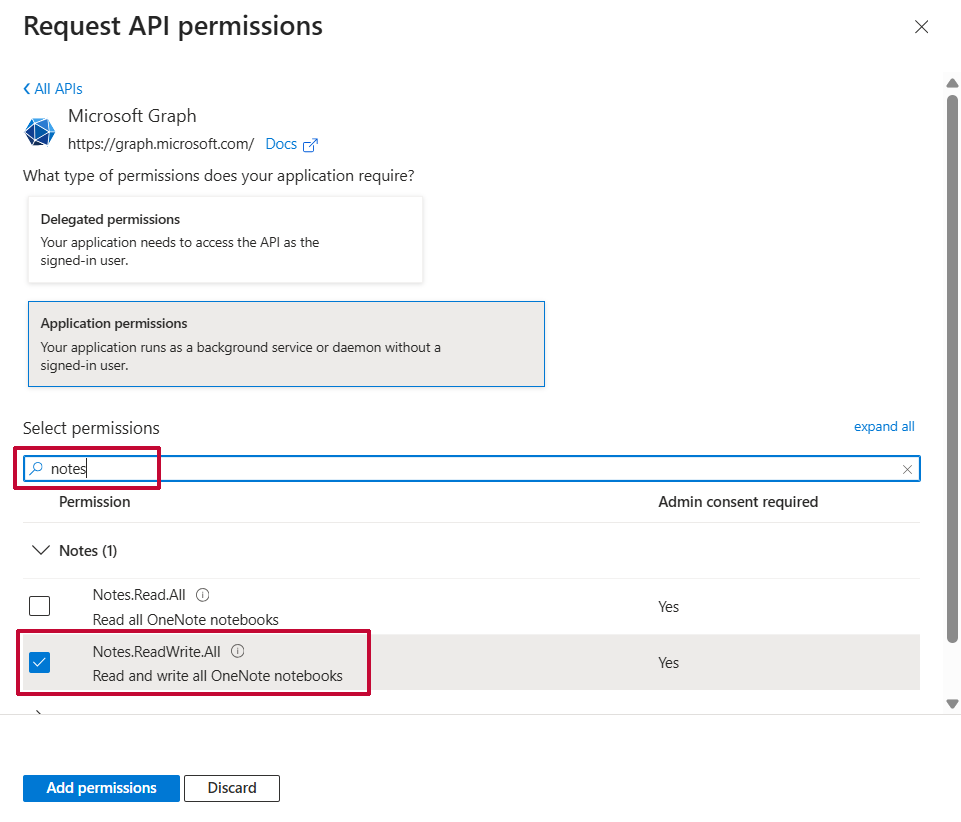
Similarly, do the same for "Note", "Tasks", "Mailbox settings", and "User", and enable "ReadWrite.All" as described in the image.
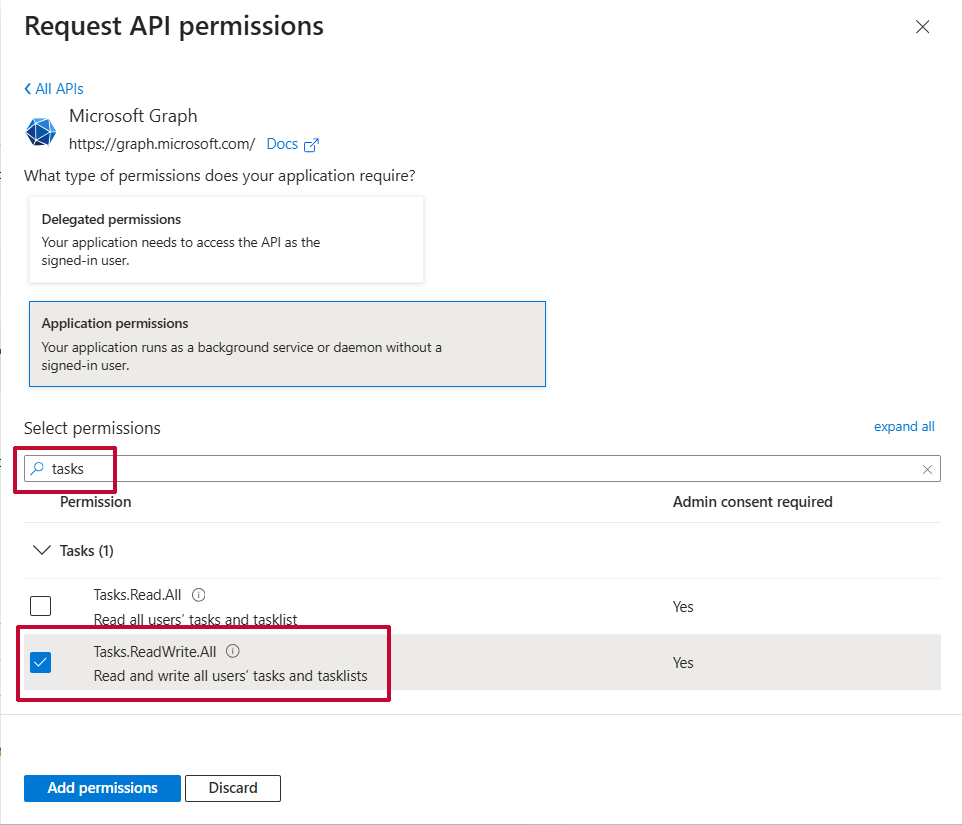
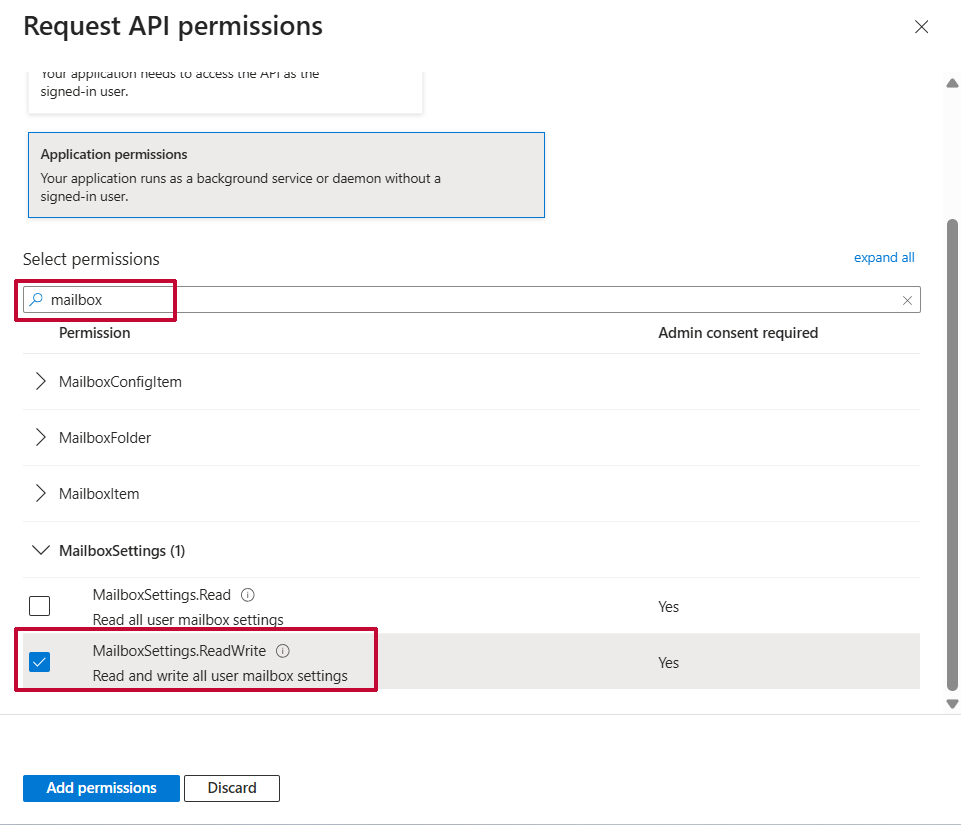

Once you have selected all the permissions, click the "Add Permissions" button.
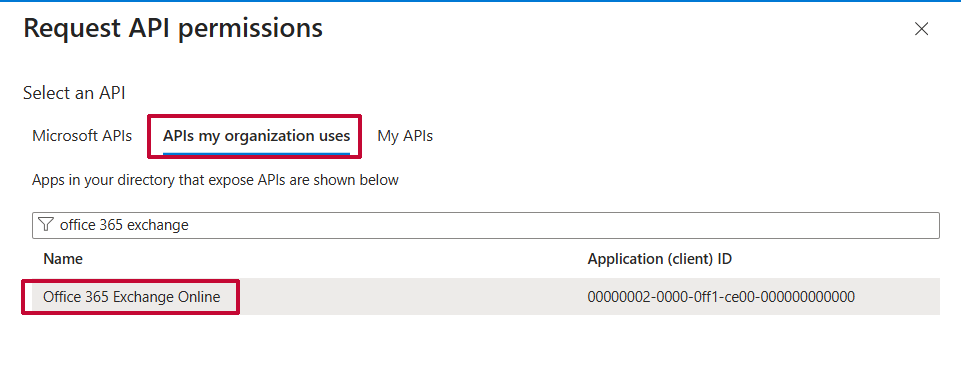
Now click "Add permissions" again, then click on the ‘APIs my organization uses’ tab and search for Office 365 Exchange Online. Click on Office 365 Exchange Online from the list.
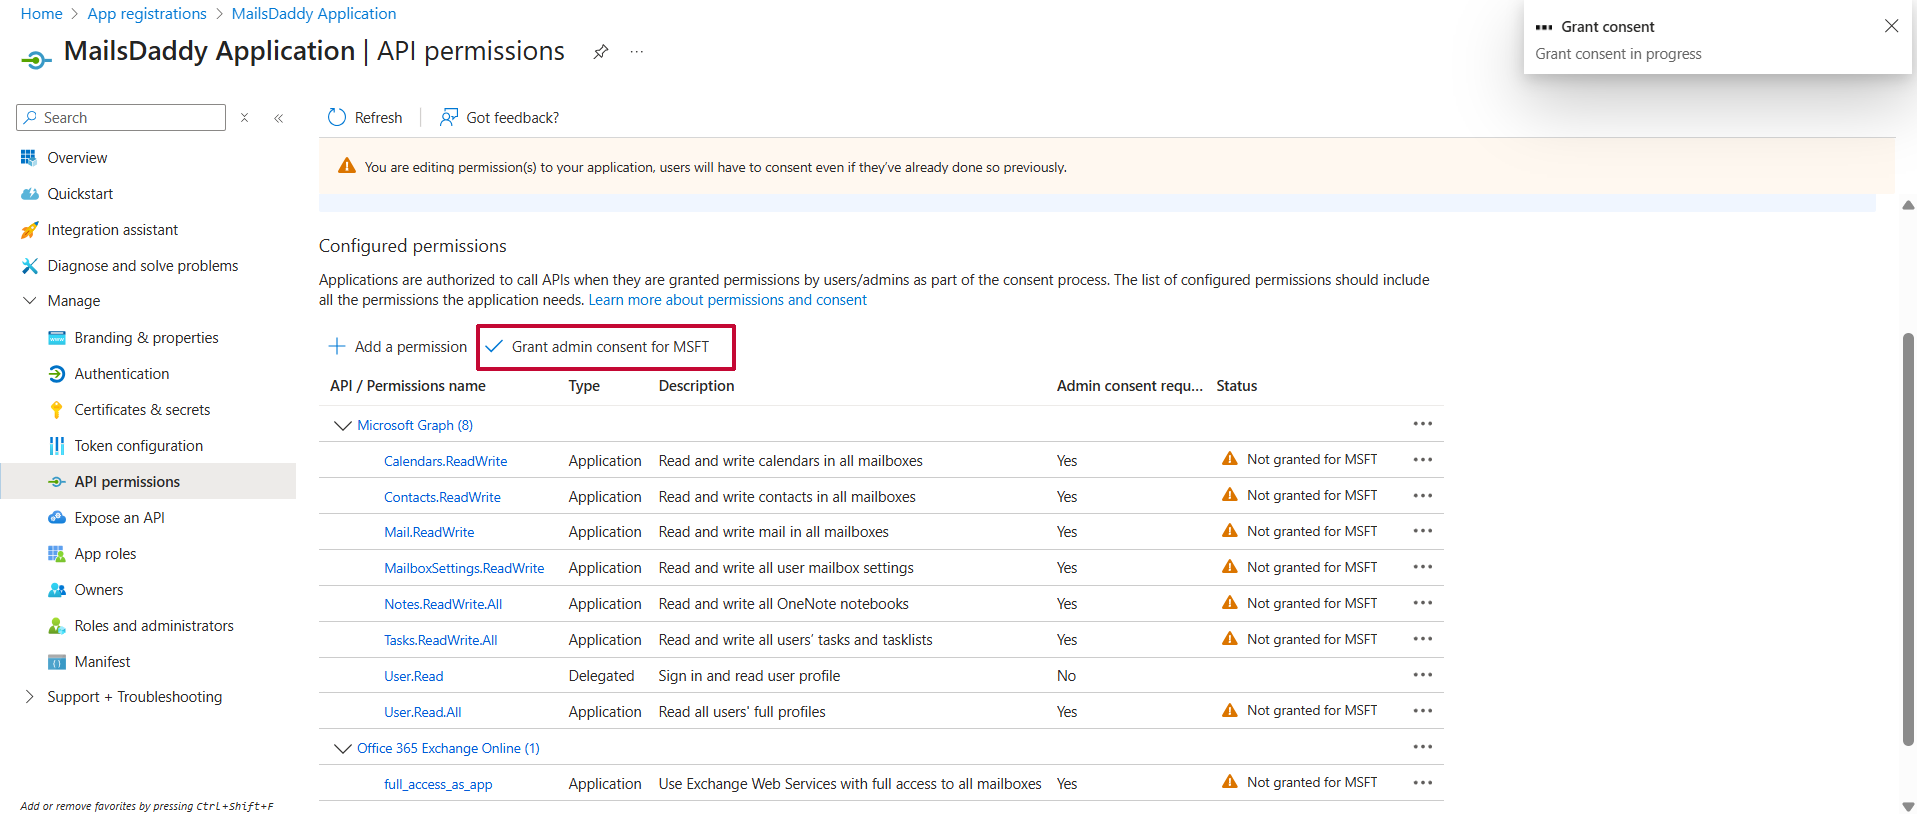
Proceed with adding the permissions for this app: select Application permissions, then select full_access_as_app. Click the Add permissions button.

Click Grant admin consent for. A new window will prompt “Grant admin consent confirmation”; click Yes. That’s it.

All done! Now you can easily use Modern Authentication with MailsDaddy Office 365 Migrator and Backup applications.