We’re all familiar with the Recycle Bin on our computers, a lifesaver when we accidentally delete something important. However, this time we’re not talking about the Windows Recycle Bin. Instead, we’ll explore how to restore deleted items in SharePoint using its built-in Recycle Bin feature.
Microsoft Office 365 is a well-designed collaboration platform that understands accidental deletions can happen during everyday work. That’s why SharePoint includes a powerful recovery system to help you quickly restore deleted files, lists, and libraries without any hassle.
What is SharePoint Recycle bin?
SharePoint Recycle Bin is an invaluable feature, especially for organizations where thousands of users may be working on the same project or site. In such environments, it’s essential for everyone to help maintain a well-organized and efficient workspace.
However, when someone inadvertently deletes or removes a file, the file or folder goes into the Recycle Bin and remains there until the Microsoft policy retention period expires.
SharePoint Recycle Bin Retention Policy
Microsoft sets the default retention policy for the SharePoint Recycle Bin for 93 days. Once this period expires, the deleted items move to the Second Stage Recycle Bin. This cannot be changed at the user level. Only an organization administrator can change the policy from the Microsoft 365 Compliance Center.
What is the Second Stage Recycle Bin?
In organizations, user and admin-level security are always top priority. This is why the Second Stage Recycle Bin exists. It acts as a final recovery option, where only site collection admins or global admins can restore items.
This stage serves as a last backup before data is permanently deleted. Just like the First Stage Recycle Bin, items in the Second Stage Recycle Bin remain for 93 days. After that period, the data is permanently deleted from the tenant and cannot be recovered.
How to Recover items from SharePoint Recycle bin?
Restoring SharePoint items from the Recycle Bin is very easy and simple. The file will be returned to its original location and state as it was before deletion. However, you must have the required permission to perform this action.
- Login to Office 365 and navigate to SharePoint.
- Open your site and go to the go to Site content then chooses Recycle bin.
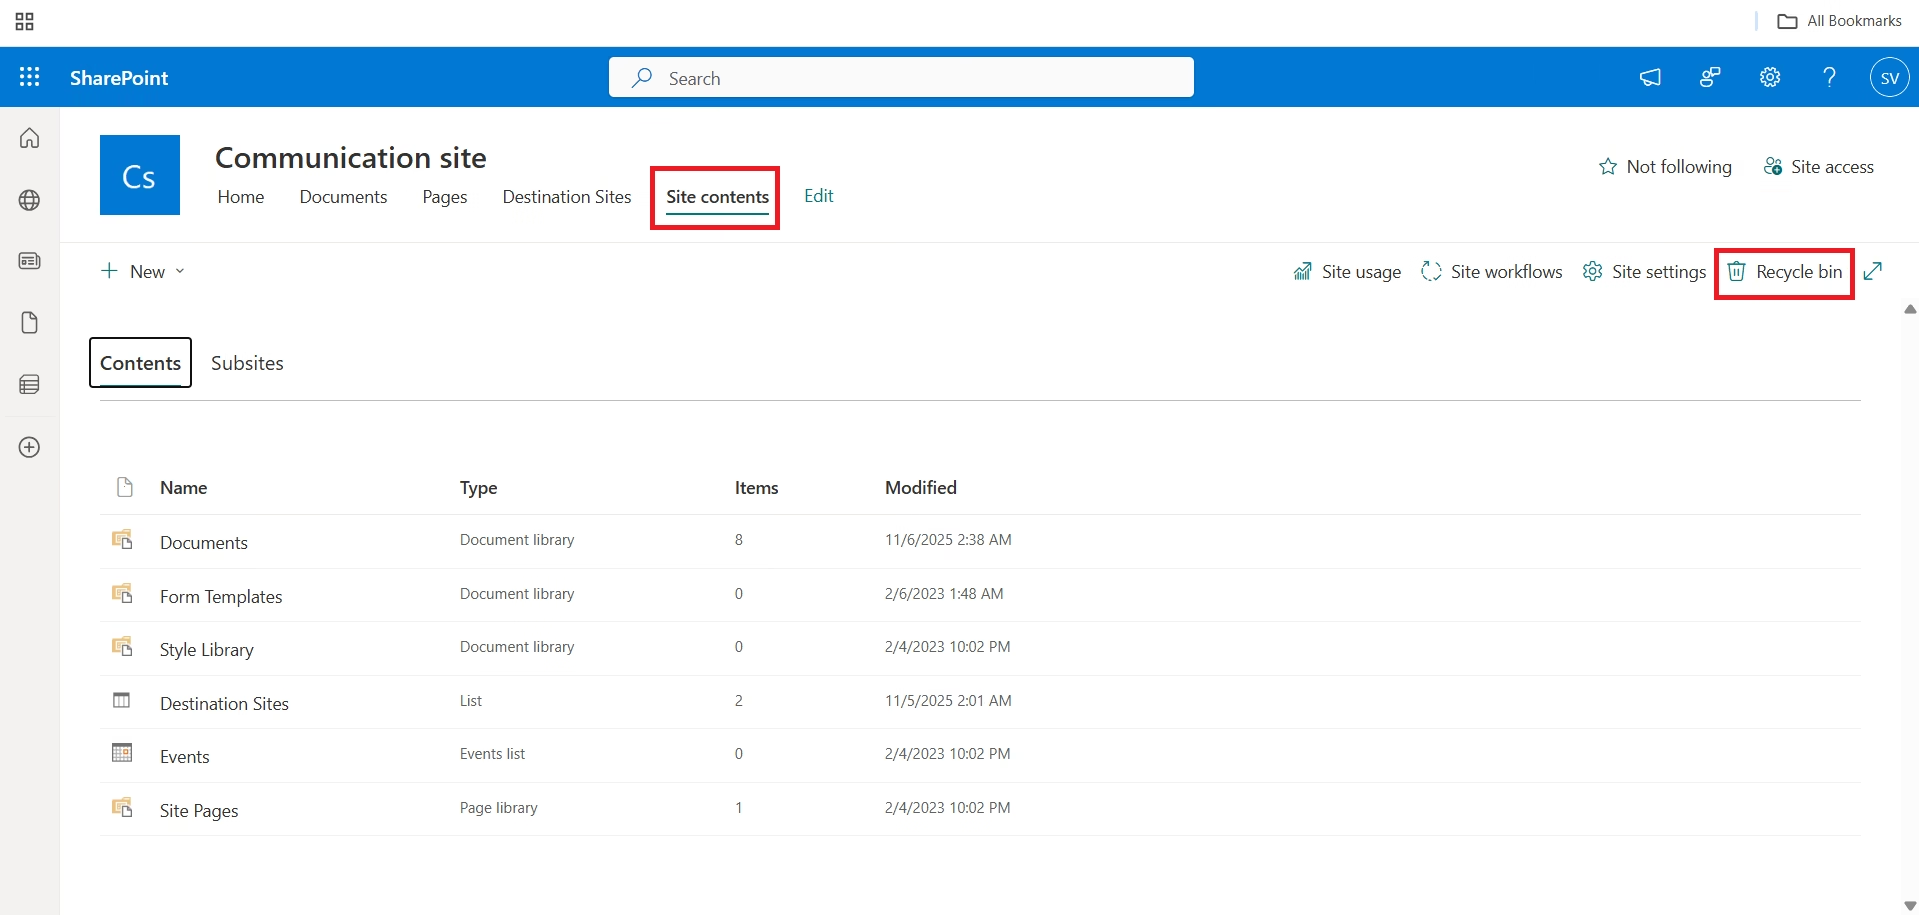
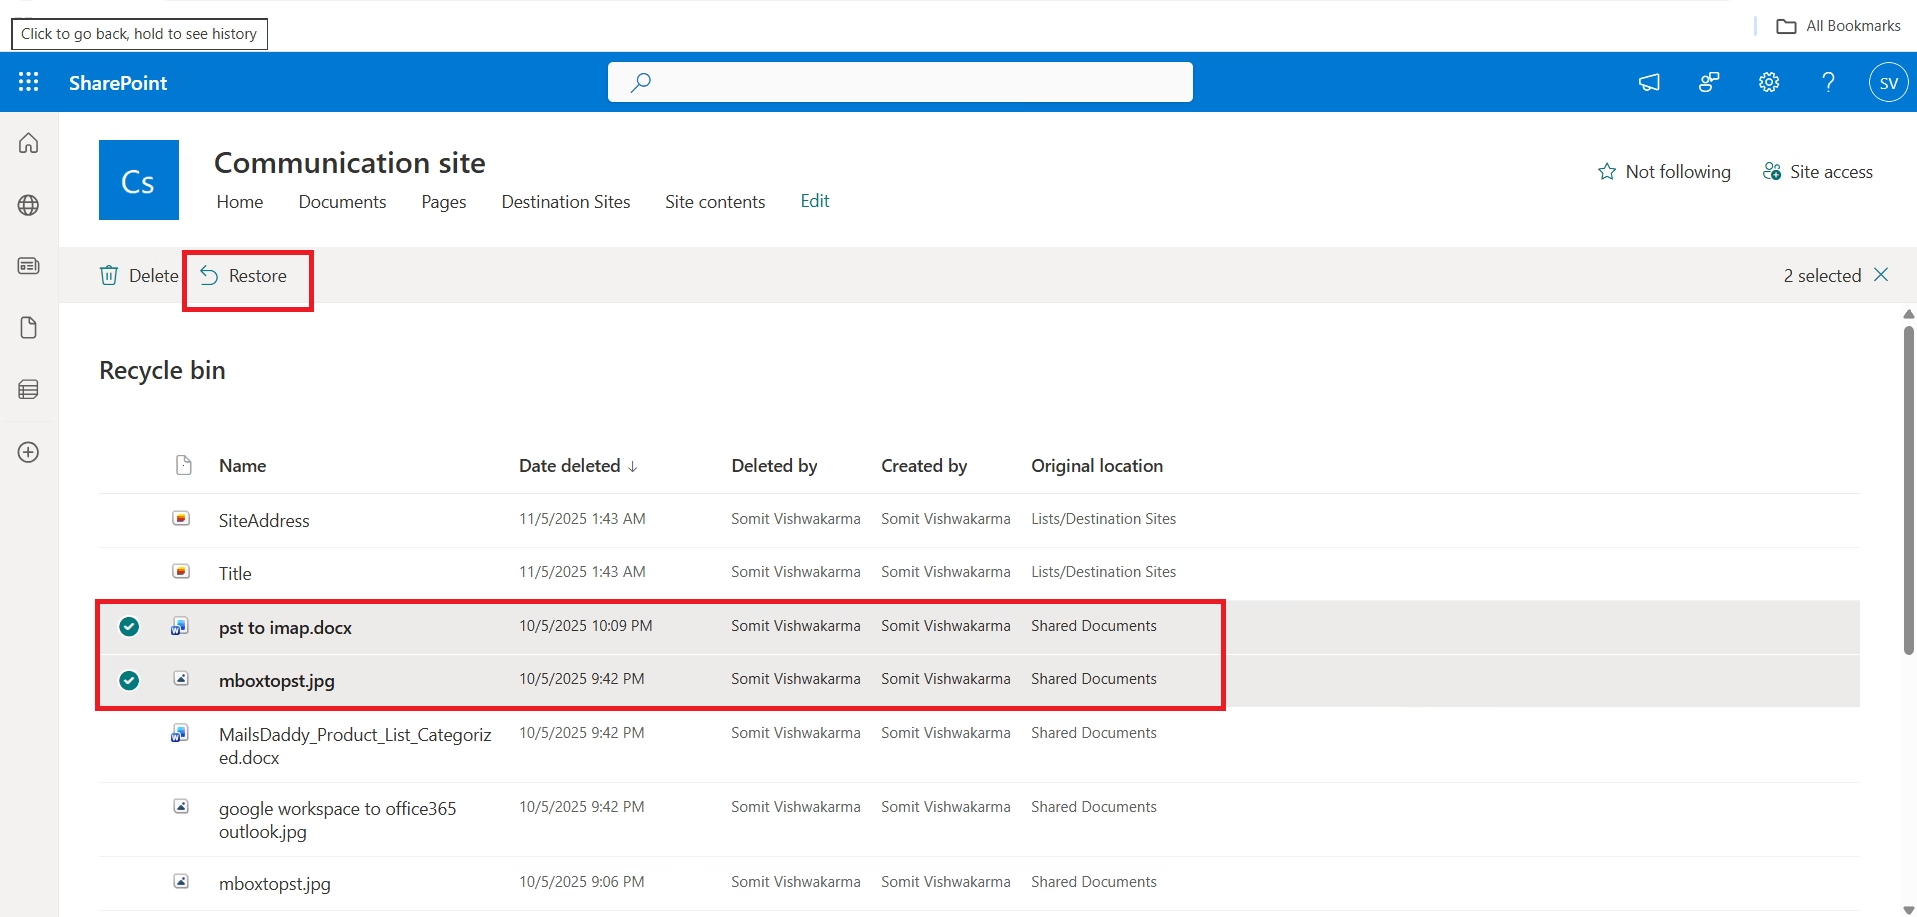
- Select files and folders which you want to restore.
- Now click Restore button to get files to their original location.
PowerShell Command to Restore Items from SharePoint Recycle Bin
PowerShell commands provide a quick and efficient way for IT professionals to restore files and folders instantly—without the need for manual navigation. It’s a fast and professional method to recover data back to its original form. However, you must have the required permissions or administrative access before performing these actions, so be sure to verify your access rights beforehand.
# Connect to SharePoint Online site
Connect-PnPOnline -Url "https://yourtenant.sharepoint.com/sites/yoursite" -UseWebLogin
Restore EVERYTHING (from both Recycle Bins)
Write-Host "Restoring ALL deleted items from both recycle bins..." -ForegroundColor Yellow
Get-PnPRecycleBinItem -FirstStage | ForEach-Object { Restore-PnPRecycleBinItem -Identity $_.Id }
Get-PnPRecycleBinItem -SecondStage | ForEach-Object { Restore-PnPRecycleBinItem -Identity $_.Id }
Write-Host "✅ All items from both recycle bins have been restored." -ForegroundColor Green
Restore ITEMS DELETED AFTER A SPECIFIC DATE
$Date = Get-Date "2025-10-01"
Write-Host "Restoring items deleted after $Date from both recycle bins..." -ForegroundColor Yellow
Get-PnPRecycleBinItem -FirstStage | Where-Object { $_.DeletedDate -ge $Date } | ForEach-Object { Restore-PnPRecycleBinItem -Identity $_.Id }
Get-PnPRecycleBinItem -SecondStage | Where-Object { $_.DeletedDate -ge $Date } | ForEach-Object { Restore-PnPRecycleBinItem -Identity $_.Id }
Write-Host "✅ Items deleted after $Date have been restored." -ForegroundColor Green
Conclusion
Here, I’ve described the step-by-step process to restore data from both the first-stage and second-stage Recycle Bins using the Office 365 dashboard and PowerShell commands. If you need to recover deleted files or folders from SharePoint, this information will be highly valuable.
For additional assistance or to perform a Cross-Tenant Migration for SharePoint, you can contact MailsDaddy Support.