Working Instructions of MailsDaddy Lotus Notes Migration Suite
Easily migrate from Lotus Notes/Smart Cloud/Domino mailboxes to Outlook PST, Exchange Server and Office 365 mailboxes.
Step-by-Step Walkthrough (43 Steps)
Click on any screenshot to view full resolution.
Add NSF File
Install and Launch the MailsDaddy Lotus Notes Migration Suite > go to the Ribbon bar and click on the Add NSF File option.
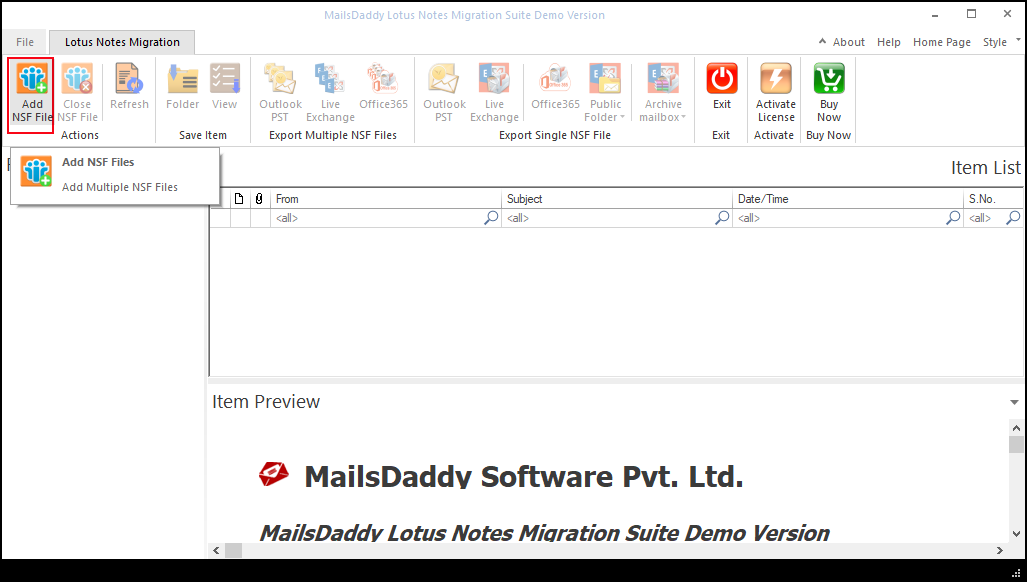
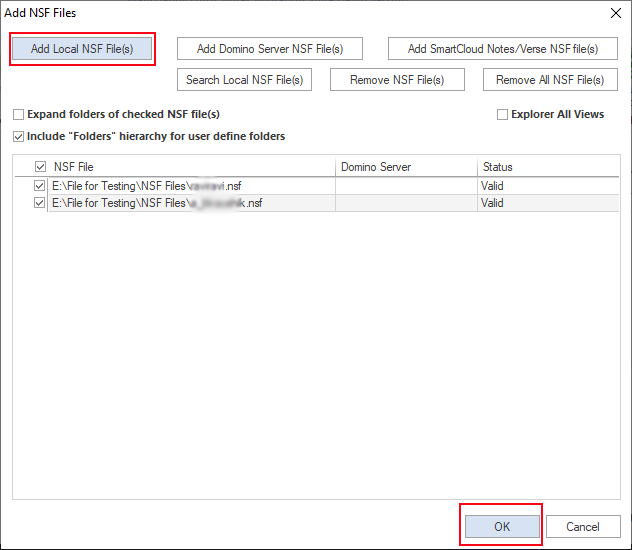
Now an Add NSF file wizard will open > Click on Add Local NSF files
Now an Add NSF file wizard will open > Click on Add Local NSF files option and select NSF files from your local folder
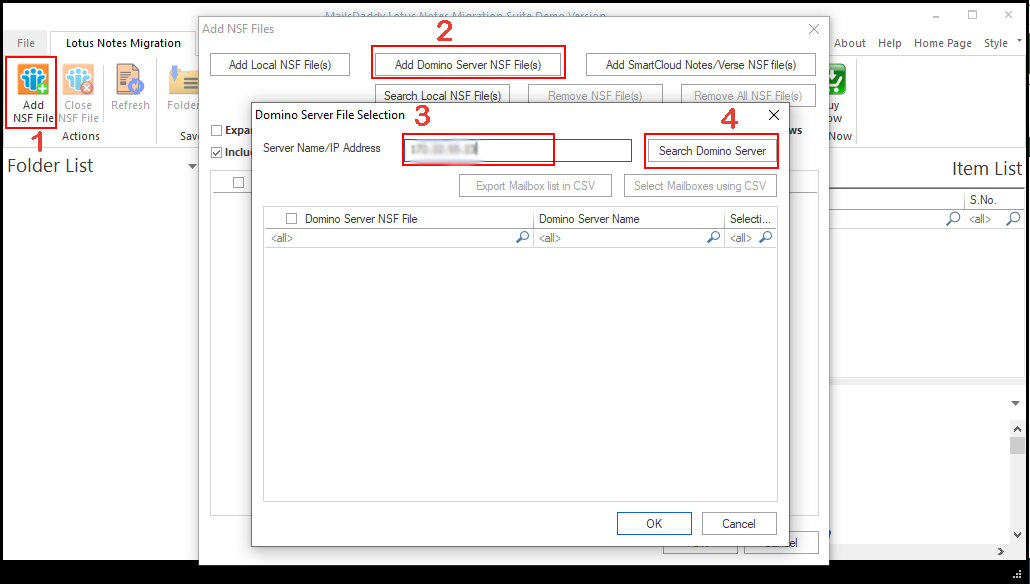
Add Domino Server NSF file(s)
Download and install the MailsDaddy Lotus Notes Migration Suite. To use this option, click on the " Add NSF File " button > Now click on " Add Domino Server NSF file(s) ." > Provide Server Name/IP Address.
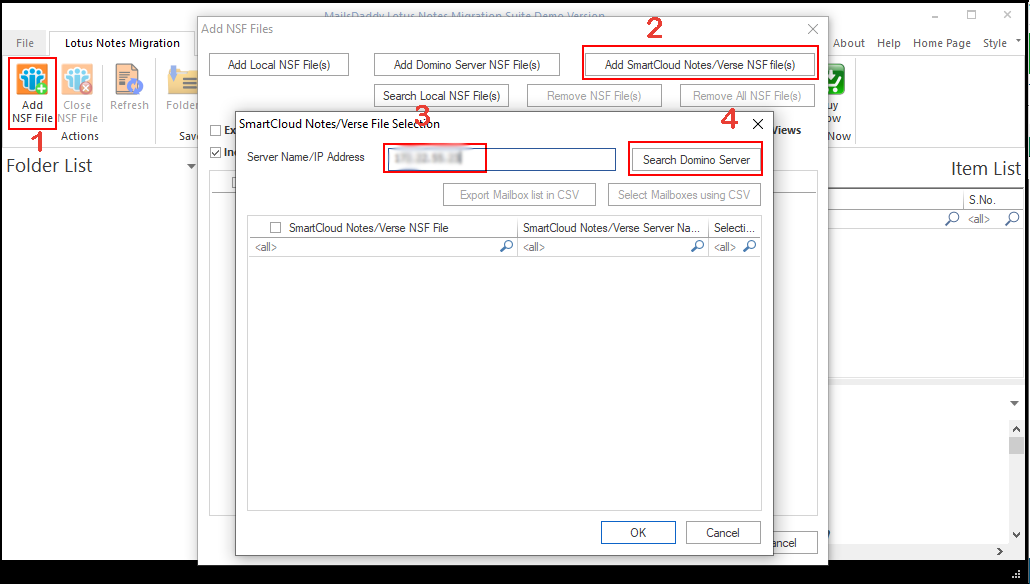
add Smart cloud notes and Verse NSF files
To use this option, Click on " add Smart cloud notes and Verse NSF files " and provide Server Name/IP Address.
Deselect All
After selecting the source, user can choose the desire target to migrate bulk Local NSF/Domino Server NSF/Smart Cloud Notes data to Outlook. There are 3 destination points for the user to move batch folder at once.
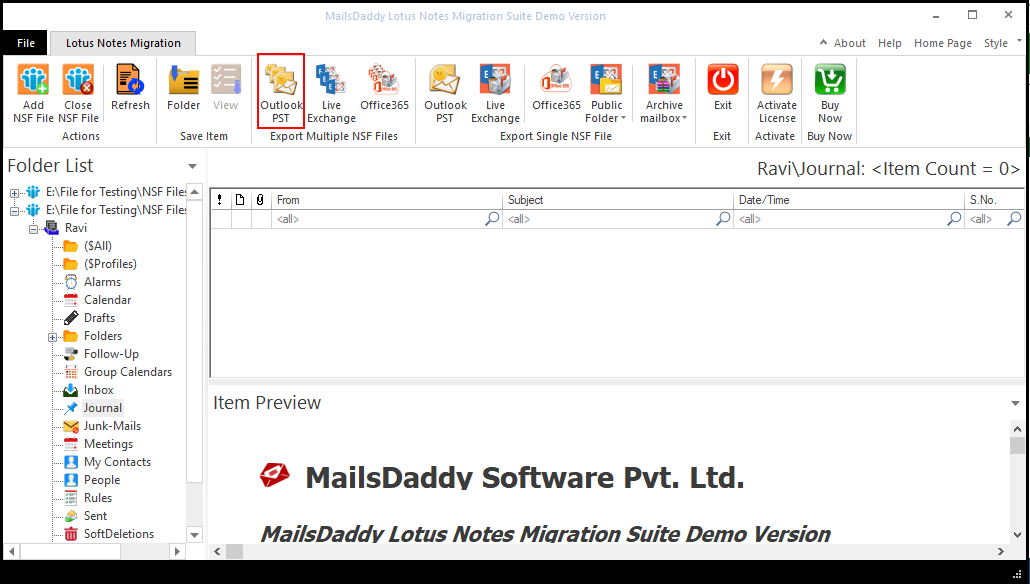
Deselect All
A wizard will be open: Check/Uncheck folder : User can leave the empty or waste folder as it is and go further in migration. Select All : Select all folders of NSF file. Deselect All : Deselect all NSF folders
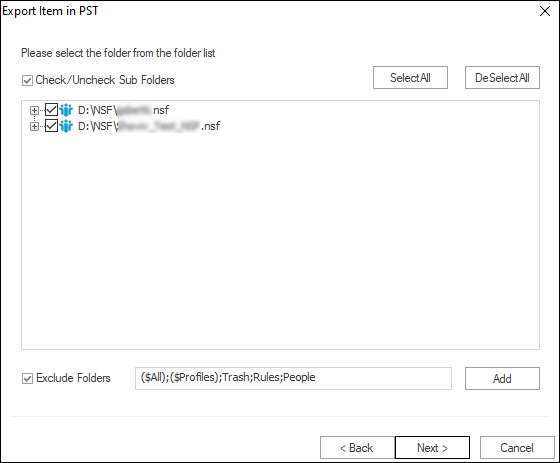
Exclude Folder
Exclude Folder : Users can exclude all NSF files from a particular folder. To exclude desired folders, click the Add button >> Select/Add a folder name in the Exclude Folder dialog box. Also, it is helpful to include subfolders of that selected folder. Once you are done, click on the OK button.
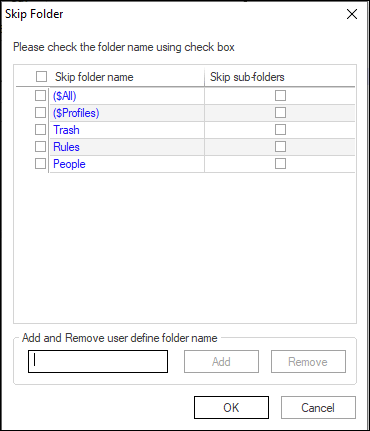
Mapping NSF Folder
NSF Mapping : Click here
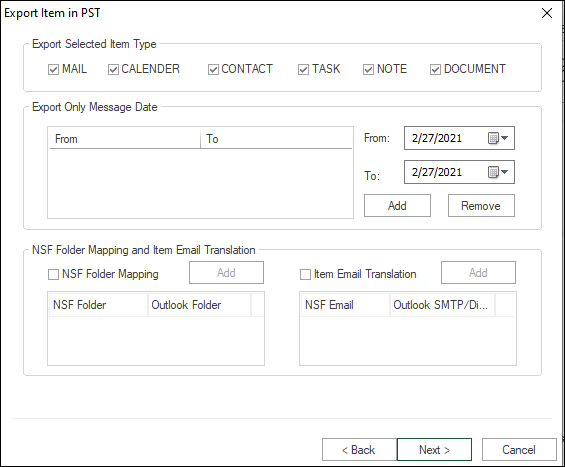
After clicking on the O365 option, you will see the check / uncheck wizard for the folder. Check / uncheck the sub folder
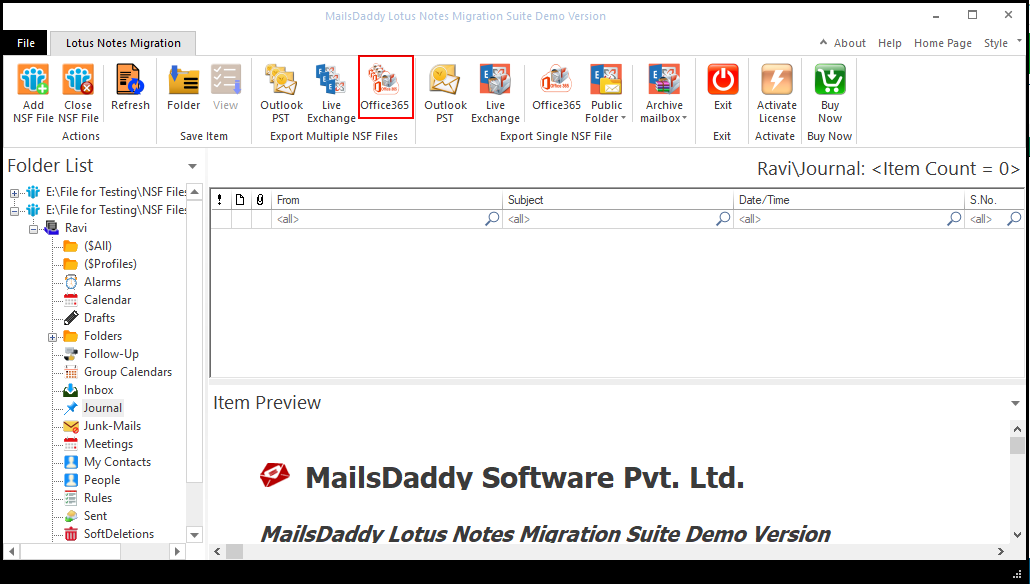
For migrating Domino Notes, Local NSF file and Smart Cloud Notes into Office 365 account. Select O365 option from red-ribbon area and follow the below steps. You can also select the target by right-clicking on the folder.
Exclude folders
After clicking on the O365 option, you will see the check / uncheck wizard for the folder.
Exclude folders
Exclude folders : To remove the unwanted folder from the selection, simply click on the Add button and type/Add folder in the Skip folder wizard.
Fetch all Mailboxes from Office 365
Fetch all Mailboxes from Office 365
Select Administrator Outlook Profile
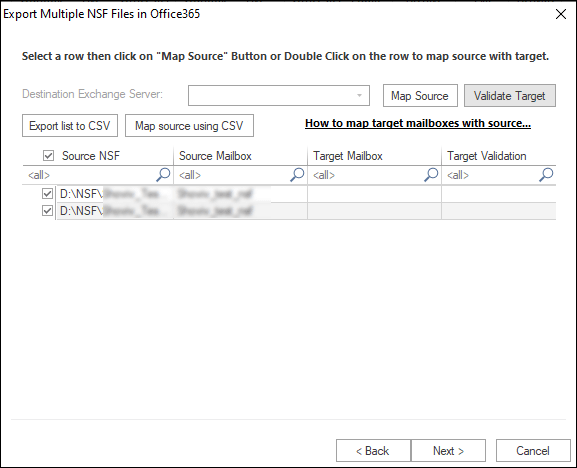
Export list to CSV : Export the source mapping list in CSV file format to use later. Map source using CSV : Map multiple NSF files by uploading a CSV file.
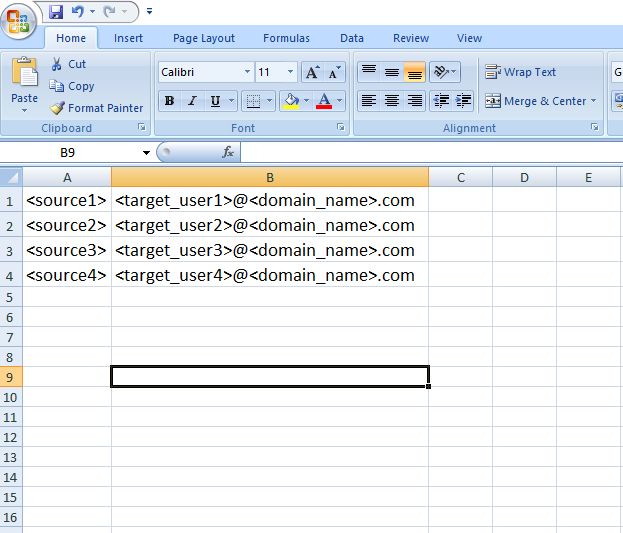
Sample of CSV file
Export list to CSV : Export the source mapping list in CSV file format to use later. Map source using CSV : Map multiple NSF files by uploading a CSV file.
Export all items
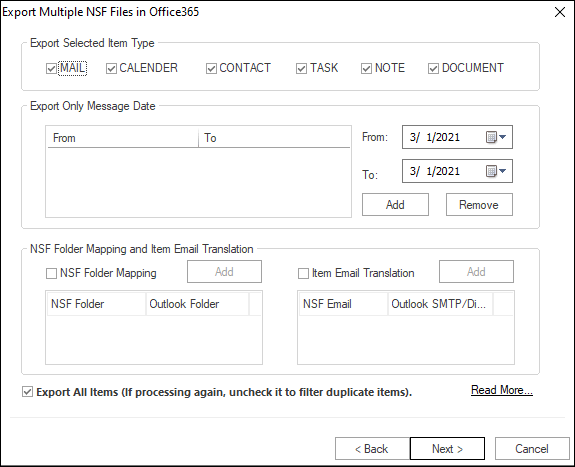
Export all items
Second Option
Here users have multiple options to migrate NSF files to Office 365 accounts. First Option : Go to the highlighted area and click on the Office 365, Public folder, or Archive mailbox option for single NSF file export. Second Option : Right-click on the folder list and select the "Export in Office 365" option and then Single NSF Files.
Export in
Export in
.png)
Export in
Migrate in selected Office 365 Mailbox: Enter the credential of the Office 365 and migrate data in O365. User Email : type Office 365 user. Password : type the respective user password. Export in : Use the dropdown to change the export type as office 365 mailbox, public folder mailbox, and archive mailbox.
.png)
Check/uncheck Subfolders
For exporting bulk Local NSF, Domino Notes, and Smart Cloud mailboxes into Live Exchange. Select Live Exchange option from red-ribbon area and follow the below steps. You can also select the target by right-clicking on the folder.
.png)
Deselect all
Check/uncheck Subfolders : Here user can select and unselect the folders by clicking on them.
Fetch All Mailboxes from Active Directory
Fetch All Mailboxes from Active Directory
Select admin outlook profile to connect
Now click on the Next button to go to the mapping window. Here users can map the source folder with the target folder as well as verify the live exchange profile whether it exists or not.
Sample CSV file
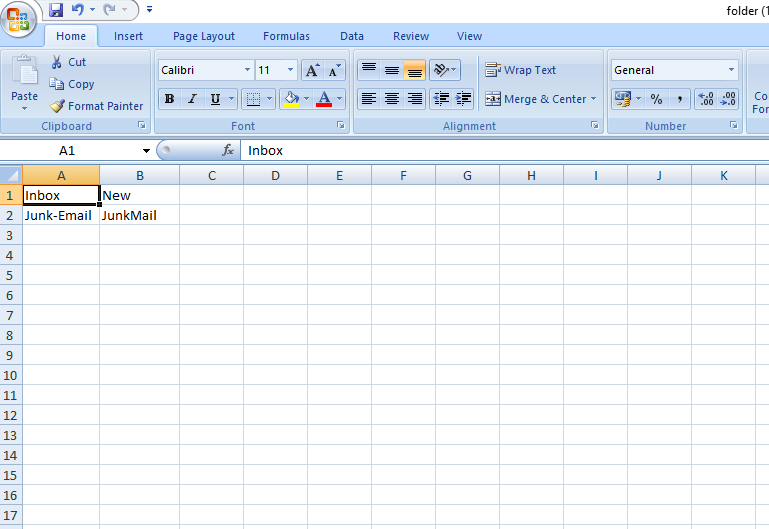
Export list to CSV : Export the list of the Folder mapping in a CSV file for future use. Map Source using CSV : Import CSV file, containing source in one column and respective target on another column and upload it.
Export All Items
Export All Items
Export in
Here you will the see the conversion steps of single NSF to Live Exchange. You have multiple option to import single NSF file:
.jpg)
Export in
When the "Export items in Live Exchange" wizard opens, it offers two different options to import mailbox. Migrate in Default Store : With an online profile, enable this option and migrate the profile to the default store. Export in :- Use the dropdown to change destination as Live Exchange mailbox, public folder mailbox, or archive mailbox.
Export in
Export in
Folder Mapping for MS Outlook using CSV file
Export to CSV : Allow the user to save the mapping data in the CSV file for later use. Import from CSV : For this, create a CSV file in which a source folder in a column and create related targets in another column. After this, upload it using the CSV option.
Demo of CSV file for importing
Export to CSV : Allow the user to save the mapping data in the CSV file for later use. Import from CSV : For this, create a CSV file in which a source folder in a column and create related targets in another column. After this, upload it using the CSV option.
Email Translation
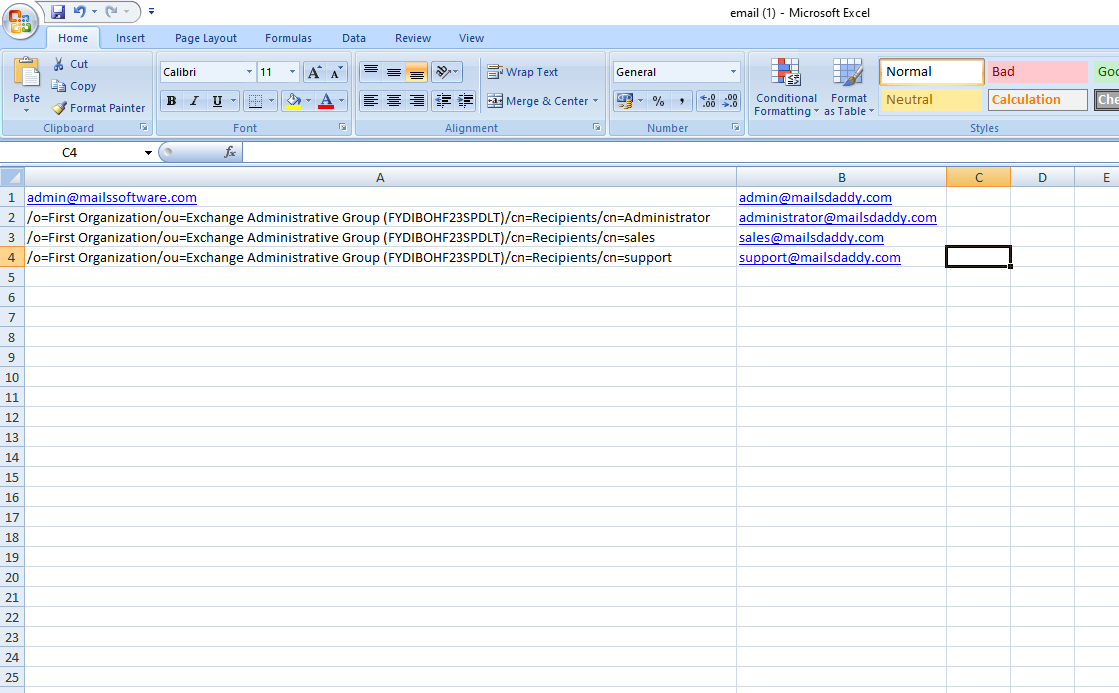
Email Translation : If you want to change the source folders’ email address with a new desired email address then you can go with the email translation opiton. The changed email address will be visible with new exported email items. For this, click on the ‘Add’ button >> Enter the source email address in the field and new email address in the next field and then click OK.
Email CSV file Demo
Export in CSV : Export the email translation list in the CSV file format for future requirements. Import from CSV : Map the source folder to the target folder using the CSV file. For this, type source in one column and respective target on another column then upload it using Import from CSV option.
Remove
Add : Manually add the source and the target name for mapping. Edit : Change the source folder or target folder name. Remove :- Remove the source folder and the target folder from the email translation.
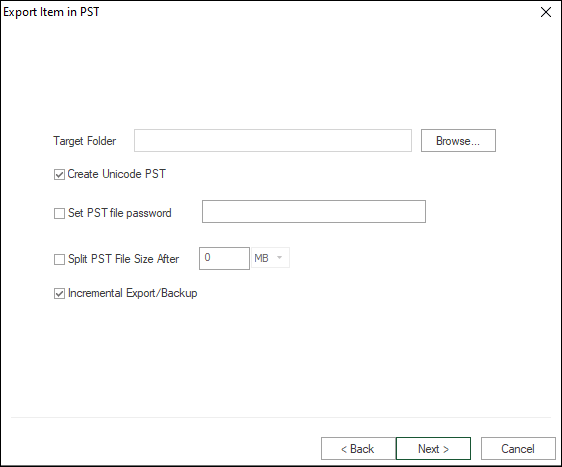
Incremental Export/Backup
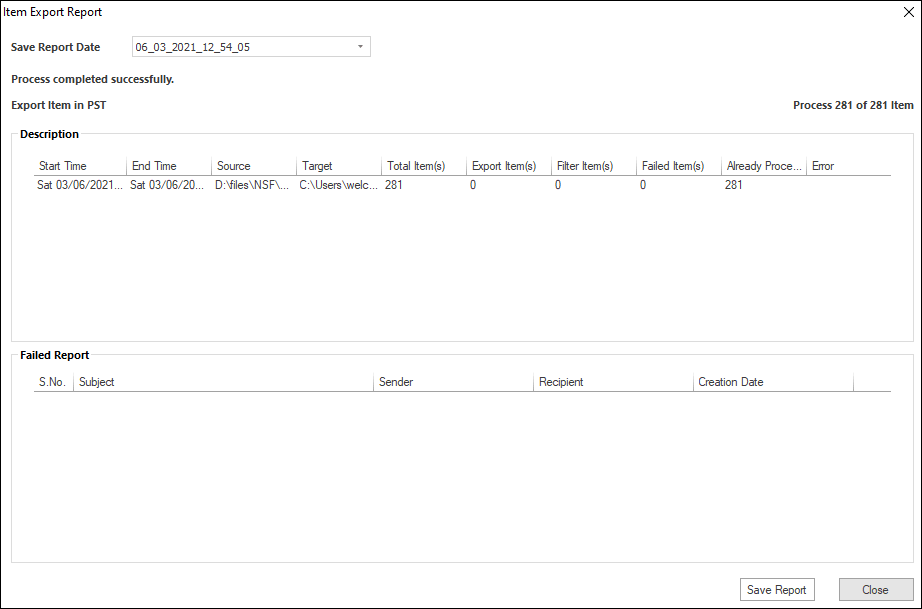
Once clicking on the next button, the Status Wizard will be displayed on the software. Here shows the status of source folder, target folder, item count, filtered item, process item etc.
Folder Mapping for Office 365 using CSV file
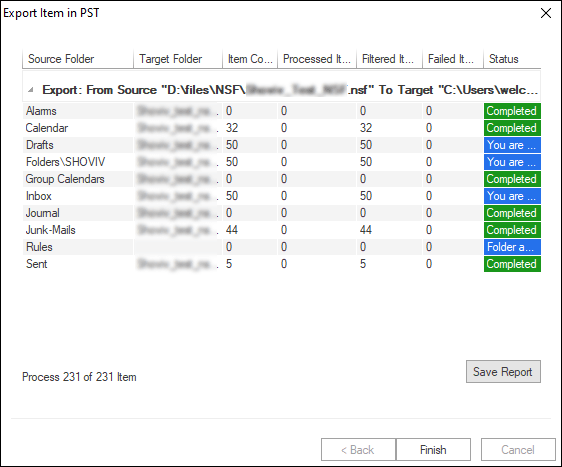
Once clicking on the next button, the Status Wizard will be displayed on the software. Here shows the status of source folder, target folder, item count, filtered item, process item etc.
Remove
Email Translation: If you want to import source data with the new email address that will show in target then use this option. To add a new email translation, click on the ‘Add’ button >> Type the source email address in the field and the new email address in the target field.
Remove
Export in CSV : Export the list of the Folder mapping in a CSV file for later use. Import from CSV : Map the multiple sources with target mailboxes using CSV file. Sample of CSV file Add : Source and the target folder name for mapping. Edit : Change the source folder or target folder name. Remove : Remove the source folder and the target folder.
Remove
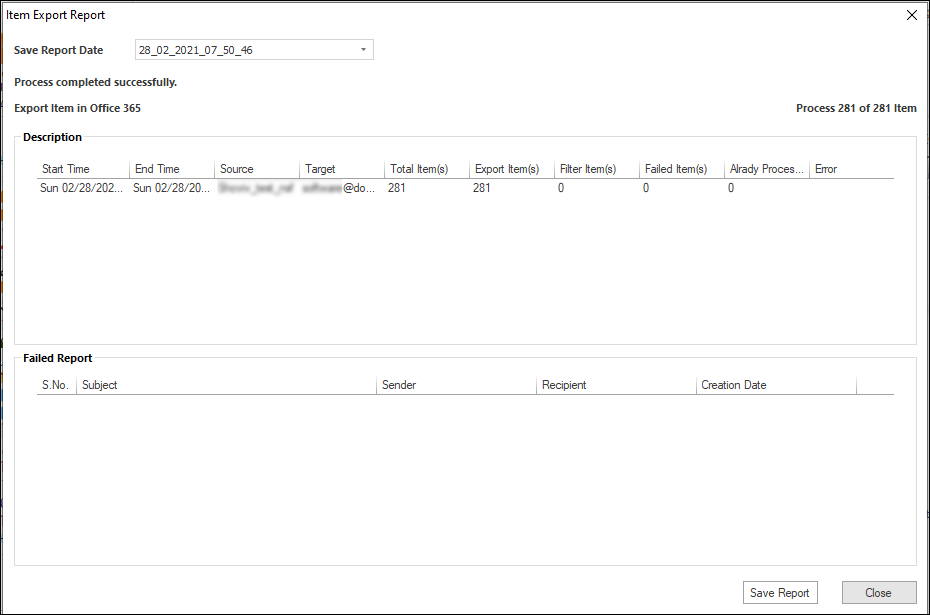
Press the next button to start the process from NSF to Office 365. Status Wizard shows source folder, target folder, item count, filtered item, process item, failed item etc.
Save the Report
Save the Report : You can save the log report to view the process in the HTML file.
Import from CSV
Map source folder to target folder using CSV file. You can also manually map the folder and perform NSF to Live Exchange migration. Export in CSV : Use this button to export the CSV file of folder mapping. Import from CSV : With this button, map source and target folder by uploading a CSV file. Sample of CSV file
Remove
Add : Type source and the target folder name for mapping and add into the software. Edit : modify the name of the source folder or target folder name. Remove : Use this button to remove the added source folder and target folder.
Remove
Press the Next button to go to the migration wizard. Here, Source Folder, Target Folder, Item Count, Filtered Items, Process Item, Failed Items, and status shows in this report.
Remove
Press the Next button to go to the migration wizard. Here, Source Folder, Target Folder, Item Count, Filtered Items, Process Item, Failed Items, and status shows in this report.
Save Report
Cancel : To terminate the process at any time click on the cancel button. Save Report : Save your migrate report in HTML file format.
Ready to Start with Lotus Notes Migration Suite?
Download the free trial version to preview all mailbox items or buy the full license for unlimited conversion.