Follow Instructions To Ensure How To Import NSF Into Office 365
Working Guide of the software
Compelete Data Migration (11 Steps)
Click on any screenshot to view full resolution.
Download and install ( Installation Guide ) the application
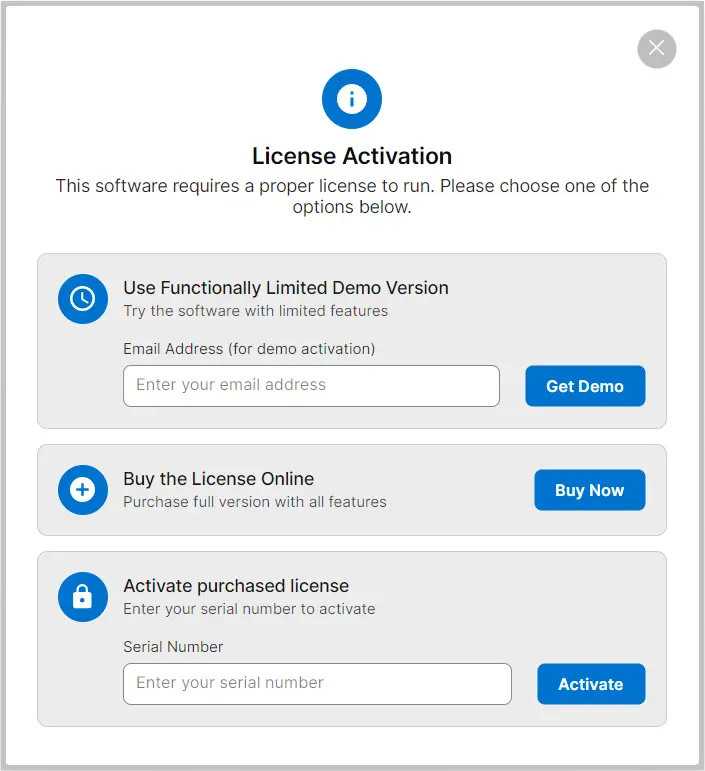
Download and install ( Installation Guide ) the application. Launch the software and then click on Get demo button in order to use free trial edition of the software. You can directly activate to full version if you already purchase the software.
Step 2: Complete Operation
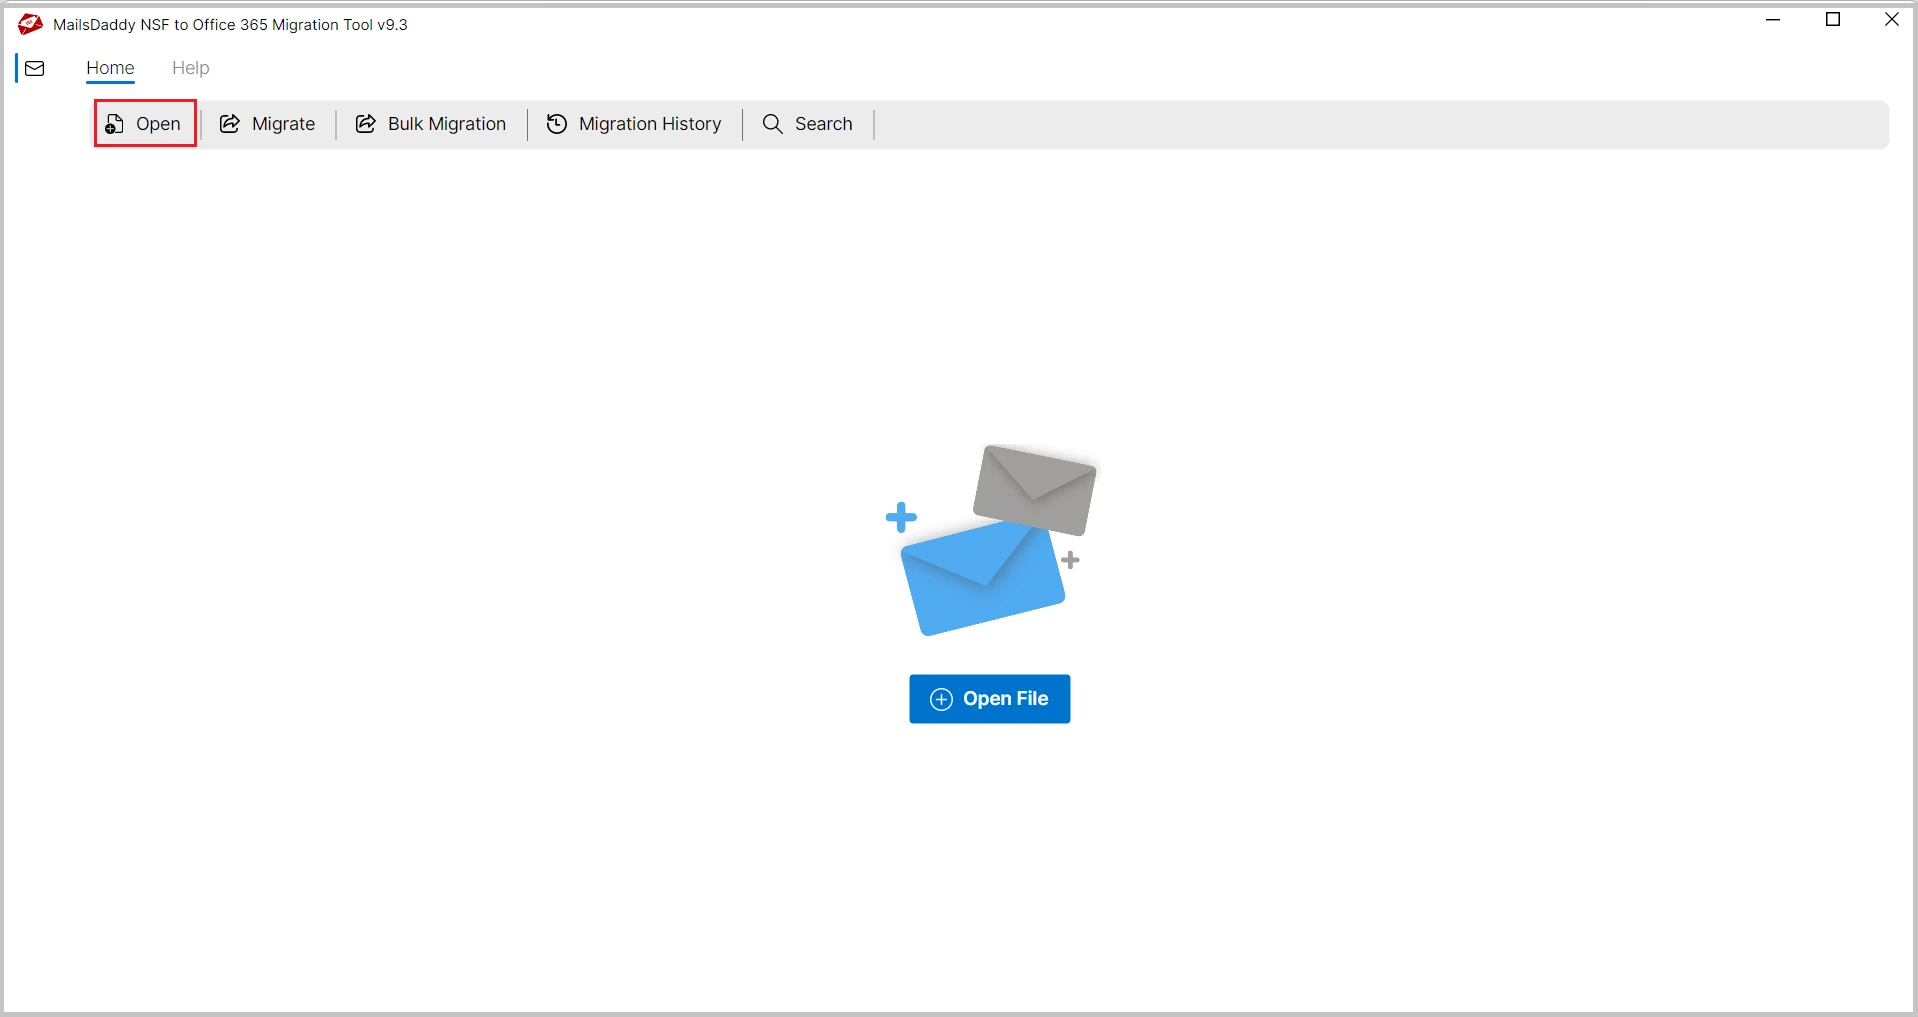
From the first screen, Click on Open button to search or browse NSF files from local system.
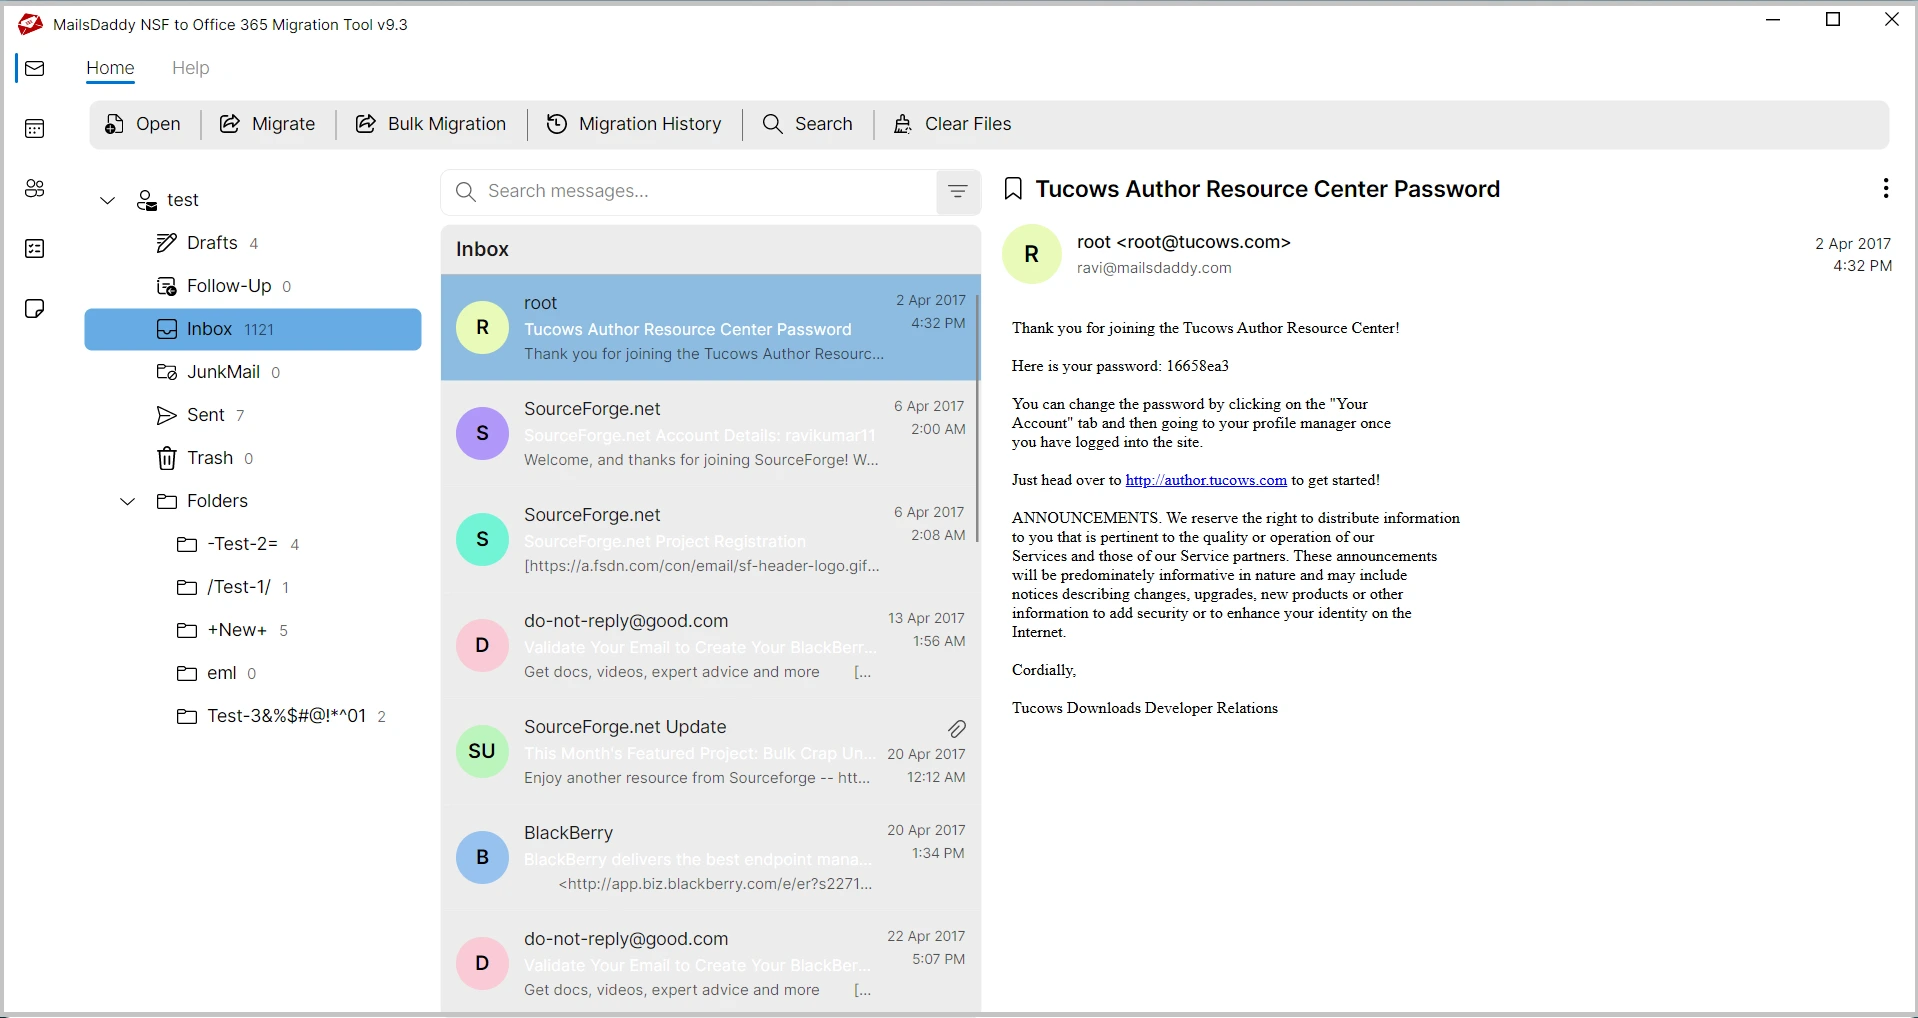
Now you can view complete NSF file databases in the software preview section area.
Now you can view complete NSF file databases in the software preview section area.
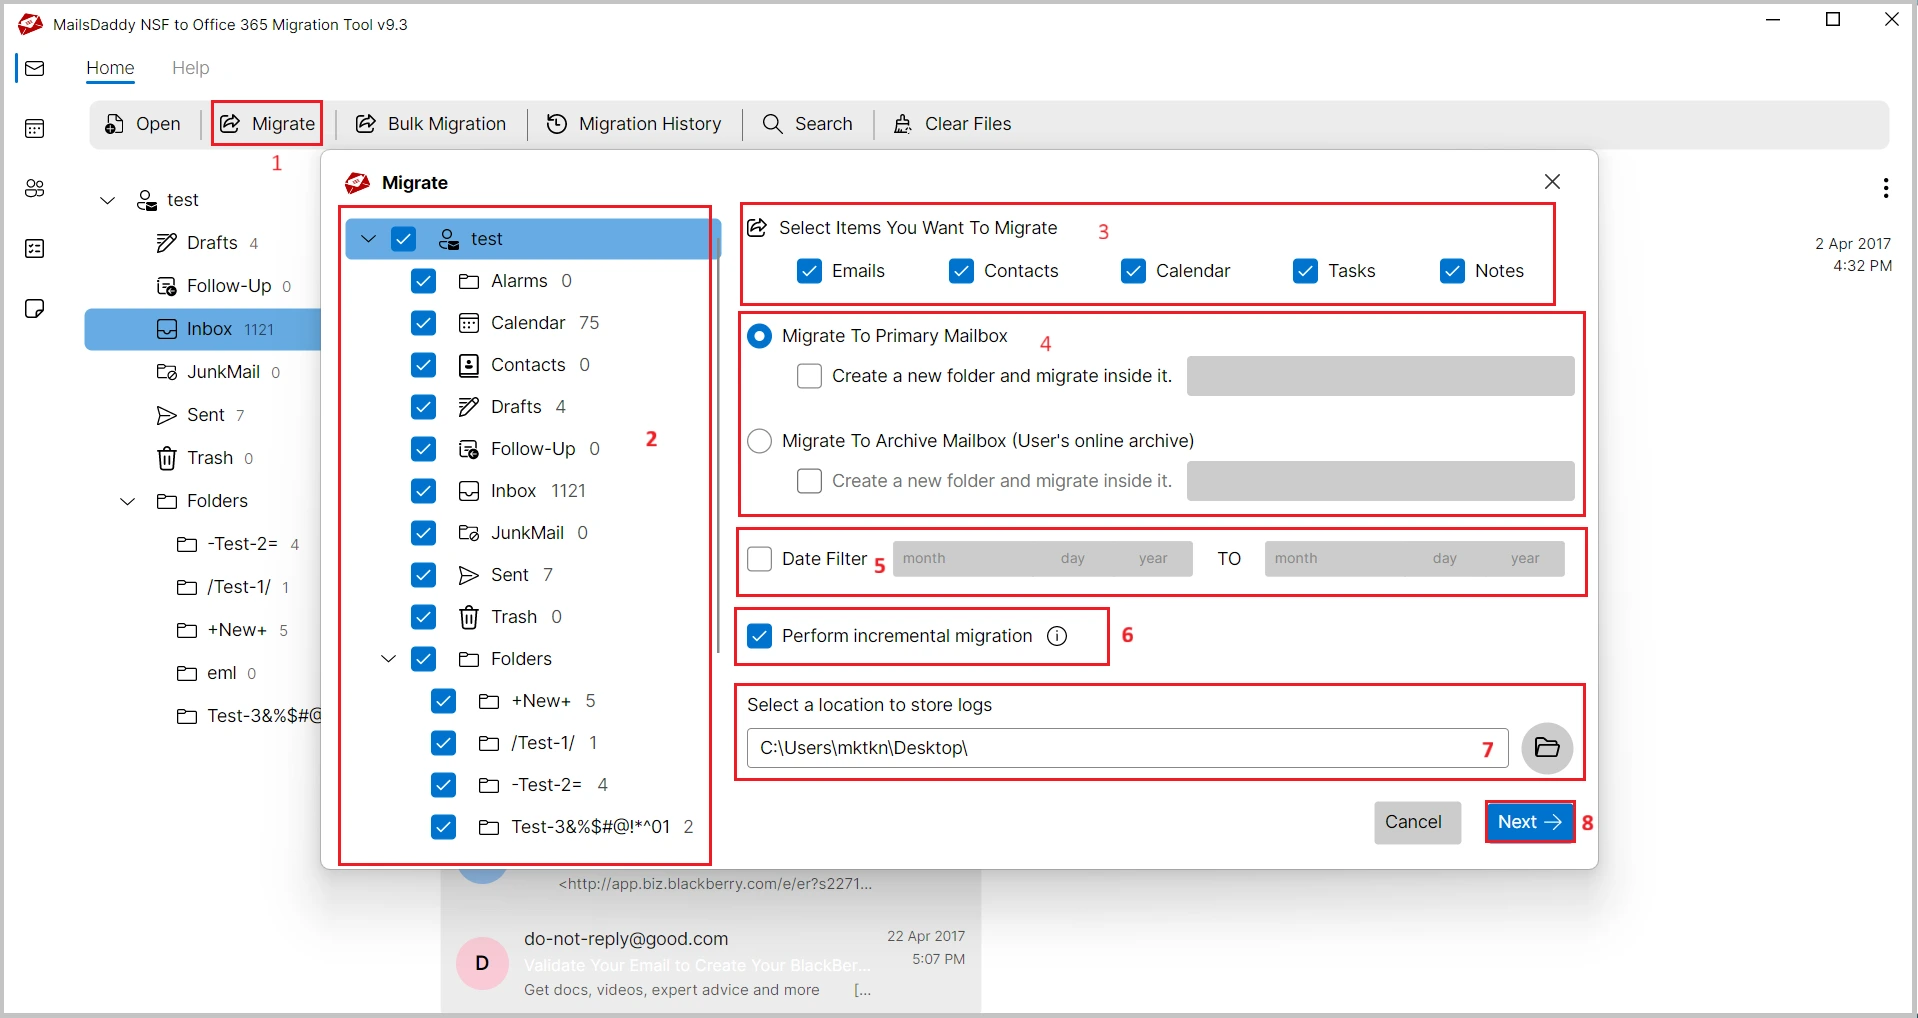
Click on Migrate button to upload Lotus Notes NSF files to Office 365 account.
Click on Migrate button to upload Lotus Notes NSF files to Office 365 account.
From the right side section, select the NSF file folder
From the right side section, select the NSF file folder. Now select the items (Emails, Contacts, Calendar, Tasks, and Notes) you want to migration.
Select the mailbox (Primary or Archive) as per your need
Select the mailbox (Primary or Archive) as per your need. If you want to move data in selected forlder of Primary or In-Place Archive mailbox, enable Creare a new Folder and migrate inside it option and put the folder name.
Step 7: Complete Operation
If you want to move selected date email database to Microsoft 365, choose Date Filter option and provide the start and end date of migration. Enalbe Incremental migration if required.
Step 8: Complete Operation
Now click on browse icon and select the location where you want to save the log file of complete migration. After that press the Next button.
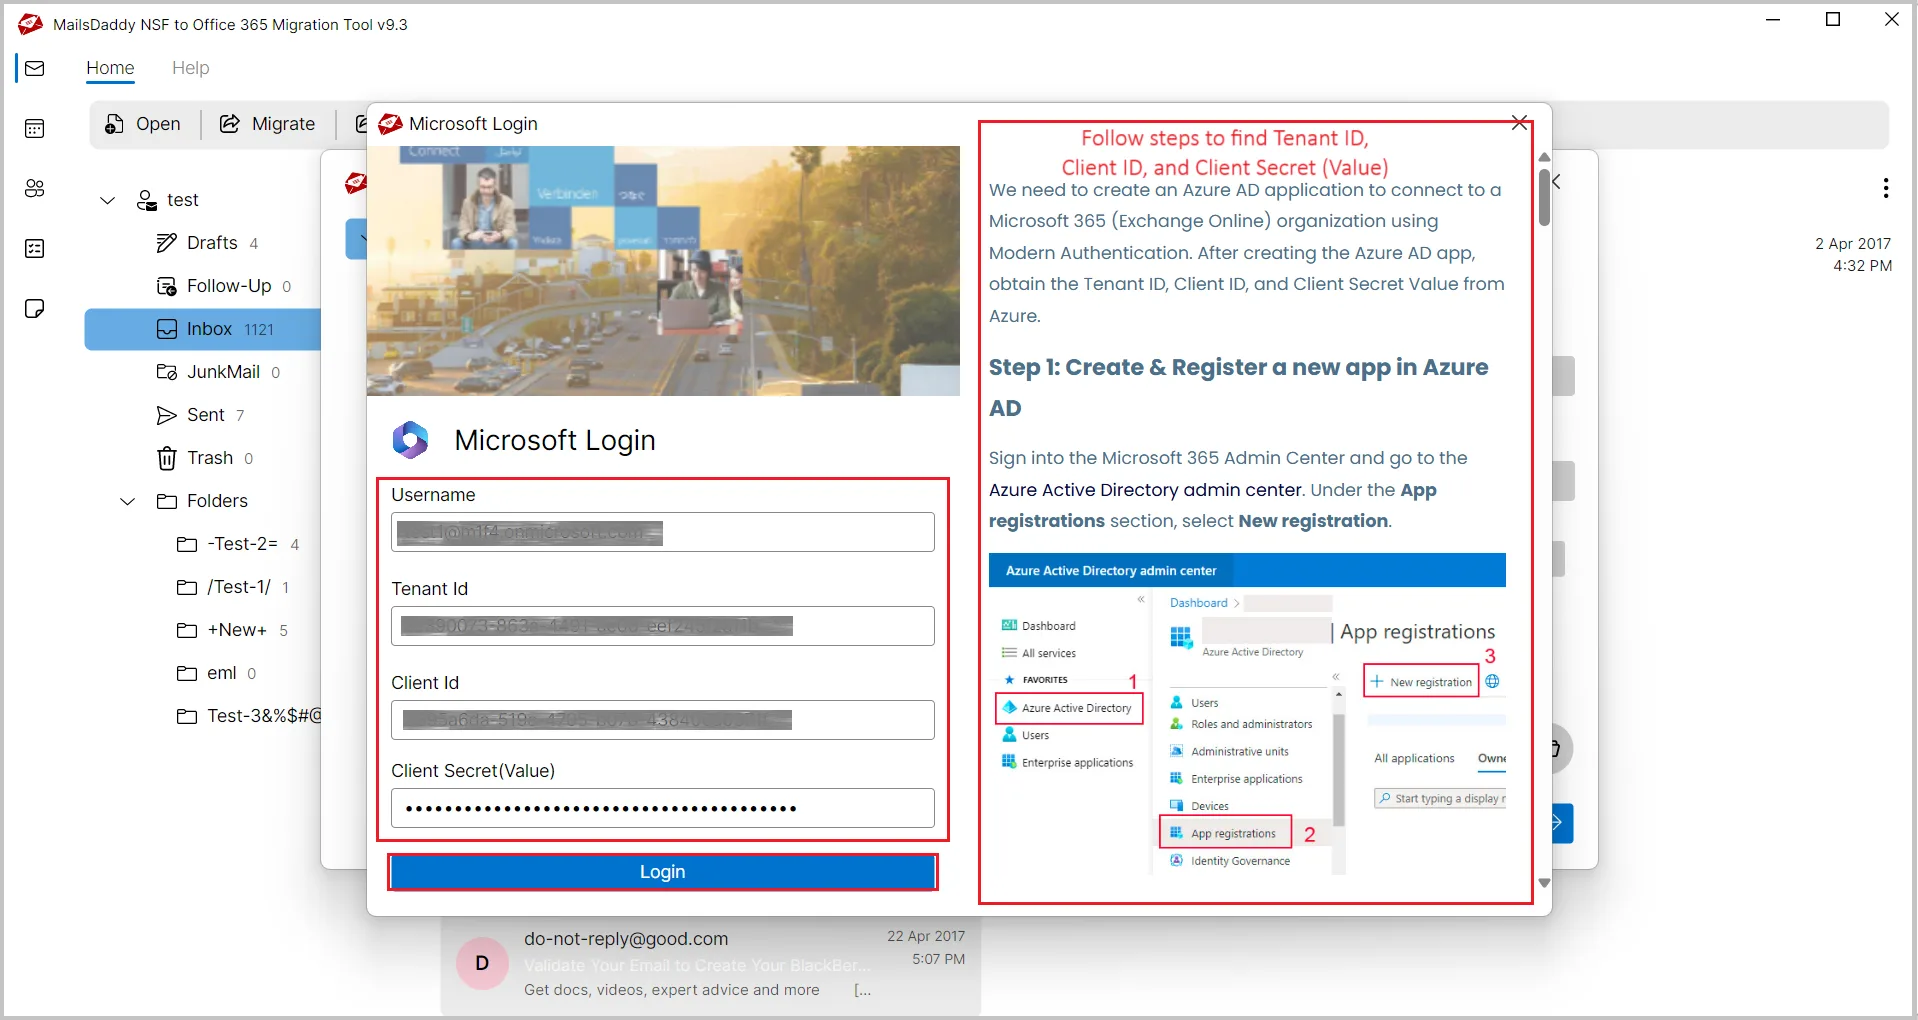
Provide Login details of Your Office 365
Provide Login details of Your Office 365. If you don't know the Tenant ID, Client ID, and Client Secrect (Value), follow all left side given all steps. Finally, click on Login button to strast the migration process.
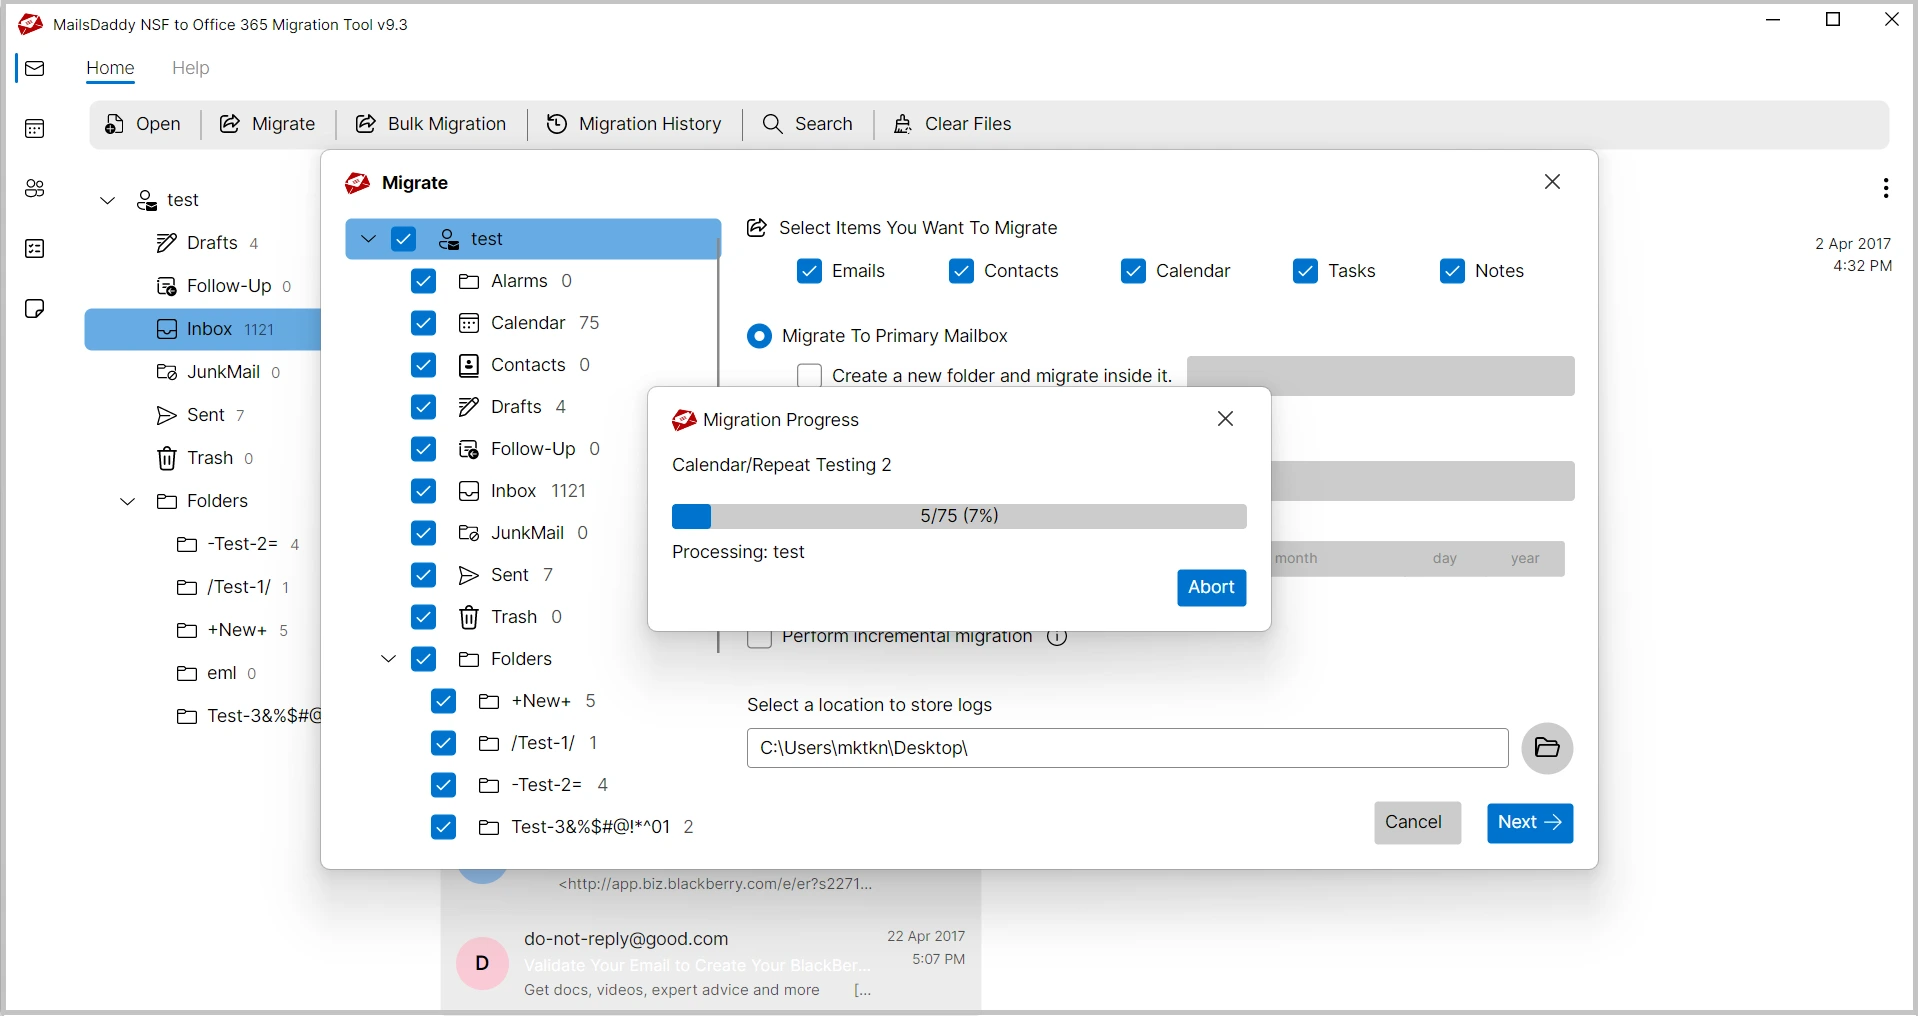
The software begins migration and show the status through progress bar.
The software begins migration and show the status through progress bar.
Step 11: Complete Operation
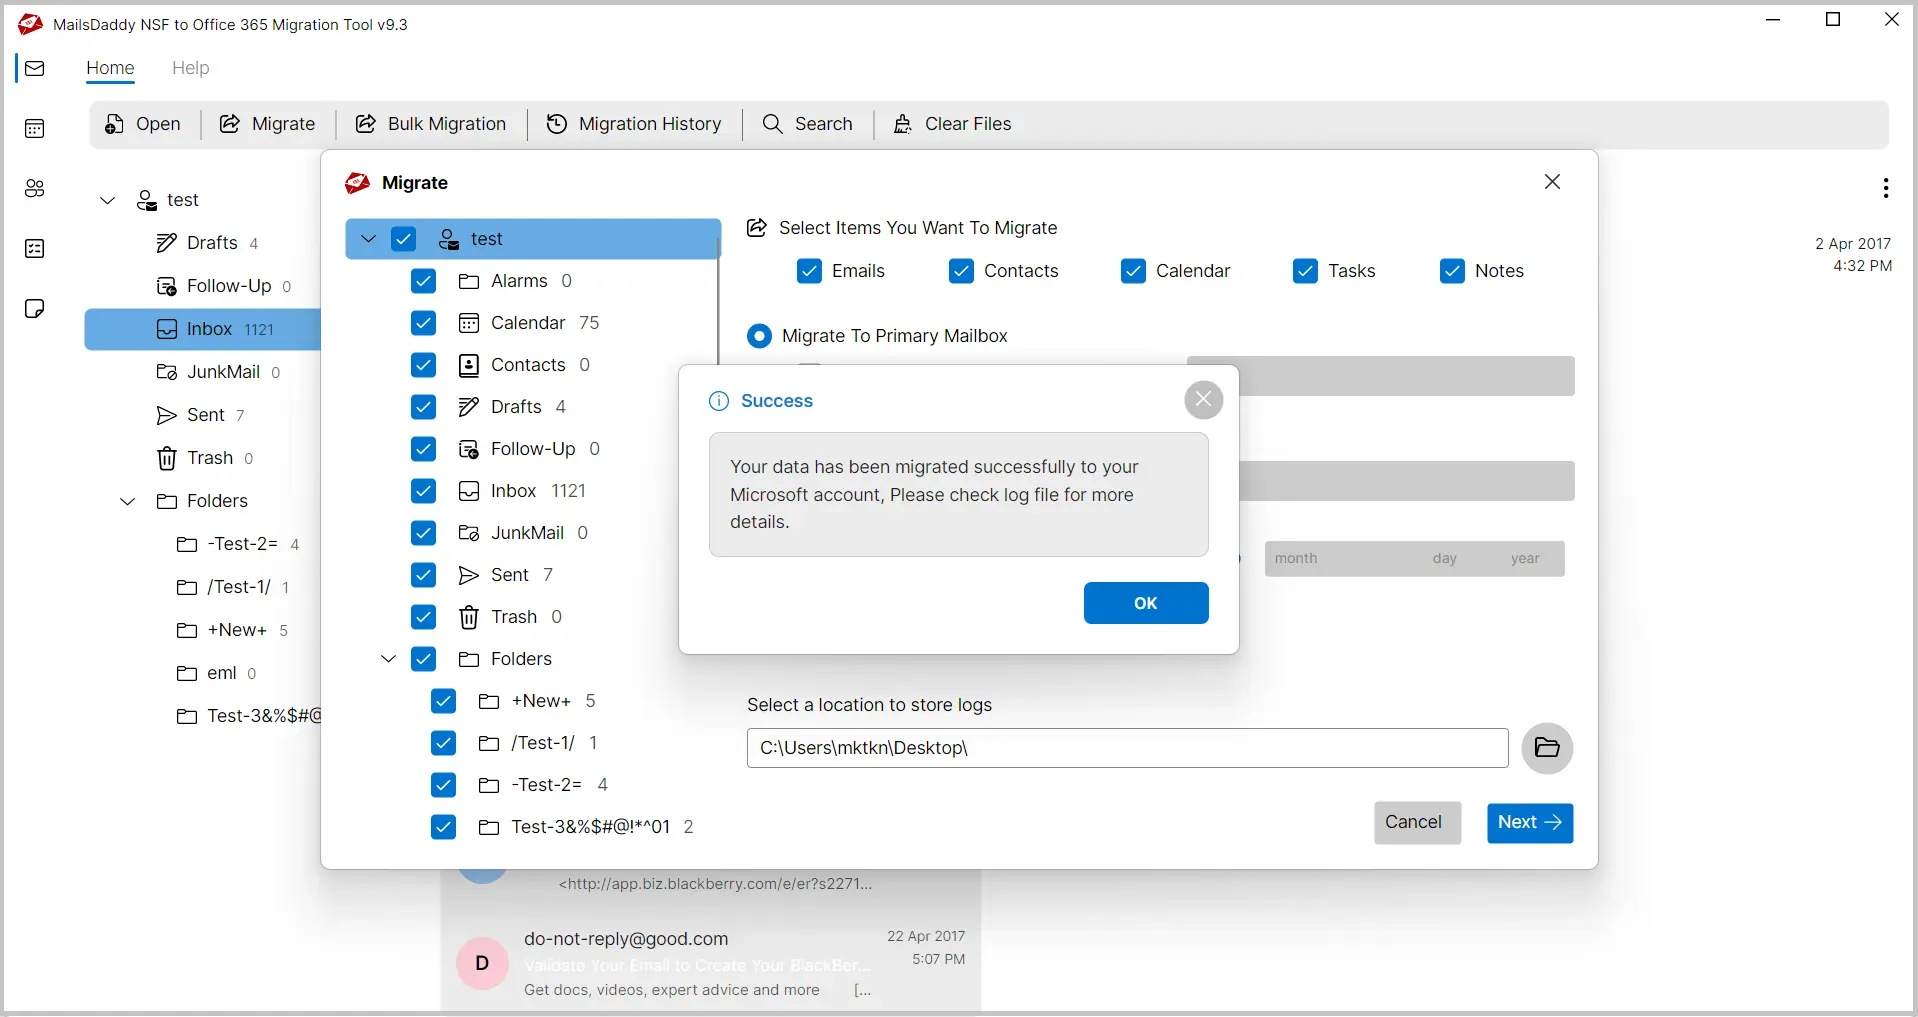
The software will display a confirmation message " Your data has been migrated successfully to your Migrosoft account . Click on the OK button.
Ready to Start with Lotus Notes to Office 365 Migration?
Download the free trial version to preview all mailbox items or buy the full license for unlimited conversion.