Working Guide for MailsDaddy OST to PST Converter
Step-by-step visual instructions to convert offline OST files to PST, Office 365, Exchange Server, and other formats with intact mailbox hierarchy.
How to Convert OST to PST ? (6 Steps)
Click on any screenshot to view full resolution.
Step 1: Complete Operation
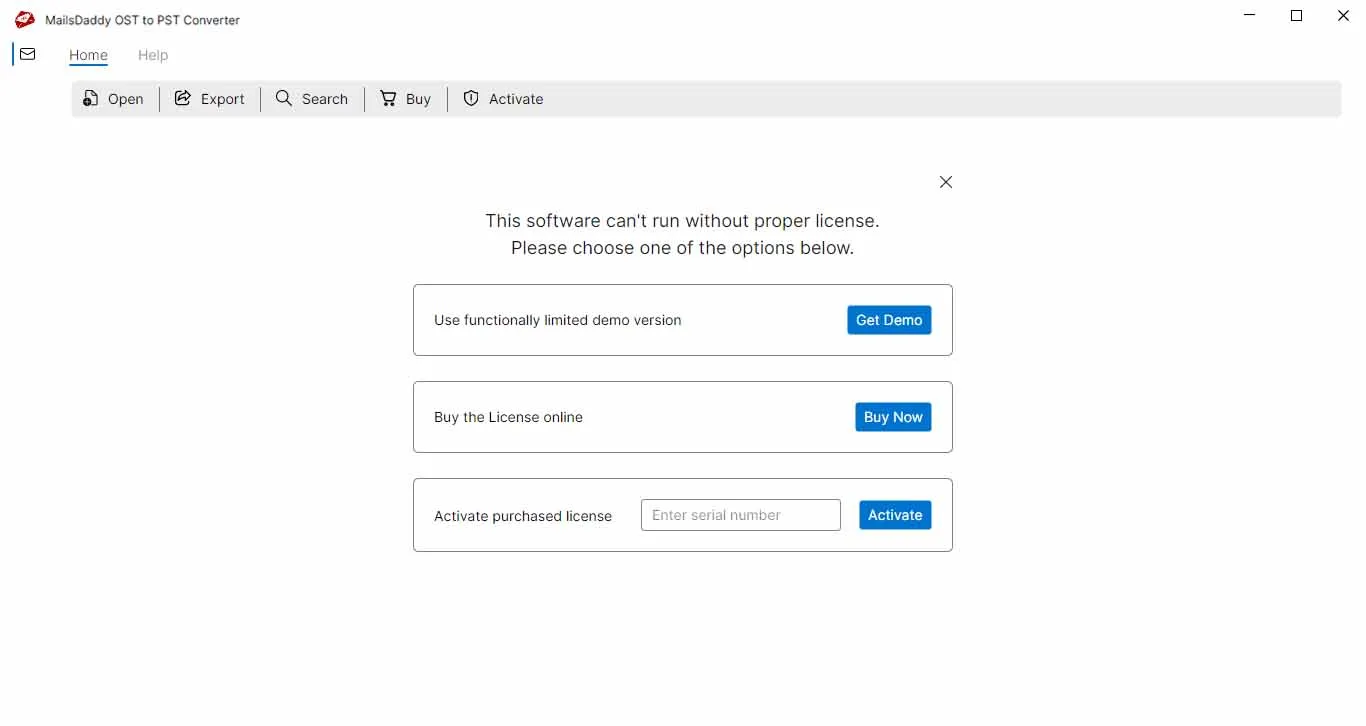
Download and install ( Installation Guide ) the MailsDaddy OST to PST Converter tool in the local machine. After that launch the OST converter tool and click on the Get Demo button if you don't have a valid license key.
Step 2: Complete Operation
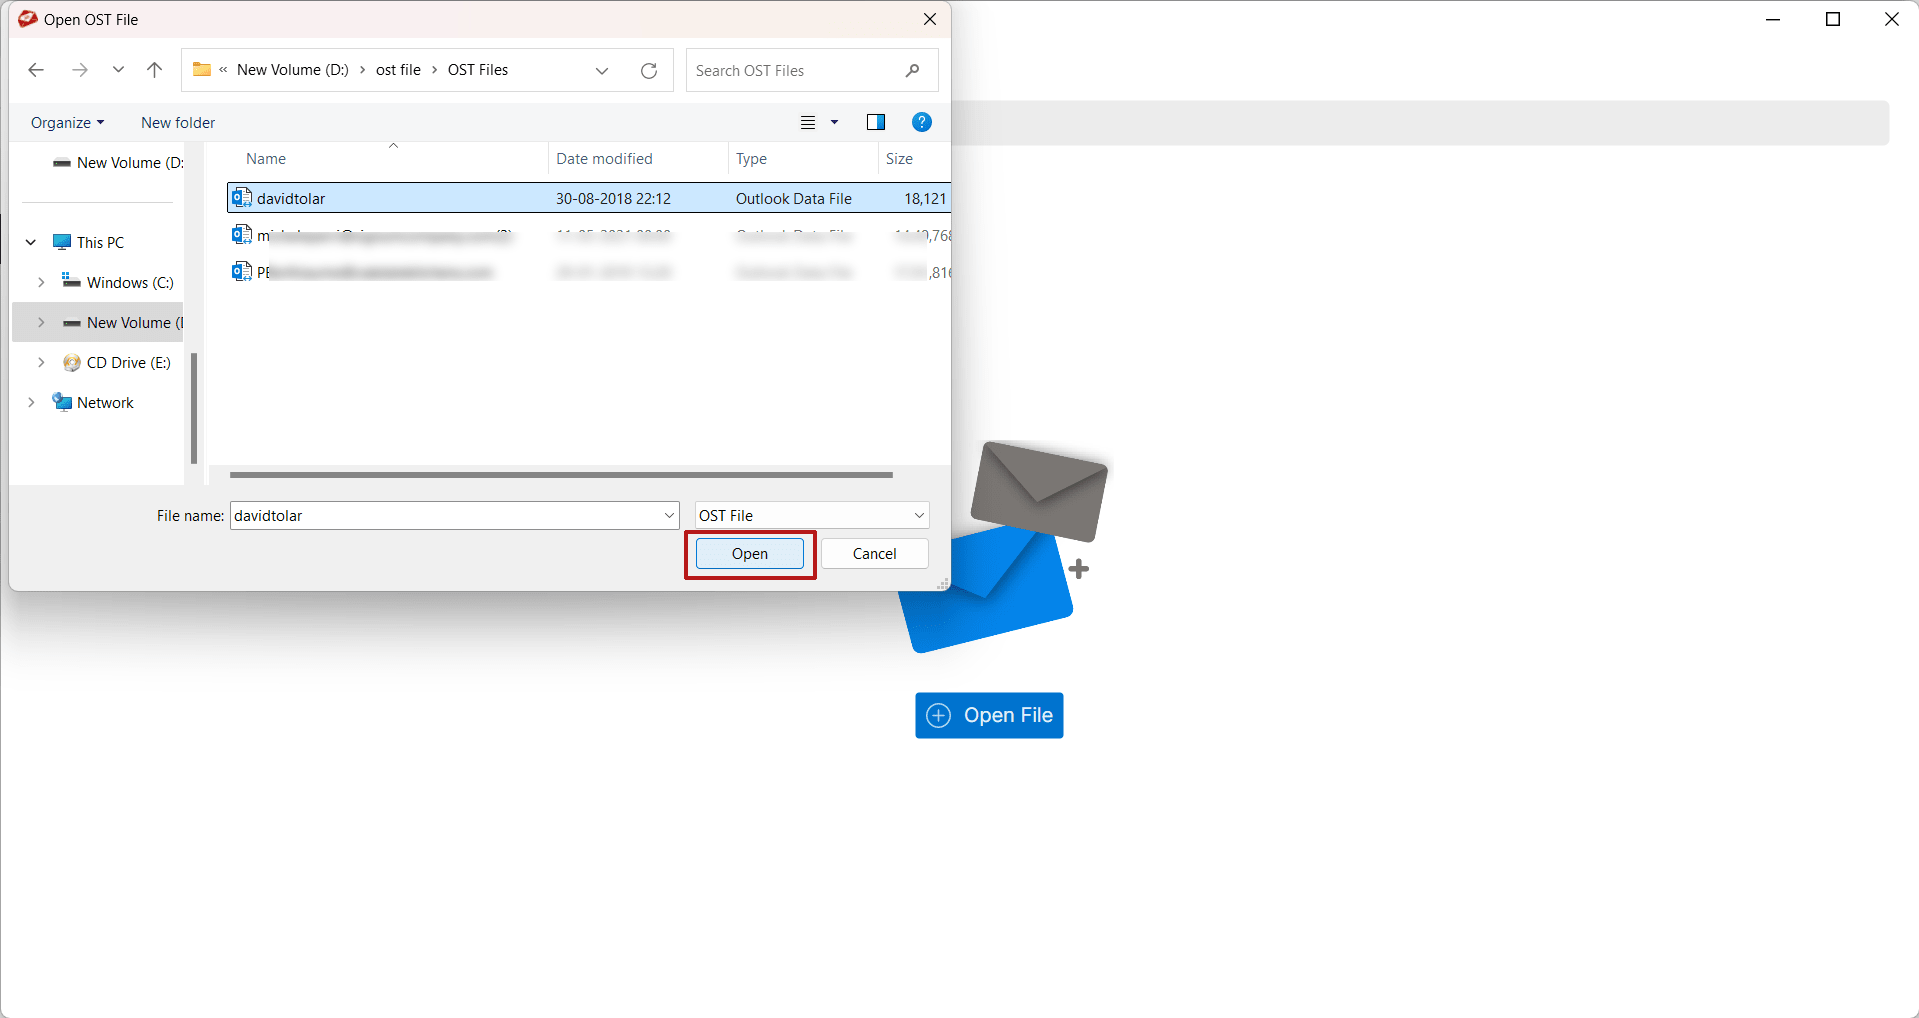
From the first appeared screen in your Window, click the 'Open' button to add OST files. Browse OST file location to load into the software. Note: You can also add multiple OST files for Bulk Migration
Step 4: Complete Operation
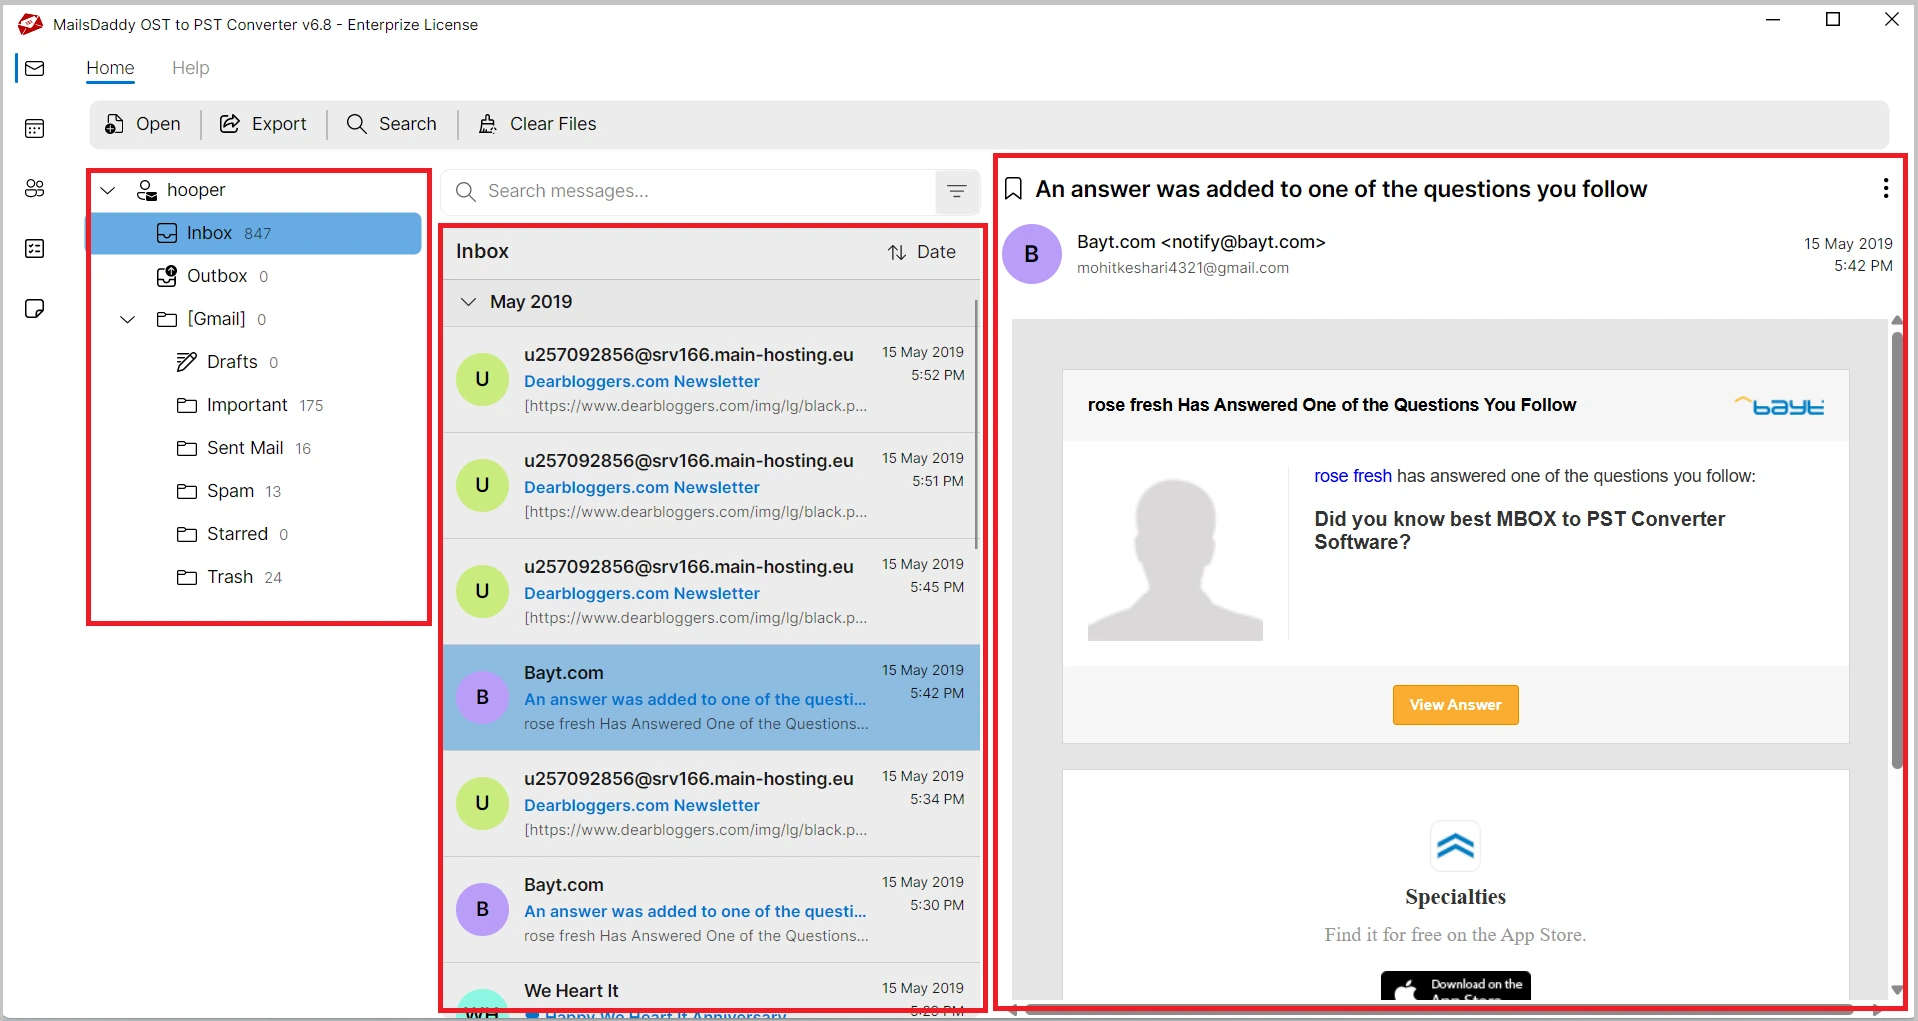
From the next appeared Window, you can see the folder structure ( optional) and preview of Emails (optional) . strong>Step 5: Click on the Export button to initiate batch migration
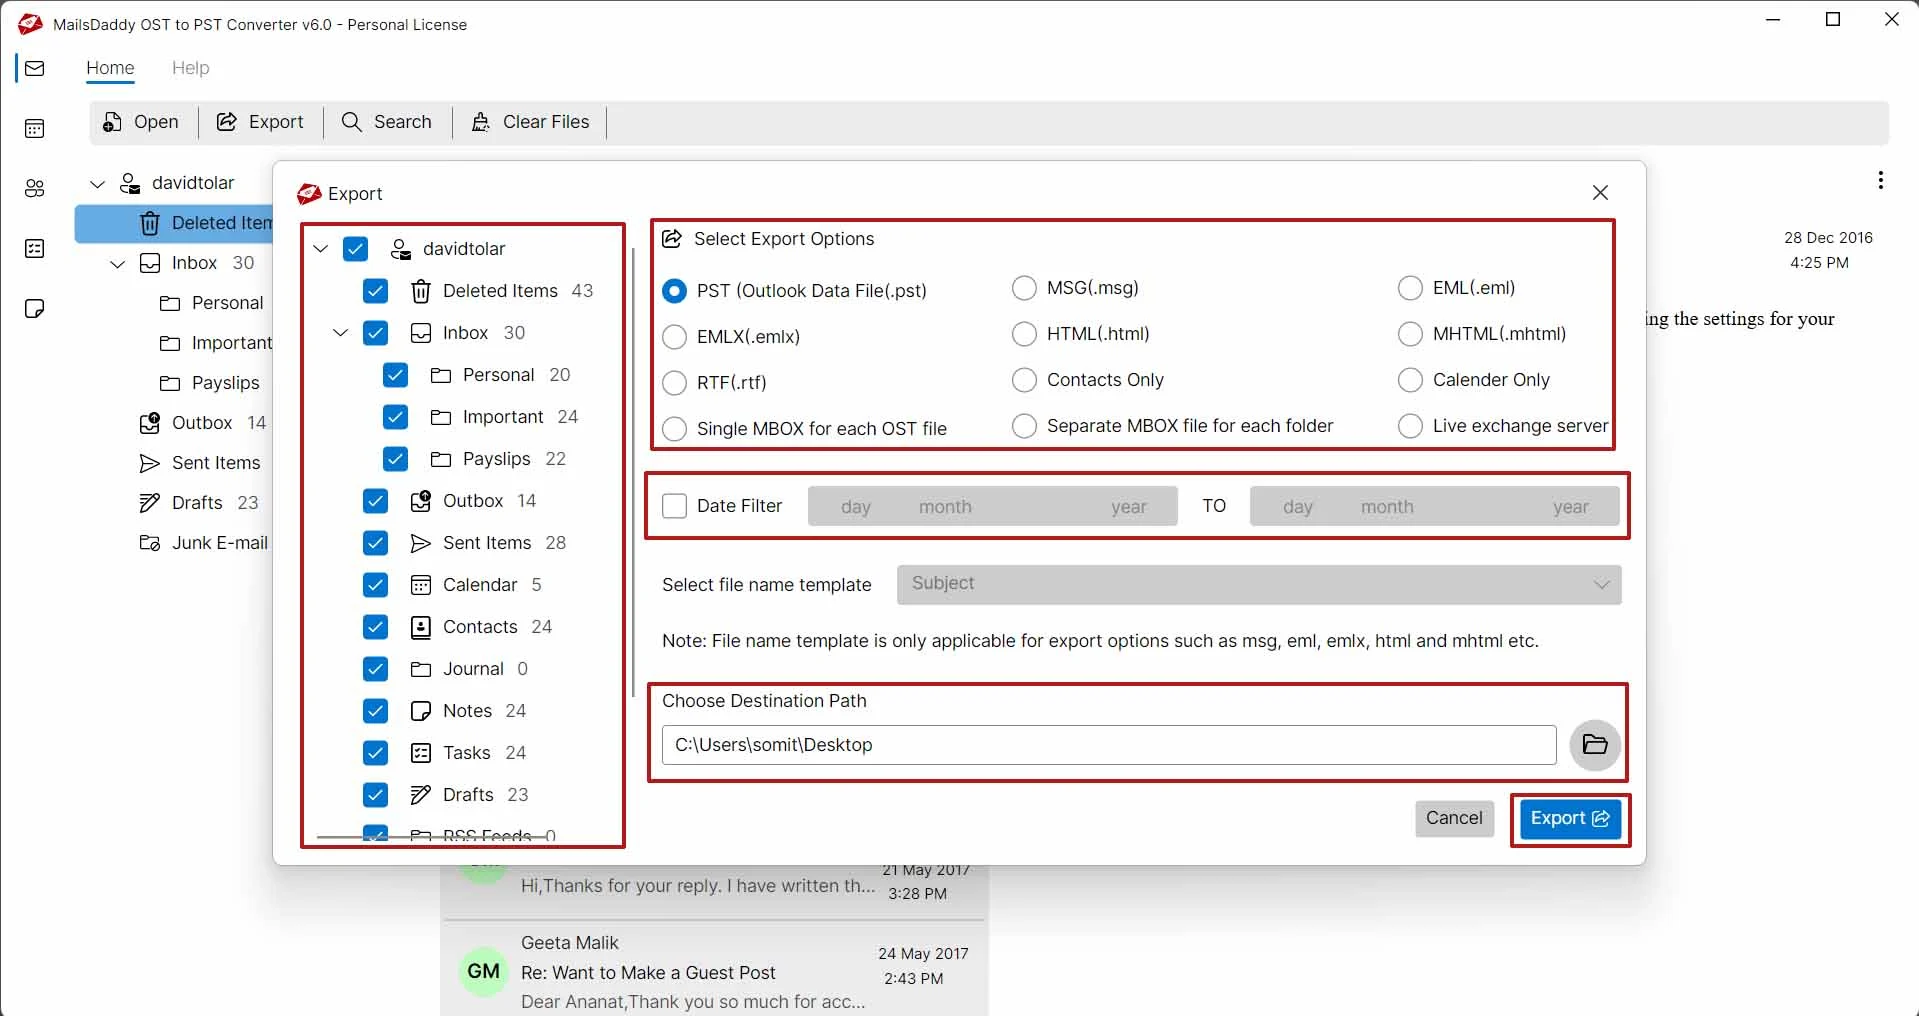
Now choose export option: PST for MS Outlook, >> Applying Date filter
Now choose export option: PST for MS Outlook, >> Applying Date filter . is optional. Browse the destination to save converted PST file in local system.
Step 7: Complete Operation
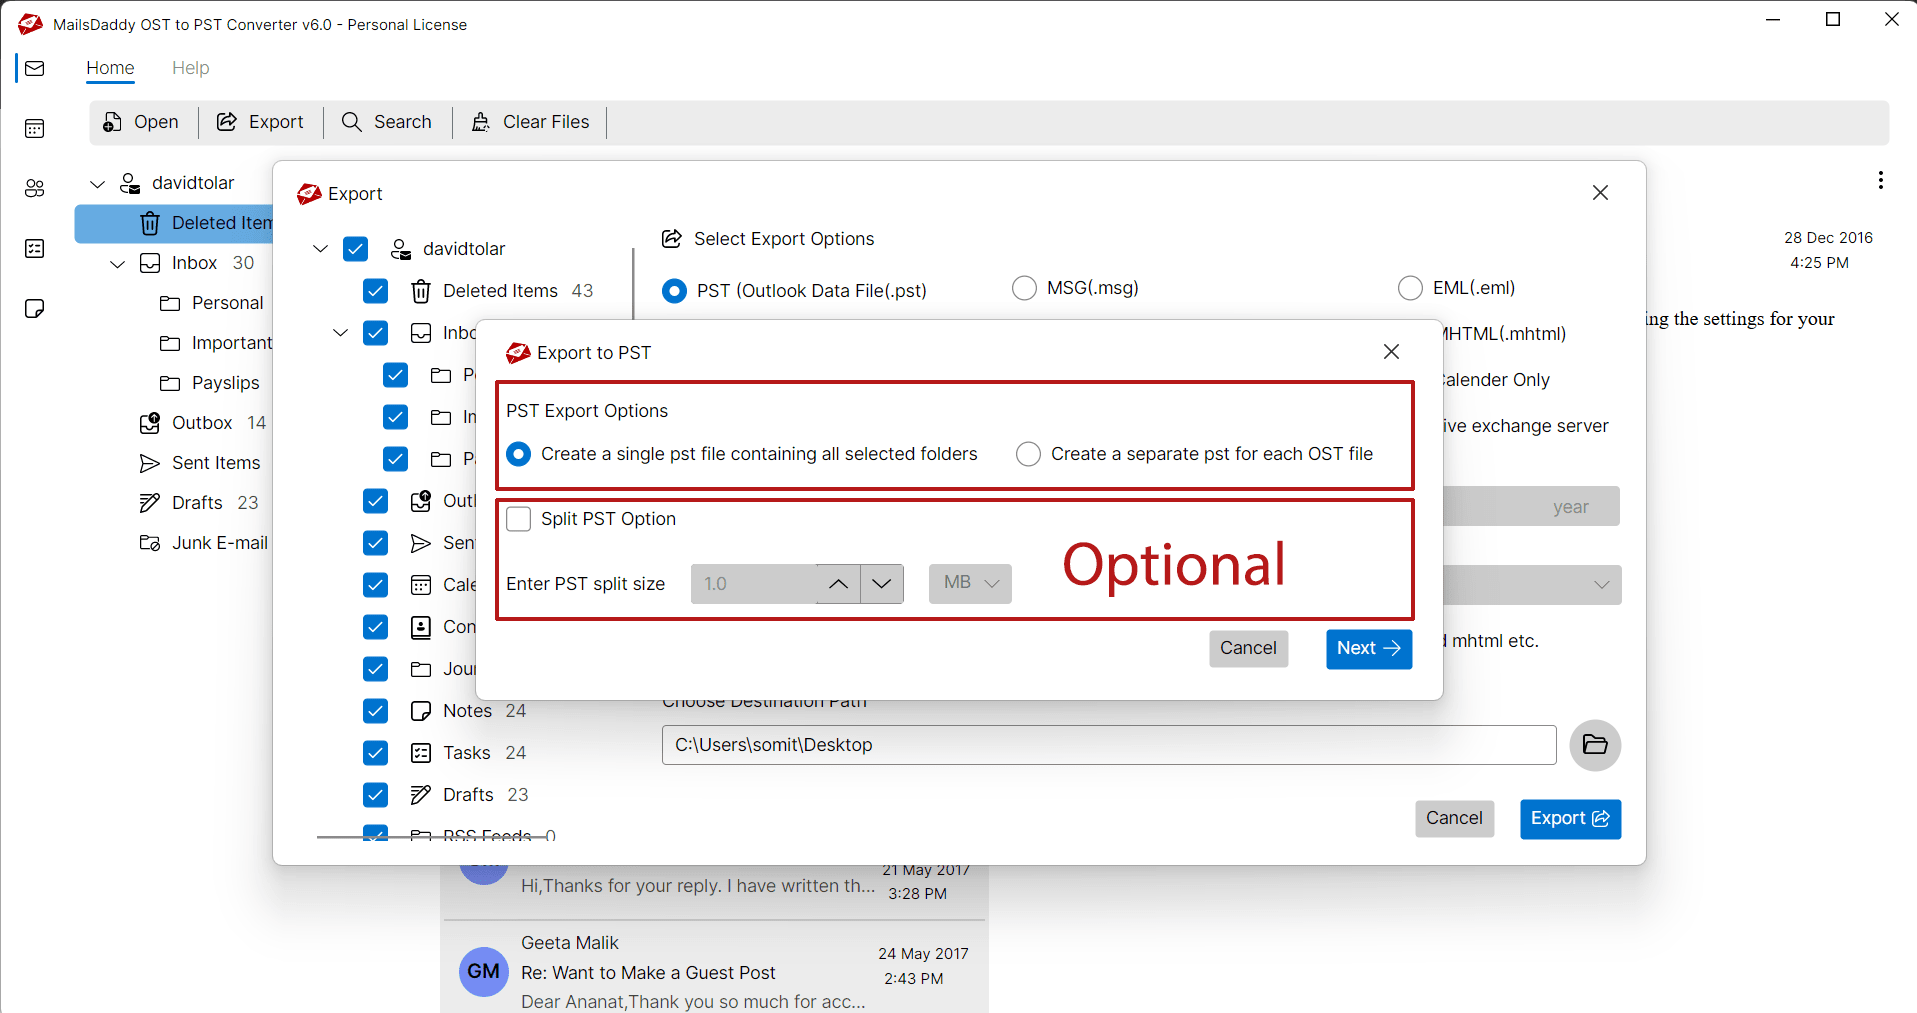
From the Export to PST Window, select the Single PST or Separate PST option as per requirements. Split the PST files, if you have large OST mailbox file and click on Export button.
Click on the Export button and wait until the process complete
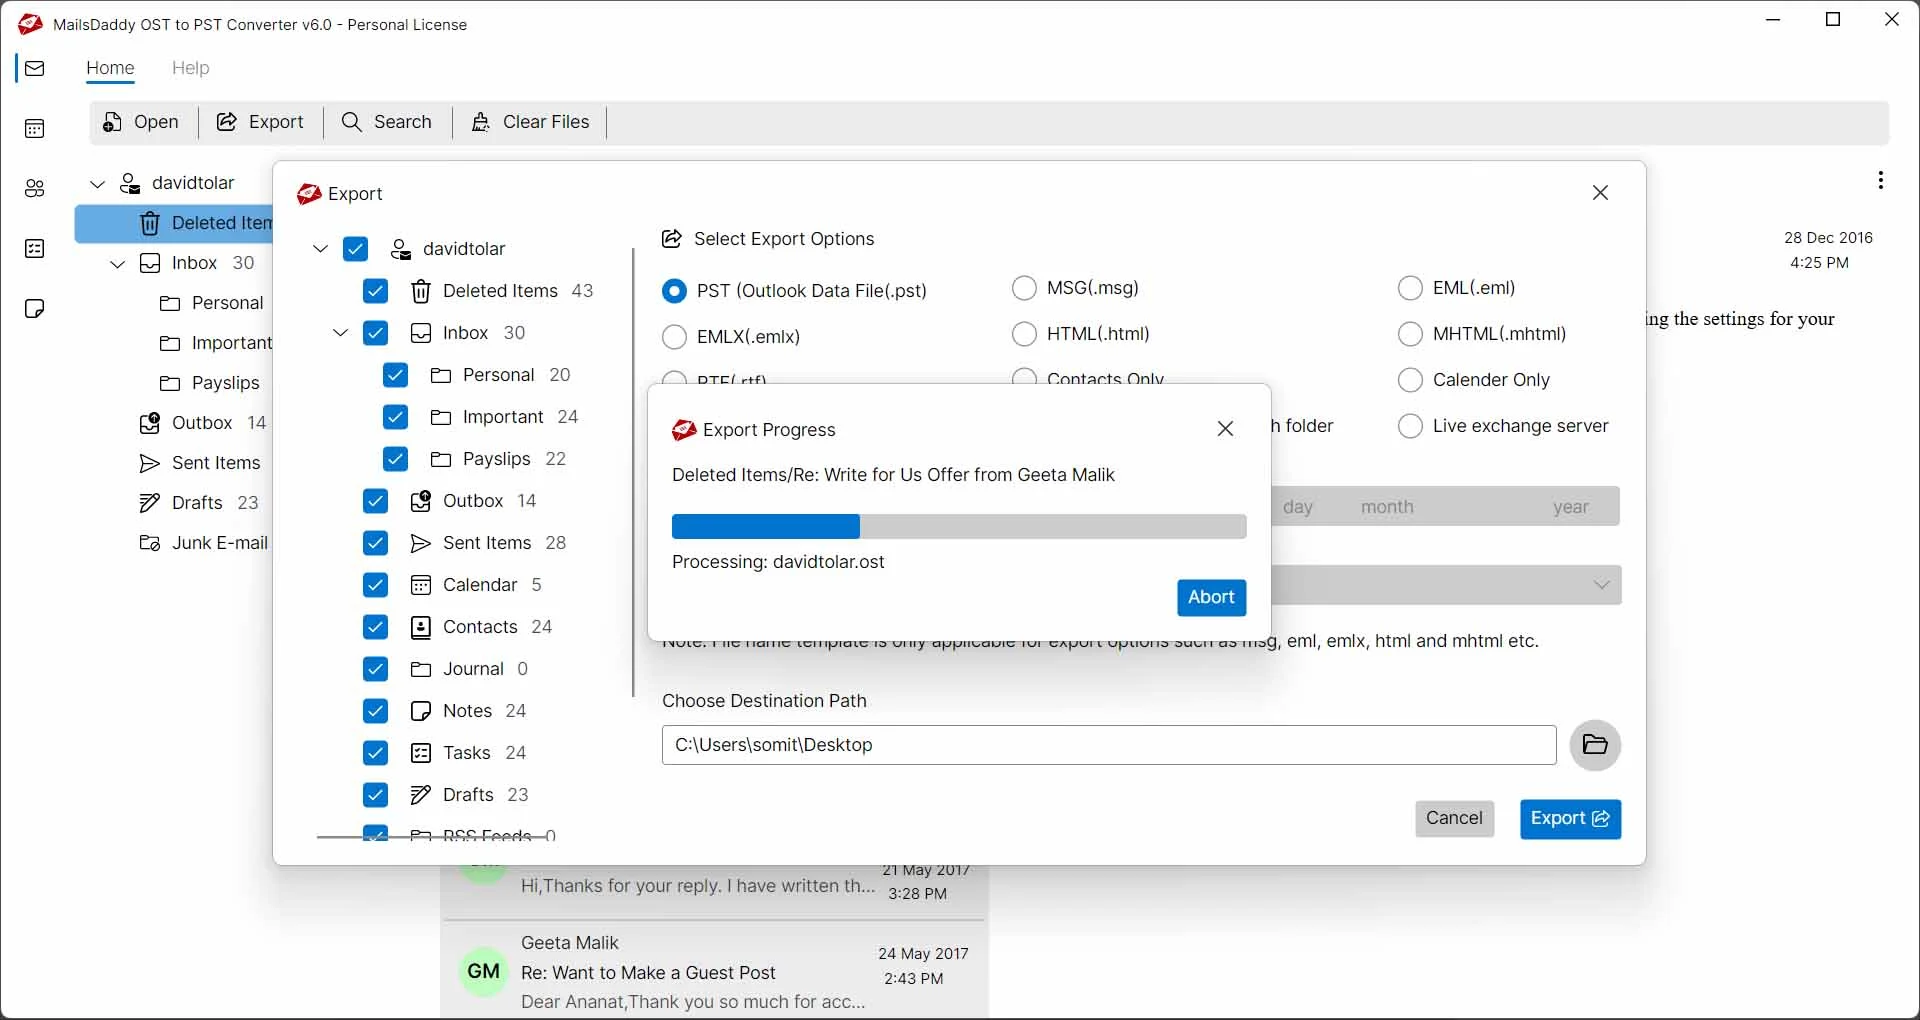
Click on the Export button and wait until the process complete. After completing the process, click on the OK button. Read our blog to make sure how to open or import PST file in MS Outlook .
Ready to Start with OST to PST Converter?
Download the free trial version to preview all mailbox items or buy the full license for unlimited conversion.