Working Instructions of MailsDaddy Zimbra TGZ to PST Converter tool
Step by step instructions to convert Zimbra TGZ mailboxes to Outlook PST, Live Exchange Server, and other supported file formats.
How to import TGZ to Outlook ? (7 Steps)
Click on any screenshot to view full resolution.
Download & Launch Zimbra Converter
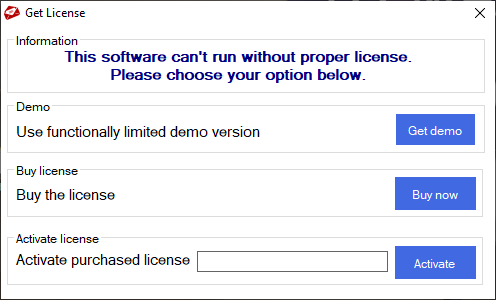
Download, install, and launch MailsDaddy Zimbra Converter on your Windows PC. Click on the 'Get Demo' button to evaluate the software or activate with your license key.
Click 'Open' to Browse TGZ Data
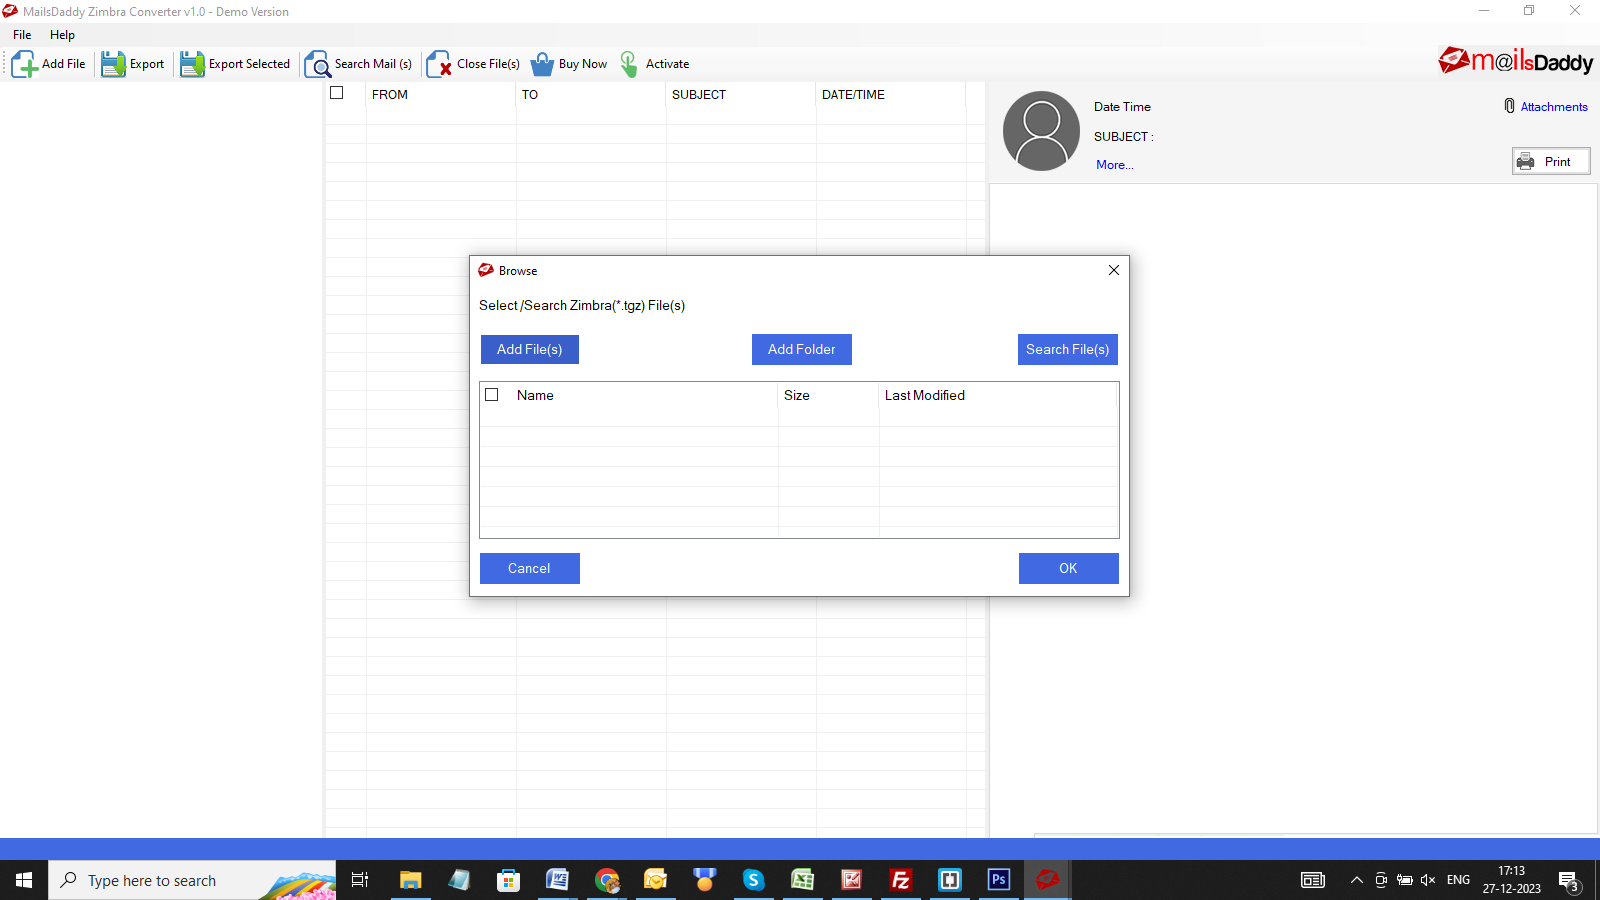
From the main interface, click on the 'Open' button to load your Zimbra TGZ mailboxes.

Choose Method to Load Zimbra TGZ File
Select between 'Open' (if you know the exact file location), Add Folder (to load multiple TGZ files in bulk), or Search Folder (to scan local drives automatically for TGZ files). Check the desired files and click OK.
Preview Emails & Folder Hierarchy
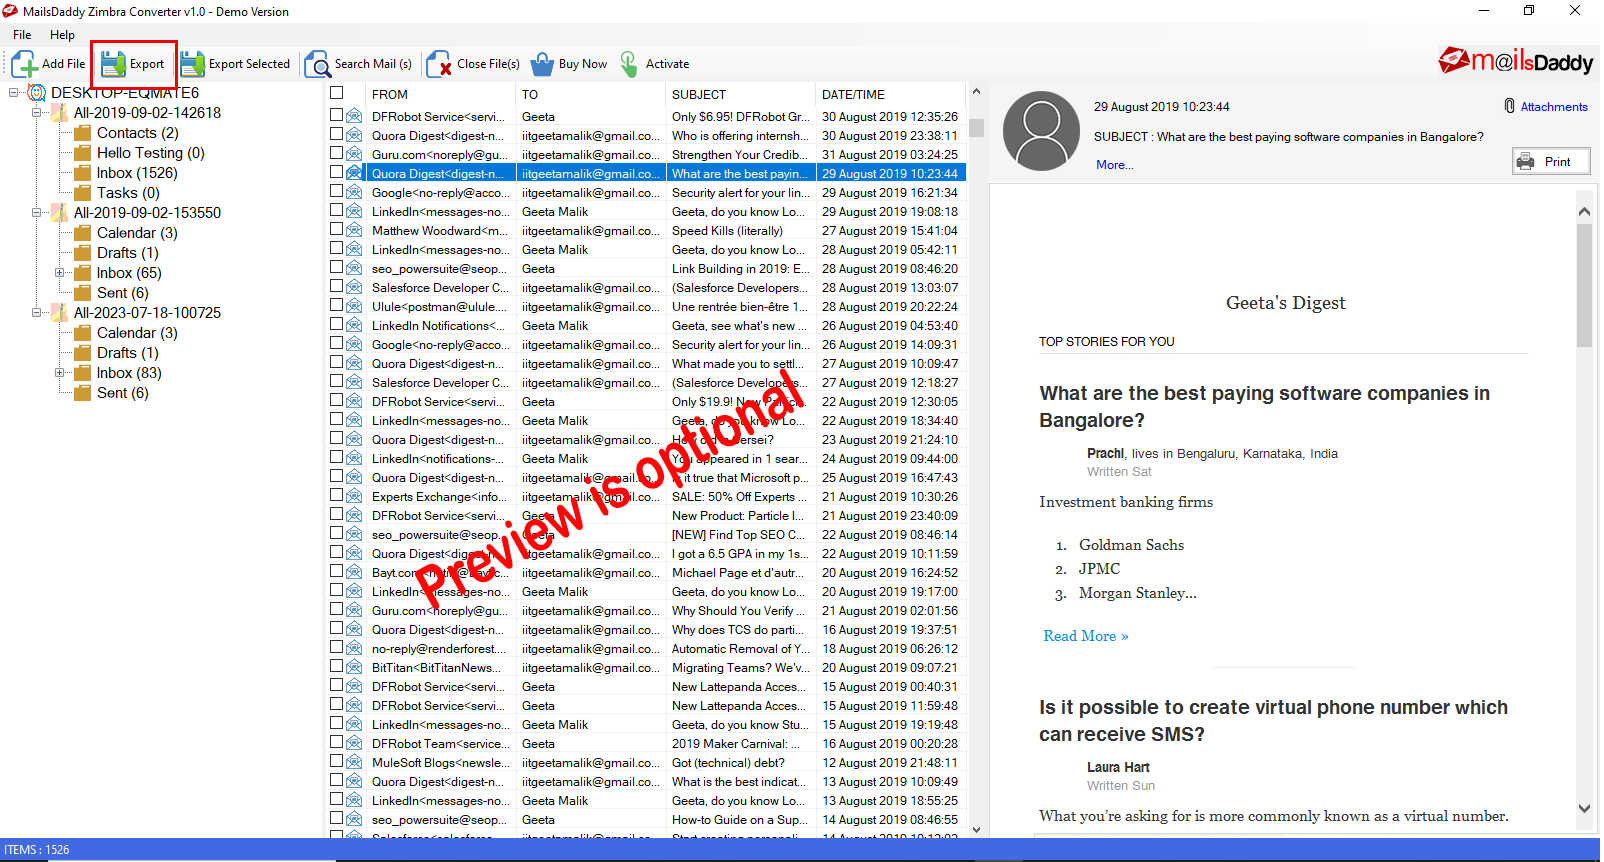
Once the TGZ mailbox is loaded, preview email contents, attachments, contacts, and calendars with complete folder hierarchy. Click on the 'Export' button to proceed.
Select PST Format & Destination Path
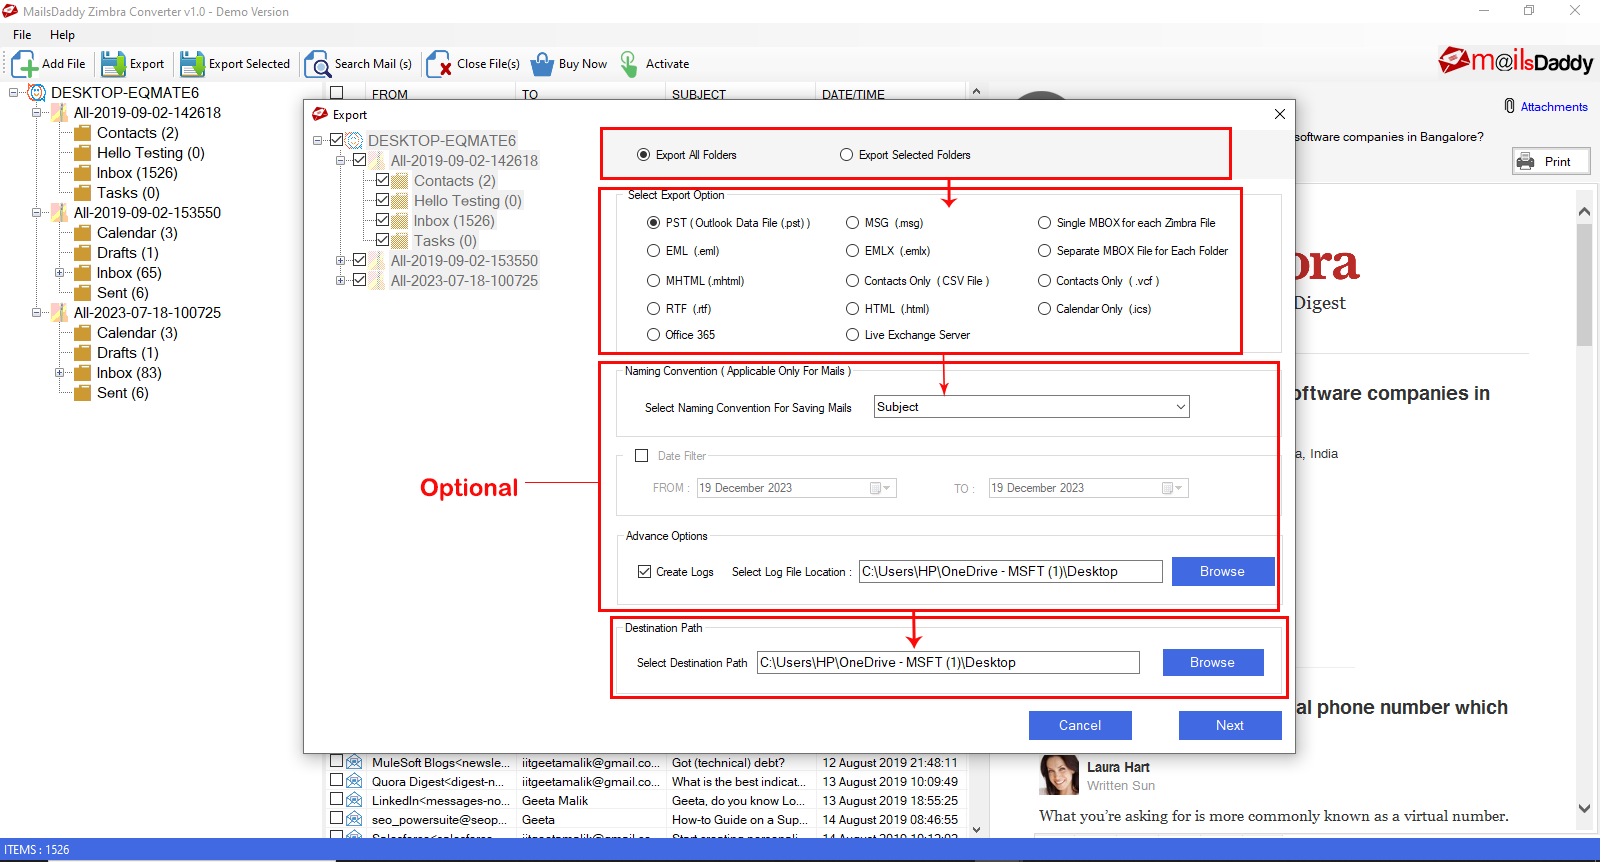
From the Export window, select the PST (Outlook data file .pst) option, apply optional date filters, set a log file saving location, and browse the destination folder to save your PST file. Click Next.
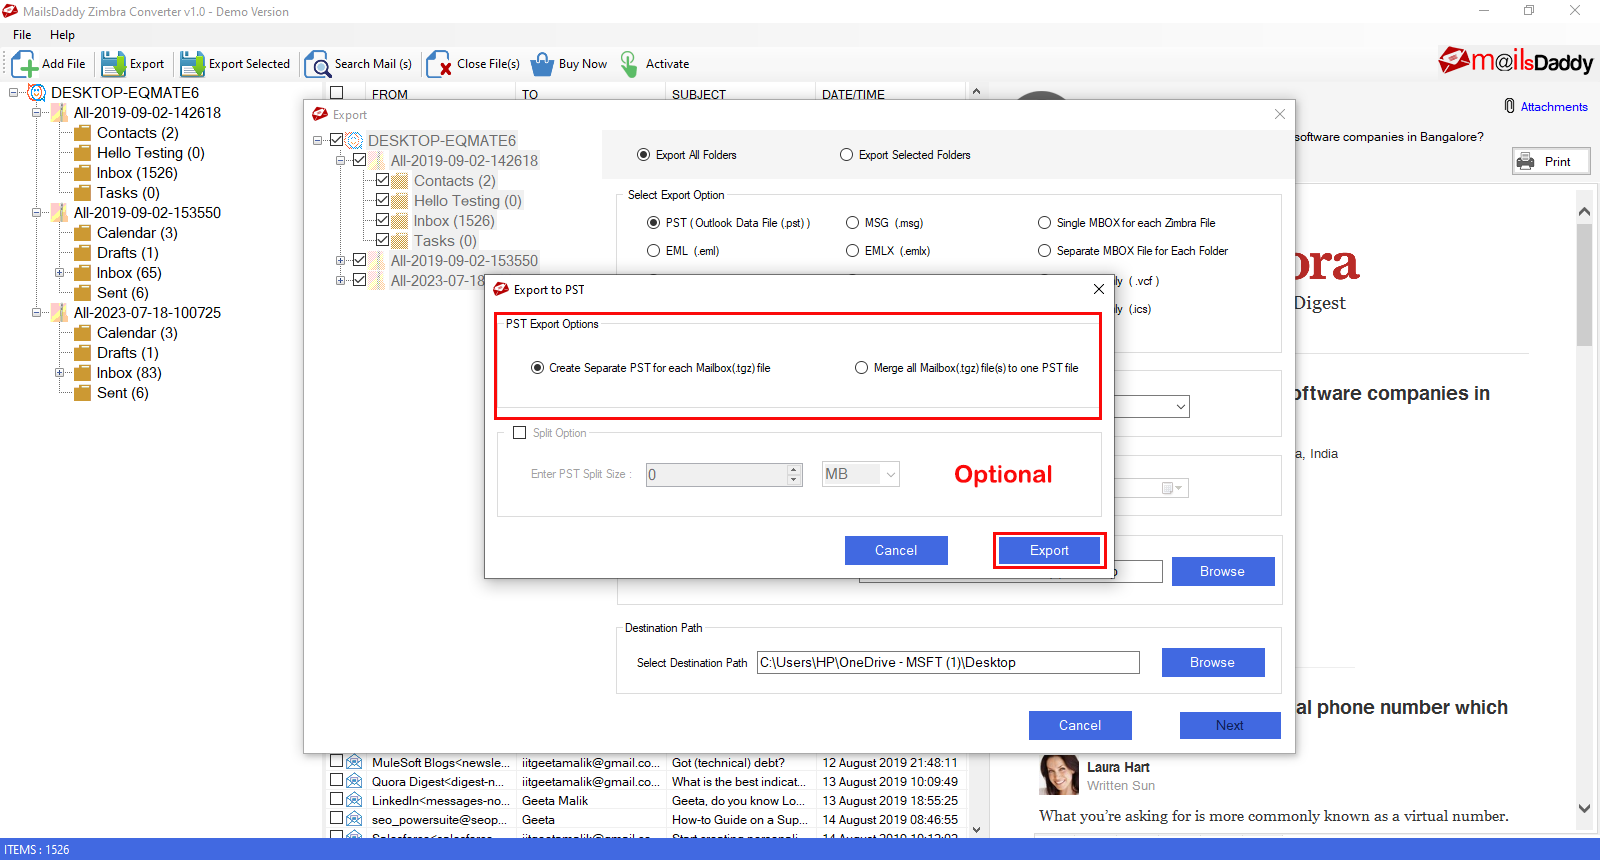
Choose Single or Separate PST & Split Options
In the Export to PST window, choose whether to create a single PST or separate PST for each mailbox. Enable PST splitting if handling large mailboxes, and click the Export button.
Start Export & Finish Conversion
The conversion starts immediately. Wait for the progress to complete, then click the OK button on the confirmation dialog. You can now open the converted PST file in MS Outlook.

Ready to Start with Zimbra Converter?
Download the free trial version to preview all mailbox items or buy the full license for unlimited conversion.