Migration endpoints are created to establish a connection between On-Premise Exchange Server and Office 365. It allows managing settings in order to perform a successful migration process from Exchange to Exchange Online. Here, I am going to discuss some steps that help you create migration endpoints in Office 365.
How to configure migration endpoints in Office 365?
It is necessary to do the Exchange migration endpoints configuration in order to connect the On-Premise Exchange to the remote server that leads to the migration of the Exchange mailbox to Office 365 Cloud.
Try MailsDaddy Exchange Server Suite to Migrate from Exchange to Office 365, and Office 365 to Office 365. Also support Exchange Database, OST & PST recovery.
-
- 1- Recover Corrupted EDB, OST, and PST files.
- 2- 100% secure App to perform Exchange Server and Office 365 Migrations.
- 3- Migrate Emails, Attachments, Contacts & Calendars items, etc.
Step 1: Follow the steps to add migration endpoints in Exchange Online
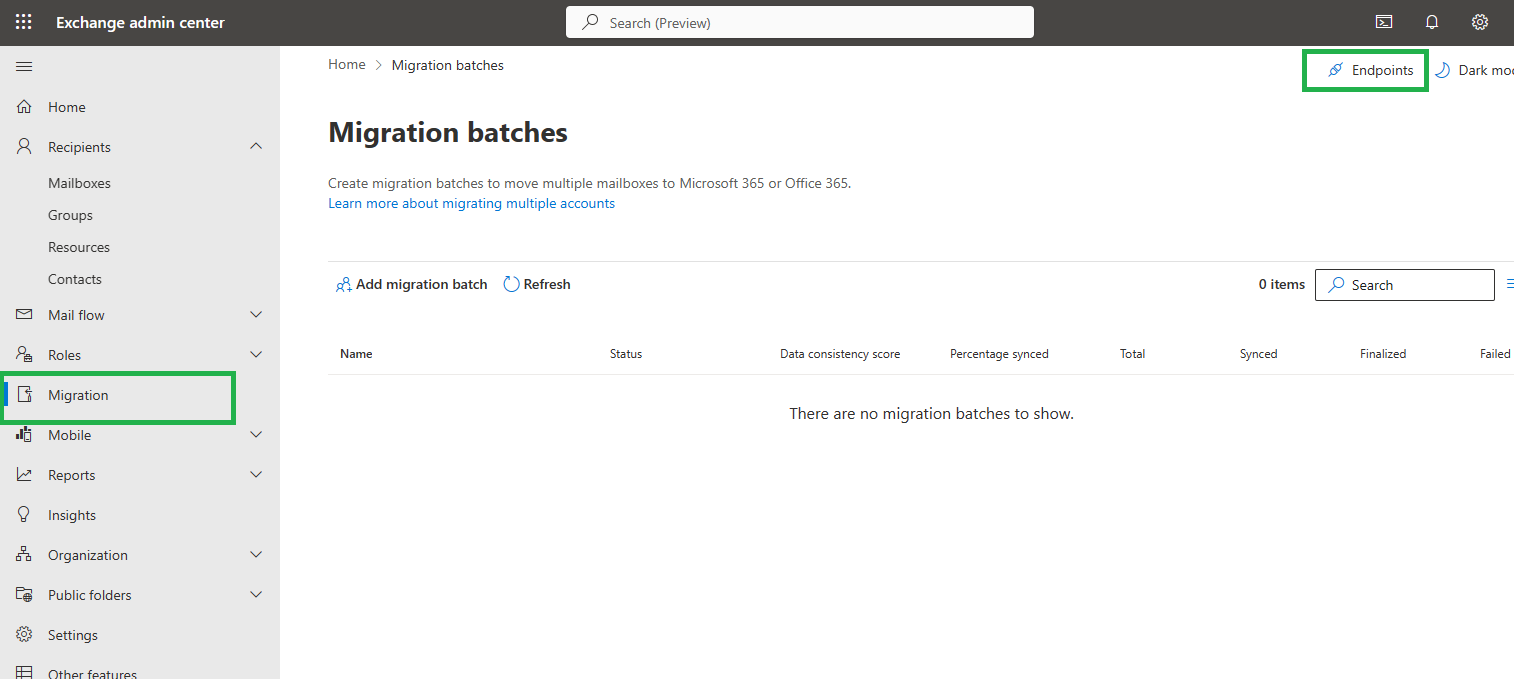
After Sign-In to Microsoft Office 365, enter the Exchange Admin Centre then go to the Migration.
Navigate to the EndPoints option in the right corner of the interface to create a Migration Endpoint.
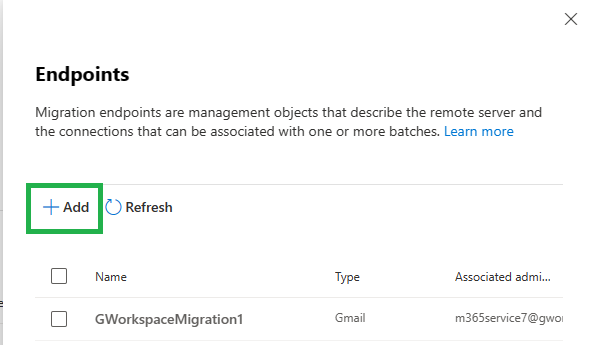
To add Endpoint, click on Add button in the newly open window.
Note: You need to select the migration endpoints according to the type of migration. It means for Cutover and Staged Migration you need to select Outlook Anywhere. However, for IMAP migration, there is the requirement to choose IMAP; for Hybrid migration, you must choose Exchange Remote.
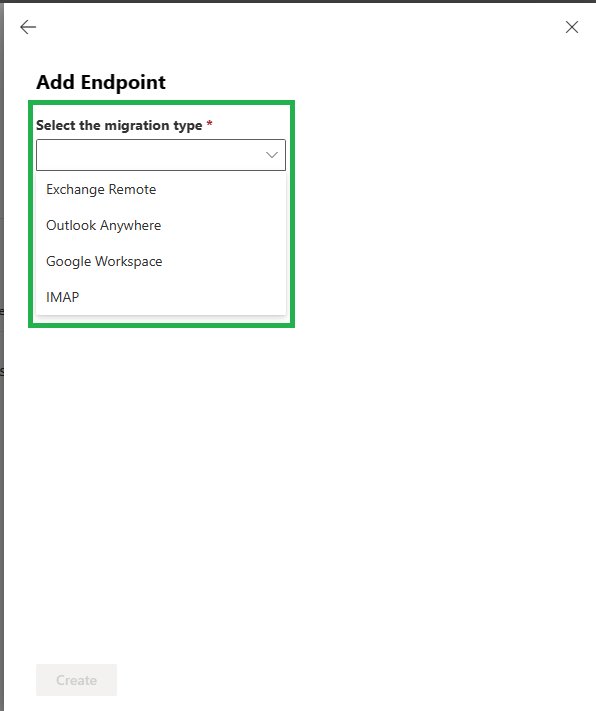
There may be some changes in other Exchange to Office 365 Migration types, therefore; you need to enter the details accordingly.
Step 2: Enter the On-Premise Account Credential
After clicking on the Next button, a new window will appear where you need to entire On-premise account credentials such as-
Email address: Under the Email address, you need to type the Email ID of the On-Premise user mailbox you want to migrate.
Account with Privileges: Enter the name of the Exchange user mailbox that has Administrative privileges.
Password of account with Privileges: Type the Password of the accounts that you have entered in the previous box with Administrative privileges.
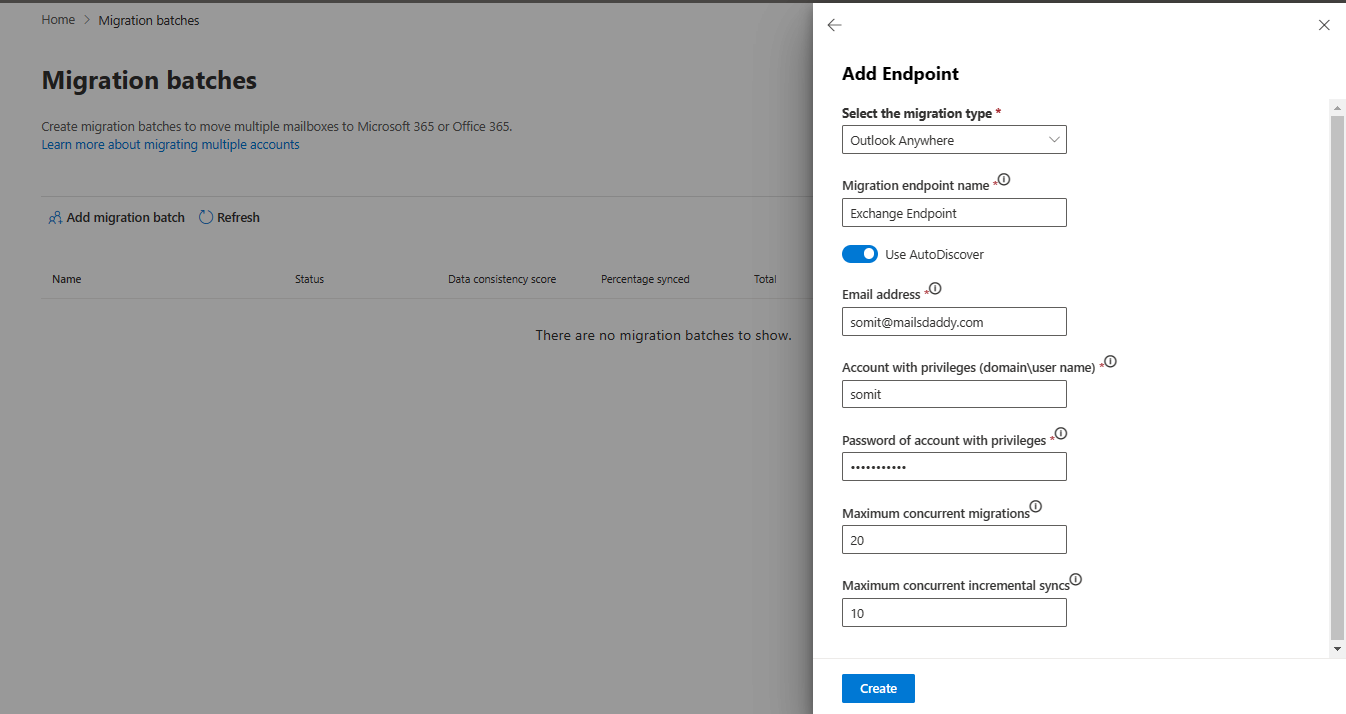
After entering all the details of the On-Premise Exchange, hit the Create button. This will create the Exchange Migration endpoint for Outlook anywhere.
Step 3: Confirm Migration Endpoints:
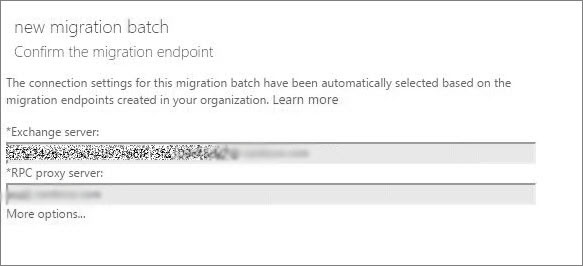
Once you enter all the information of the Microsoft Exchange Server, the connection setting for the migration is automatically selected based on the migration endpoints created in the organization then click done.
If Office 365 failed to create the server setting and does not connect to the source server and then enter FDQN of the Exchange Server and RPC Proxy Server manually.

Exchange Server FQDN: It is the fully qualified domain name for the Exchange Server. You need to put the hostname for your mailbox server.
RPC Proxy Server: Here, you need to write the FQDN for the RPC Proxy Server for Outlook Anywhere. It is the URL for the RPC Proxy Server that Outlook uses to connect with the Exchange Server.
Once all the details entered hit next.
Step 4: Enter the general information and complete the process:
Now, enter the Migration endpoint name and leave the other two boxes (Maximum Concurrent Migrations and Maximum Concurrent Incremental Syncs) empty, as it is not necessary to fill them.
Enter the New button to create the migration endpoints.
Step 5: Verify the connection of migration endpoints
To check the connection setting you can run the below command in the Windows PowerShell to verify the migration endpoints connection.
Test-MigrationServerAvailability -Endpoint endpoint.xyz.com
Conclusion: To create migration endpoints in Office 365 you need to follow the above-given steps and fill all the information according to the type of migration you are going to implement.