Are you looking for a guide to change an OST file name? Or do you want to understand why renaming an OST file may be necessary? There are several factors and scenarios that we will discuss in this guide. Additionally, you will learn more about the OST file and its uses.
What is an OST file in Outlook?
Outlook users know that an OST file is a local copy of their Outlook mailbox created when Cached Exchange Mode is enabled. OST stands for Offline Storage Table and allows users to open, read, and compose emails even without an internet connection. When the user goes back online, the OST file automatically syncs with the Exchange Server, Microsoft 365, or IMAP account.
Outlook also uses PST files to store data locally without server synchronization, whereas OST files keep mailbox data continuously synchronized with the server.
When do we need to rename OST file?
Re-syncing data is not the only reason to change an OST file name. There are several other situations in which renaming the OST file can be helpful, such as:
- Outlook profile is not loading.
- OST file is not syncing with the server even when you are online.
- OST file is corrupted or damaged.
- Outlook shows the status “Disconnected.”
- Outlook performance is slow.
- Multiple OST files are linked to a single Outlook profile.
If you encounter any of these issues, you can rename the OST file and allow Outlook to download a new copy from the server. This process often helps resolve local errors and synchronization problems.
Is renaming the OST file safe?
Yes, it is perfectly safe until then your mailbox is available on server (Exchange, Microsoft 365, or IMAP). Because all your mailbox data resides on the server, Outlook will simply create a new OST file the next time you open it.
Note: This is not working with POP accounts because it does not resync with the server.
Step 1: Close Outlook
If your Microsoft Outlook is running then first close it completely even from background.
Step 2: Navigate to the OST file location
OST file location (By default)
C:\Users\%username%\AppData\Local\Microsoft\Outlook\
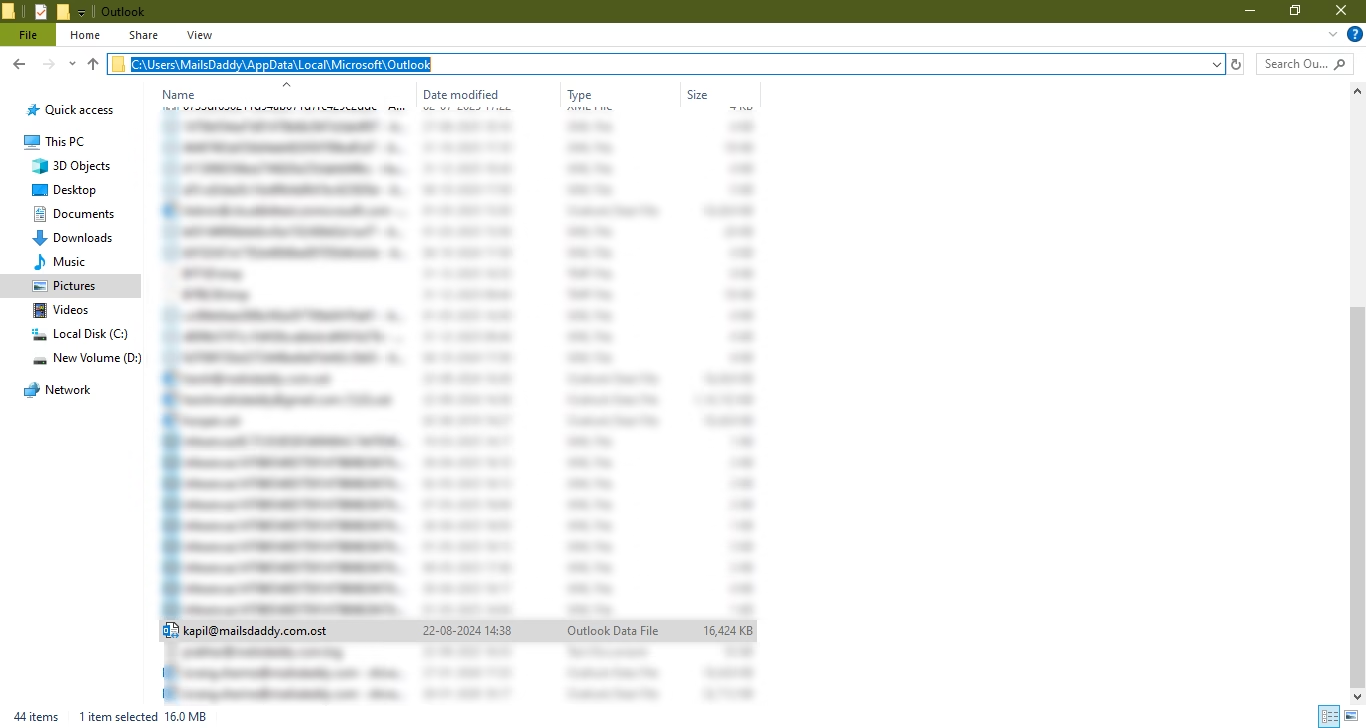
You can also use “Run” command and directly open “appdata”
Note: If you are browsing manually and AppData folder is not visible then enable hidden items.
Step 3: Identify the correct OST file
Now the most typical step to choose correct OST file. If you have multiple accounts or profiles, choose the right one. For that, you can check Outlook data file location from account setting.
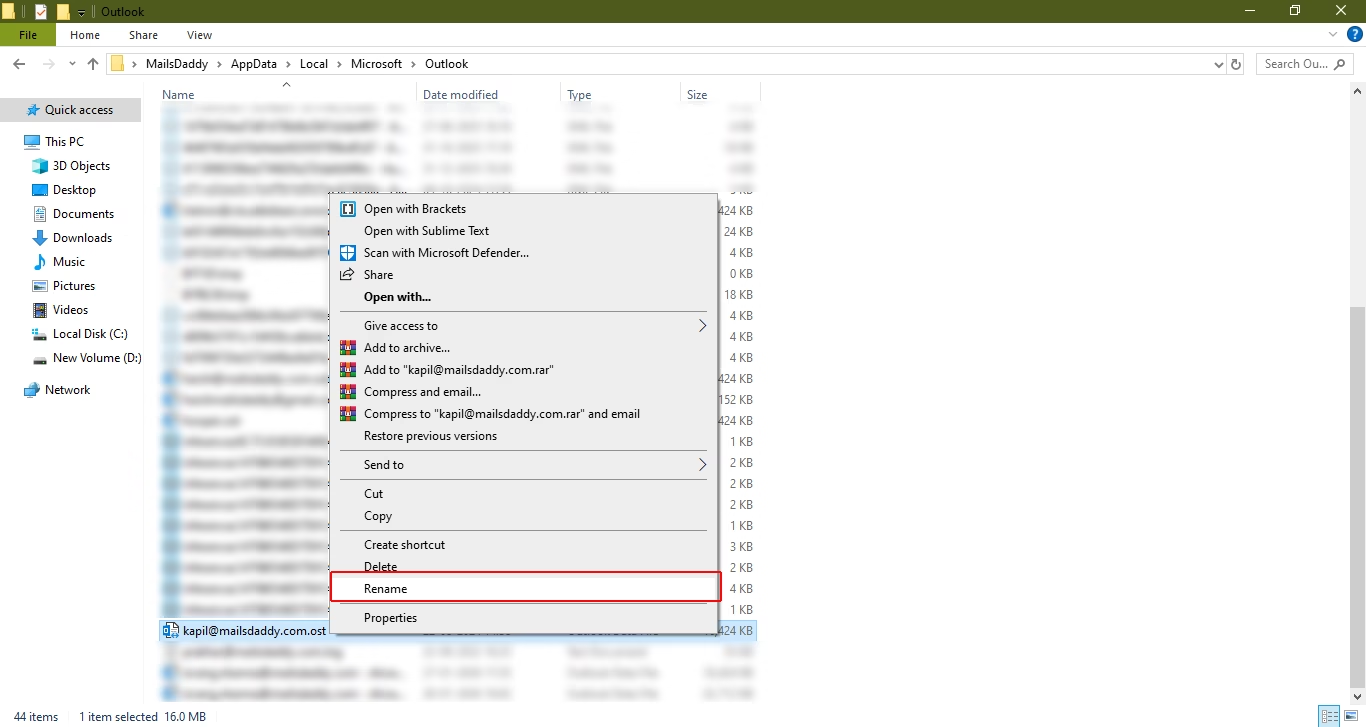
Step 4: Rename the OST file
Once you have identified the file then Right-click and select Rename. For example: user_address.ost to user_address_backup.ost
Step 5: Restart Outlook
Now launch your Outlook so that it creates a new OST file and resync all mailbox items.
That’s it.
Final Verdict
Renaming the OST file is not required unless you are facing an issue. This step-by-step guide helps users re-create a new OST file from the server. Make sure not to follow these steps with a POP3 account, as doing so may result in data loss. It is also recommended to create a backup or export OST file to PST file before proceeding with the renaming steps.
Common FAQ’s
Q: Is it important to close Outlook before renaming the OST file?
Ans: Yes, it is essential to close Outlook before following any because it locks the OST file during operation.
Q: Do I need to take a backup of OST file?
Ans: The above content is based on Microsoft guidelines. However, at MailsDaddy, we advise users to back up their OST file by exporting it to a PST file, especially if they are holding highly valuable data.
Q: How long is it expected to take to rebuild the OST file?
Ans: This is not technically correct, as the process largely depends on the mailbox size and the available internet speed.
Q: What is the difference between renaming and deleting an OST file?
Ans: Renaming the OST file preserves the data as a backup, whereas deleting the file removes it permanently.