Recently, I found some queries on how to change your display language & time zone in Office 365 account. People are facing some issue with the steps that exactly needs to follow. That is why I thought of writing a blog for the people who are looking for a solution. Here, I am going to provide all the methods through which you can update the default language and the time zone in Office 365 mailbox. There is no complex technique to do this; you just need to follow a few simple steps.
Method 1: How to set language and time zone for all users in Office 365?
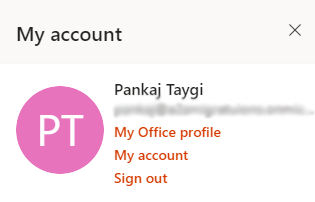
Step 1: Sign in to Office 365 account and go to My Office Profile through Account Manager Icon on the upper right corner of the Exchange Online window.
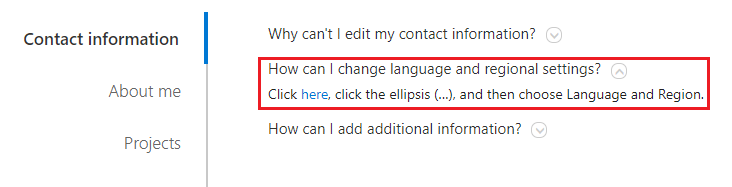
Step 2: A profile window will appear, click on Update Profile and under the contact information hit on “How can I change the language or regional setting?”. Now, hit on the “here” option.
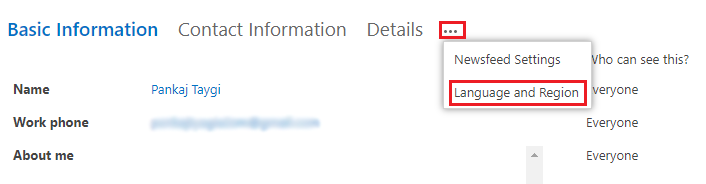
Step 3: A new page will open where you need to hit the ellipsis (…) and then go to the Language and Region.
Now, you can find the options to set the language, time zone, and region.
Step 4: Under language, you can choose your display language from the drop-down menu and click on the Add button.
You can even use an advanced language setting to select your content and search language.
In the same way, choose the time zone for your current location that will visible as local time on your profile.
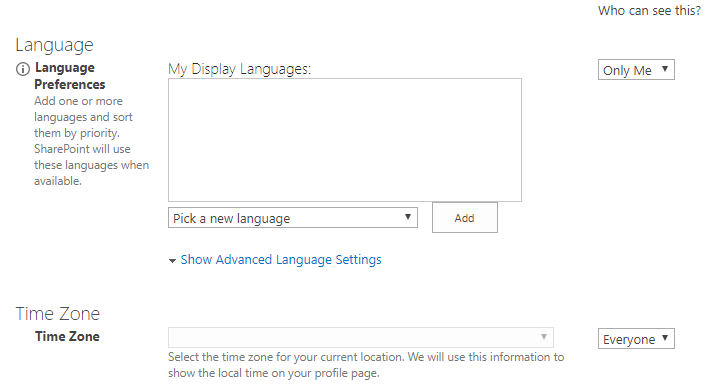
You can even select chooses for “Who can see this?”, whether you want to change the setting only for yourself or for everyone.
Step 5: Lastly, click on save all and close button to set the changed settings.
Alternative Method: Change your display language & time zone in Office 365 Portal
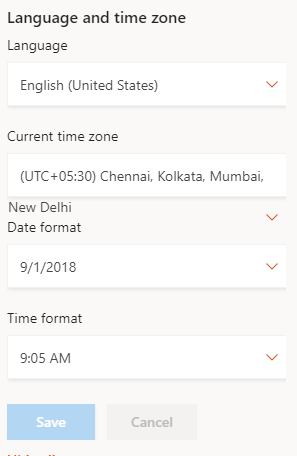
Step 1: Go to the settings of the Office 365 account. Under Language and time zone, click on View all.
Step 2: Choose the language and current time zone and hit on the save button. Here, you can even set the Date and Time format of your Office 365 Exchange Online.
Method 2: How to add language and time zone in Office 365 with PowerShell
You can also take the help of Microsoft Windows PowerShell for setting your language and time in the Office 365 Webmail account. You need to execute the given command for implementing the change in your language & time zone setting.
Get-Mailbox | Get-MailboxRegionalConfiguration | Set-MailboxRegionalConfiguration -Language it-it -TimeZone "Standard Time"
To set language and time for a particular Office 365 mailbox, you need to follow the below command.
Get-Mailbox UserName | Get-MailboxRegionalConfiguration | Set-MailboxRegionalConfiguration -Language it-it -TimeZone "Standard Time"
Conclusion: In the above blog, you have learned all the methods for How to Change your display language & time zone in Office 365. I hope this informative blog helps you provide the answer to all your queries to change the setting in your Exchange Online cloud account.