Here, through this blog, I am ging to tell how to create shared mailbox in Office 365. Creating shared mailboxes helps a group of people to communicate and reply to messages sent to the shared mailboxes. Shared mailboxes are free and there is no requirement to license up to 50 GB. To increase the limit of shared mailbox there is the need for the license.
Only people inside the organization can use shared mailboxes. When a user sends a message from this mailbox then is sent from the shared username rather than the individual username. Members of the shared mailbox can see the received message and respond to it. Each member can also view the changes done by the other members.
How to create shared mailbox in Office 365 using EAC?
- Sign to Exchange Online Admin account. On the O365 Admin center page, go to Groups and then the shared mailboxes page.
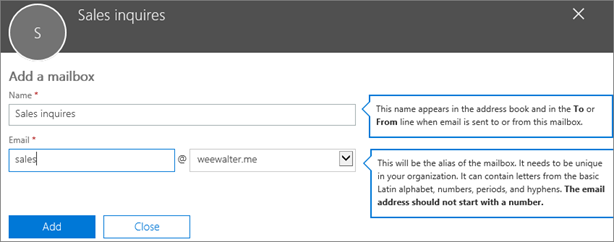
- Select +Add a mailbox. Enter your name and the email address then click the Add.
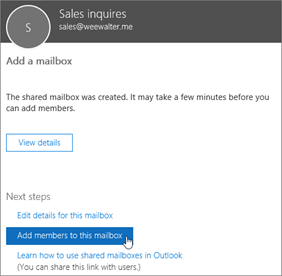
- Now, hit on Add members to this mailbox and click on the +Add members
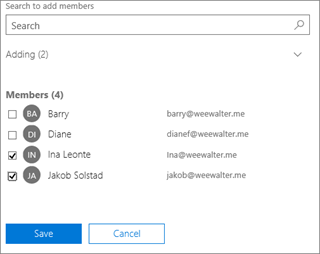
- Select members to add to shared mailboxes of Office 365 account. Click the Save button and then close.
Open shared mailboxes in Office 365 using PowerShell?
Below are the command to create shared mailbox in O36 account. User just need to execute the below given command to the Microsoft PowerShell.
New-Mailbox -Shared -Name "Sales Department" -DisplayName "Sales Department" -Alias Sales | Set-Mailbox -GrantSendOnBehalfTo MarketingSG | Add-MailboxPermission -User MarketingSG -AccessRights FullAccess -InheritanceType All
Steps to Block the Sign-In for shared mailbox account
- On the Admin page, go to User and then Active Users. Now, find the account for the shared mailbox.
- Then, select the user and then select Block this user Click on Block the users from signing in and select Save changes.
Add or remove the shared mailbox in Office 365?
- Go to Admin and the shared mailboxes. A page will open.
- Tick the required mailbox and click on Edit members.
- A page will appear.
- To add a member type the person name in the search field and the result will appear beneath the search field.
- Click on the valid appeared member.
- To remove the member, just click on the cross sign present beside the member’s name whom you want to remove.
- Moreover, lastly after performing either the addition or the deletion process of the member, click Save.
How to save sent emails to shared mailboxes?
- Log in to Exchange Online admin center. Click on Groupsand then Shared mailboxes.
- Select the shared mailbox, then Edit next to the sent items
- Enable the option Copy items sent as this mailboxand Copy items sent on behalf of this mailbox to On, and then Save.
How to add shared mailbox Office 365 to Outlook?
Once the Office 365 Admin adds the user as a member of the O365 shared mailbox, it will automatically display in Outlook. If not visible, the user can close and restart Microsoft Outlook.
If still not visible, then the user can manually add the Exchange Online shared mailbox to Outlook.
- Open Outlook.
- Go to Fileà Account settings
- Again, select Account Settingsfrom the drop-down menu.
- Under the Emailtab, note that the correct account is highlighted.
- Choose A new window appears.
- Click on More Settings> Advanced > Add.
- Type the shared mailbox email address Choose OK.
- Again, click OK. Choose Next > Finish> Close.
Conclusion
Shared mailbox is a great feature of the Office 365 cloud. Through this informative article, I tried to explain about the shared mailbox and the steps to how to create shared mailbox in Office 365.