MS Outlook is the desktop-based email client provided by Microsoft. The Outlook provides a lot of functionality to sending/receiving the email as well as managing calendars, contacts, and meetings, etc. We can easily set-up and access domain email in a desktop-based email client on any Windows OS system.
In Outlook we use three types of email protocols, these protocols allow users to access domain email in Outlook and manage their data.
- POP3 (Post Office Protocol)
- SMTP (Simple mail transfer protocol)
- IMAP ( Internet message access protocol)
In Microsoft Outlook, the user needs a protocol to send and receive an email. SMTP server (protocol) is required for sending mail and IMAP/POP3 for receiving email from your personal domain.
Set up a Domain email account with POP3/IMAP in MS Outlook-
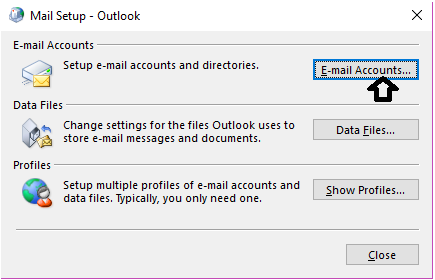
- Firstly, open the control panel and select the “Mail option” and click on “E-mail Accounts”.
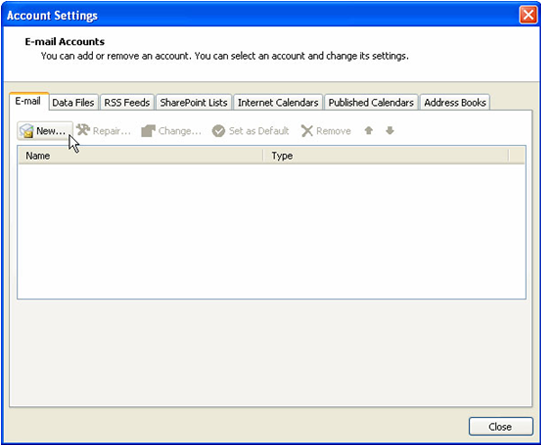
- Select the “New” option.
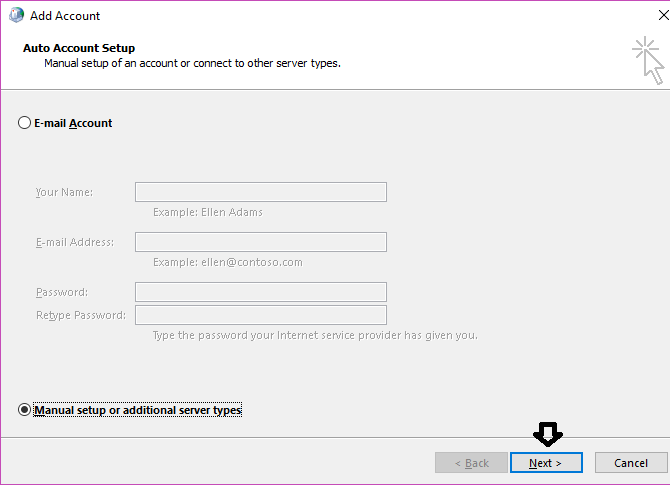
- Now select on “Manually setup or additional server types” option and click on the Next button.
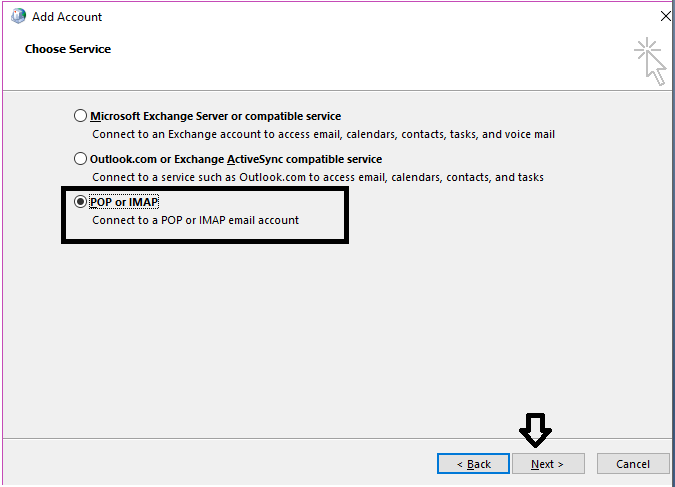
- Open the new “Choose service” dialog box, select the option “POP or IMAP” then hit the “Next” button.
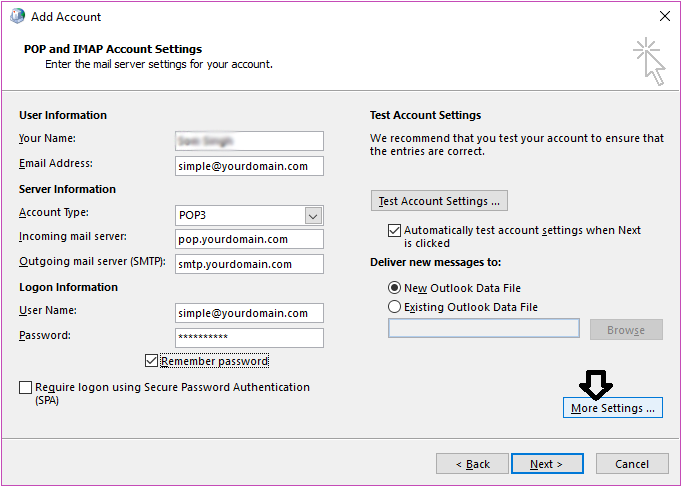
- After open the new tab fill in all your details-
1- User Name– Enter your name
2- E-mail Address– Enter the contact address email address
3- Account Type- POP3 (The mailbox data will be stored in PST file format for any MS Outlook version) or IMAP (If MS Outlook version is higher than 2010, the data will be stored in OST file and if the MS Outlook version is lower than 2013 then the data will store in PST file format)
4- Incoming Mail Server- for POP3 Enter “pop.yourdomain.com” and for IMAP “imap.yourdomain.com”
5- Outgoing Mail Server– Enter smtp.yourdomain.com
6- User Name- Enter your full email address.
7- Password- if you want to save your password in MS Outlook then enable the “Remember Password”
8- After fill, all details click on the “more settings” option.
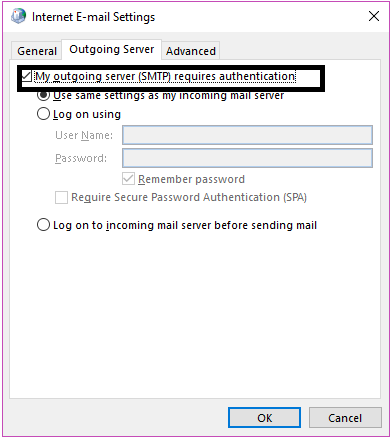
- Open more settings tab select Outgoing Server and select the option “My Outgoing Server (SMTP) requires authentication” and choose to “Use the same setting as my incoming mail server”.
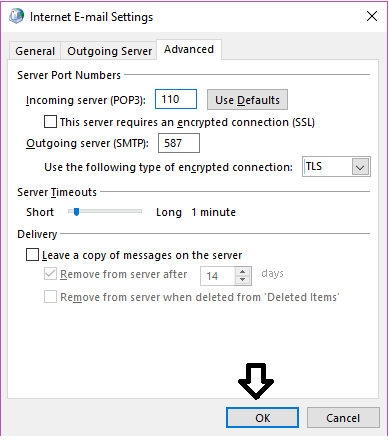
- Now click on the Advanced tab
1- Incoming server POP3 the port no. should be set to 110
2- Outgoing server SMTP the port no. should be set to 587
3- And select the encrypted connection- TLS
4- Click on the OK button
- Now back to the “E-mail account” tab and click “Test Account Setting” to confirm that all details are rights >> click on the Next button.
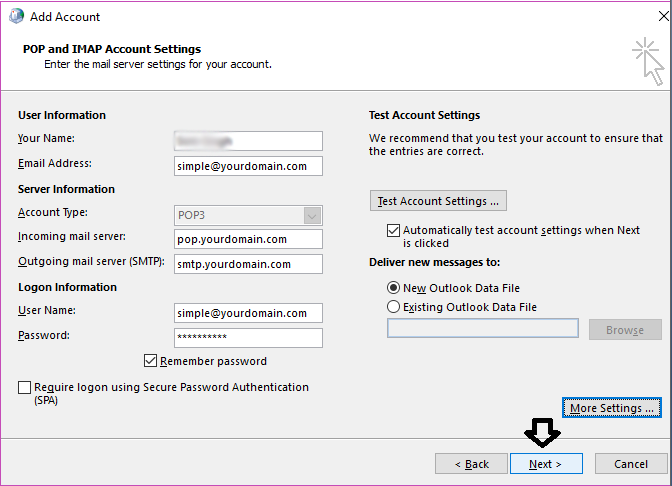
- After completing all the process, click on the finish button.
Here your outlook is successfully configured with the POP3 protocol. For IMAP change “incoming server name: imap.yourdomain.com” and port no-143 other steps are the same as above.
Final Word
I have mentioned a very easy way in this blog to know about how the user can set up a domain email in Microsoft Outlook with POP3/IMAP protocol. For more help, you can see the images carefully and add your domain email to Outlook.