What is Multi-Factor Authentication in Office 365?
Multi-Factor Authentication (MFA) is a security feature in Office 365 where it authenticates whether the person trying to assess the Exchange Online is the same person who claims the account. It uses the person’s phone number or the mobile app connected to Office 365. These features let you strengthen the security to Exchange Online account. Here, in this blog, I am going to discuss how to Enable or Disable Multi-Factor Authentication in Office365.
Do you need to backup office 365? Get an affordable application to backup your o365 emails, contacts, calendar and notes etc. to Outlook compatible PST, EML, MSG and MBOX formats. MailsDaddy Office 365 Backup Tool is available free to try with limited functionality.


How to Enable Windows Azure Multi-Factor Authentication Office 365?
Method 1: How to Turn-On Multi-Factor Authentication for Office 365?
Add MFA Office 365 for Single User:
1) First, log in to Exchange Online account and go to Users–> Active Users. A new window will appear.
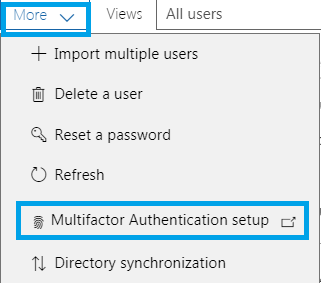
2) Click on More and from the drop-down menu hit on Multifactor Authentication Setup.
3) Select the checkbox of the Office 365 user for whom you want to enable MFA. As you select the mailbox, on the right side a new window appears of that selected mailbox.
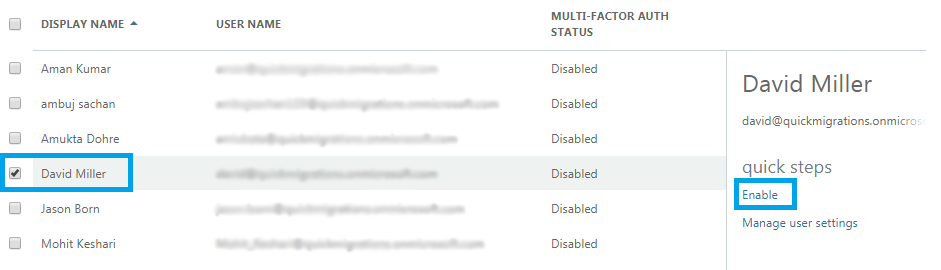
4) Hit on the Enable option and again click on Enable Multi-Factor Auth–> Close. Finally, you have set up the MFA to Office 365 account.
Bulk Enable Multi-Factor Authentication:
1) For enabling the multiple MFA for multiple users, you need to create a CSV file with the following details in the given format and save it .csv format.
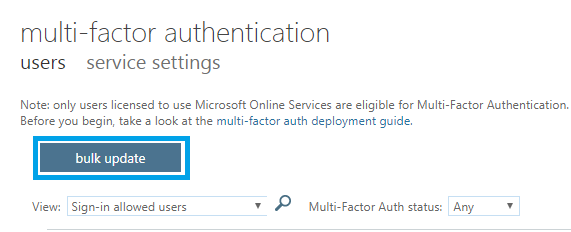
2) Hit on the Bulk Update button in the multi-factor authentication factor page.
3) Click on Browse For File, insert the CSV. Click the Next Arrow and it validate the CSV. Once verified again hit the next arrow and Done. This will assign MFA to all mailboxes for Exchange Online mentioned in the CSV.
Choose Authentication Method
Once you have assigned MFA for the Exchange Online mailboxes, you need to choose the method for verification at the type of Office 365 account login process.
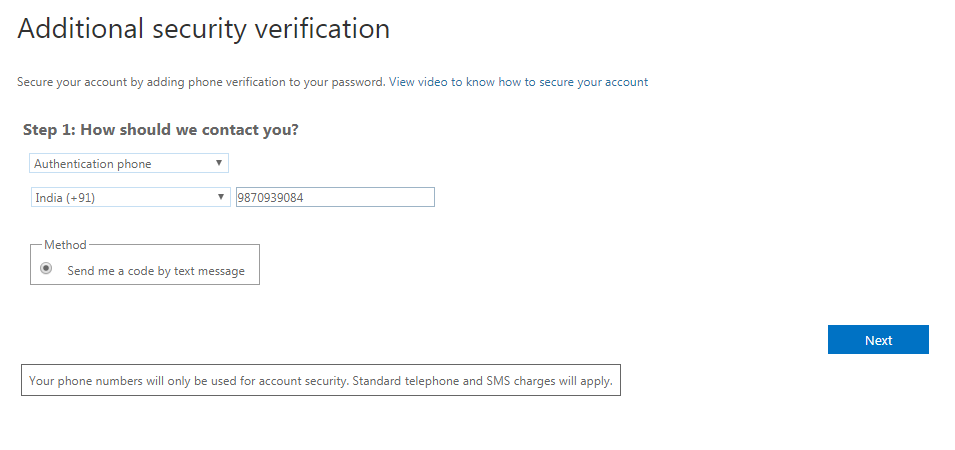
After enabling MFA to Exchange Online mailbox, you need to login to the assigned MFA mailboxes and set up the verification method. As you open those accounts, it will ask you to provide the additional security verification type.
There are two options to boost your Office 365 account security. You can choose any one of them.
- Authentication Phone: If you choose this option, you need to provide your mobile number with the country code. Click Next, this will let your phone number get registered to Office 365 account. After this step, you will get a code, type the code and hit on the Verify button. At last, you get a code that you need to keep it with you.
- Mobile App: Here, you need to set the Microsoft Authenticator app on your mobile phone. You need to install and sign-in to the mobile app. Click on the Setup. Once you click on the Setup button, you get the barcode on the screen, which you need to scan from your mobile app. Click on Next. This will set up MFA for Office 365 users.
Method 2: How to set up Multi-Factor Authentication Office 365 with PowerShell?
There are the few requirements that need to fulfill as you assign Office 365 MFA using the Window PowerShell. Below are some pre-requisites.
(a) The latest version of .NET Framework
(b) Microsoft Online Service Sign-in Assistant for IT Professionals RTW
(c) Azure Active Directory Module for PowerShell (64-bit version)
Now, follow the below steps to set up MFA for Office 365 Exchange Online with PowerShell.
1) Get all the policies to run Office 365 to remote areas.
Get-ExecutionPolicy
If the outcome is showing unrestricted then type the below command:
Set-ExecutionPolicy Unrestricted –Scope CurrentUser
2) Now connect PowerShell to the Exchange Online using the given command and enter O365 login credentials.
$UserCredential = Get-Credential
3) Import Online Service and connect it to Office 365.
Import-Module MSOnline
Connect-MsolService –Credential $UserCredential
4) Now again execute the below command.
$auth = New-Object -TypeName Microsoft.Online.Administration.StrongAuthenticationRequirement

$auth.RelyingParty = "*"
5) Select the MFA status as Enabled.
$auth.State = "Enabled"
$auth.RememberDevicesNotIssuedBefore = (Get-Date)
6) Finally set up MFA.
For a single user:
Set-MsolUser -UserPrincipalName <UserPrincipalName> - StrongAuthenticationRequirements $auth
For multiple users:
Get-MsolUser –All | Foreach{ Set-MsolUser -UserPrincipalName $_.UserPrincipalName -StrongAuthenticationRequirements $auth}
7) Login to the user account, which you have assigned the MFA and provide the information for the 2-step verification process.
How to Disable Multi-Factor Authentication for Office 365?
Method 1: How to Remove Multi-Factor Authentication Office 365?
- Sign-In to Exchange Online and enter the Admin Portal.
- Go to User and then to Active Users page.
- Go to More–> Multifactor Authentication Setup.
- Select the Exchange Online account. A new window appears on the right.
- Select Disable to remove the MFA for a particular user.
Method 2: How to Turn-Off MFA using Windows PowerShell?
Execute the below commands on the PowerShell to remove MFA.
Get-MsolUser -UserPrincipalName < UserPrincipalName > | Set-MsolUser -StrongAuthenticationRequirements @()
Or, Set-MsolUser -UserPrincipalName [email protected] -StrongAuthenticationRequirements @()
Conclusion:
Enable or Disable Multi-Factor Authentication in Office365 with the help of Exchange Admin Portal. Add or Remove MFA for Office 365 using the Windows PowerShell.