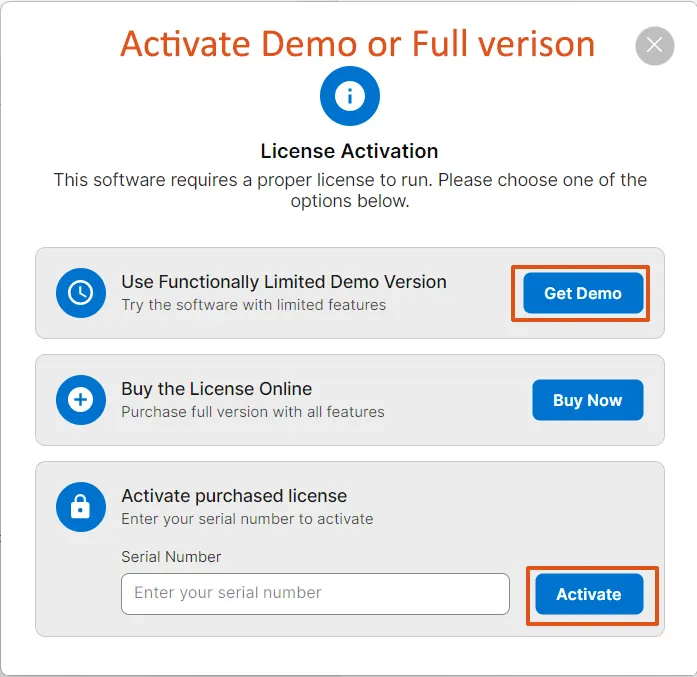
Step 1:Click Free Download, Install & Launch the application in Windows OS. Click on Get Demo button to register free MBOX viewer.
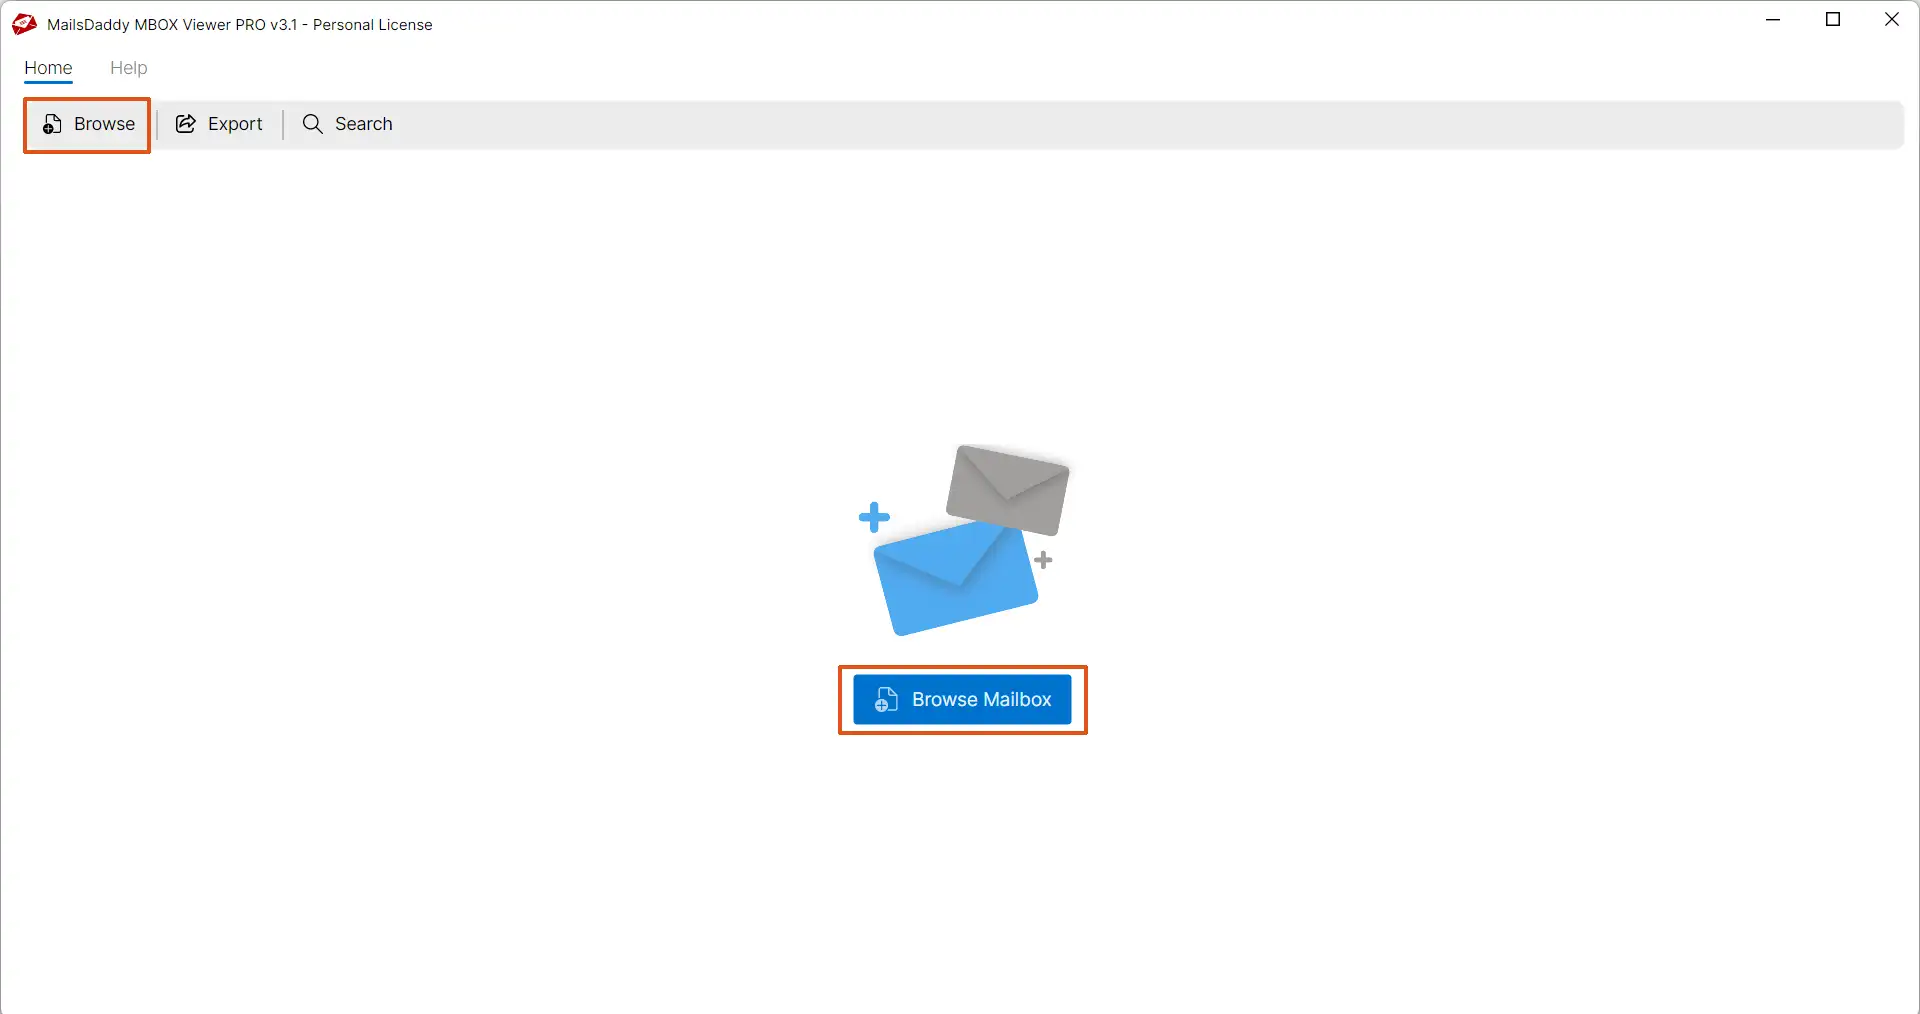
Step 2: Now click on the Add mailbox button to Add MBOX files manually.
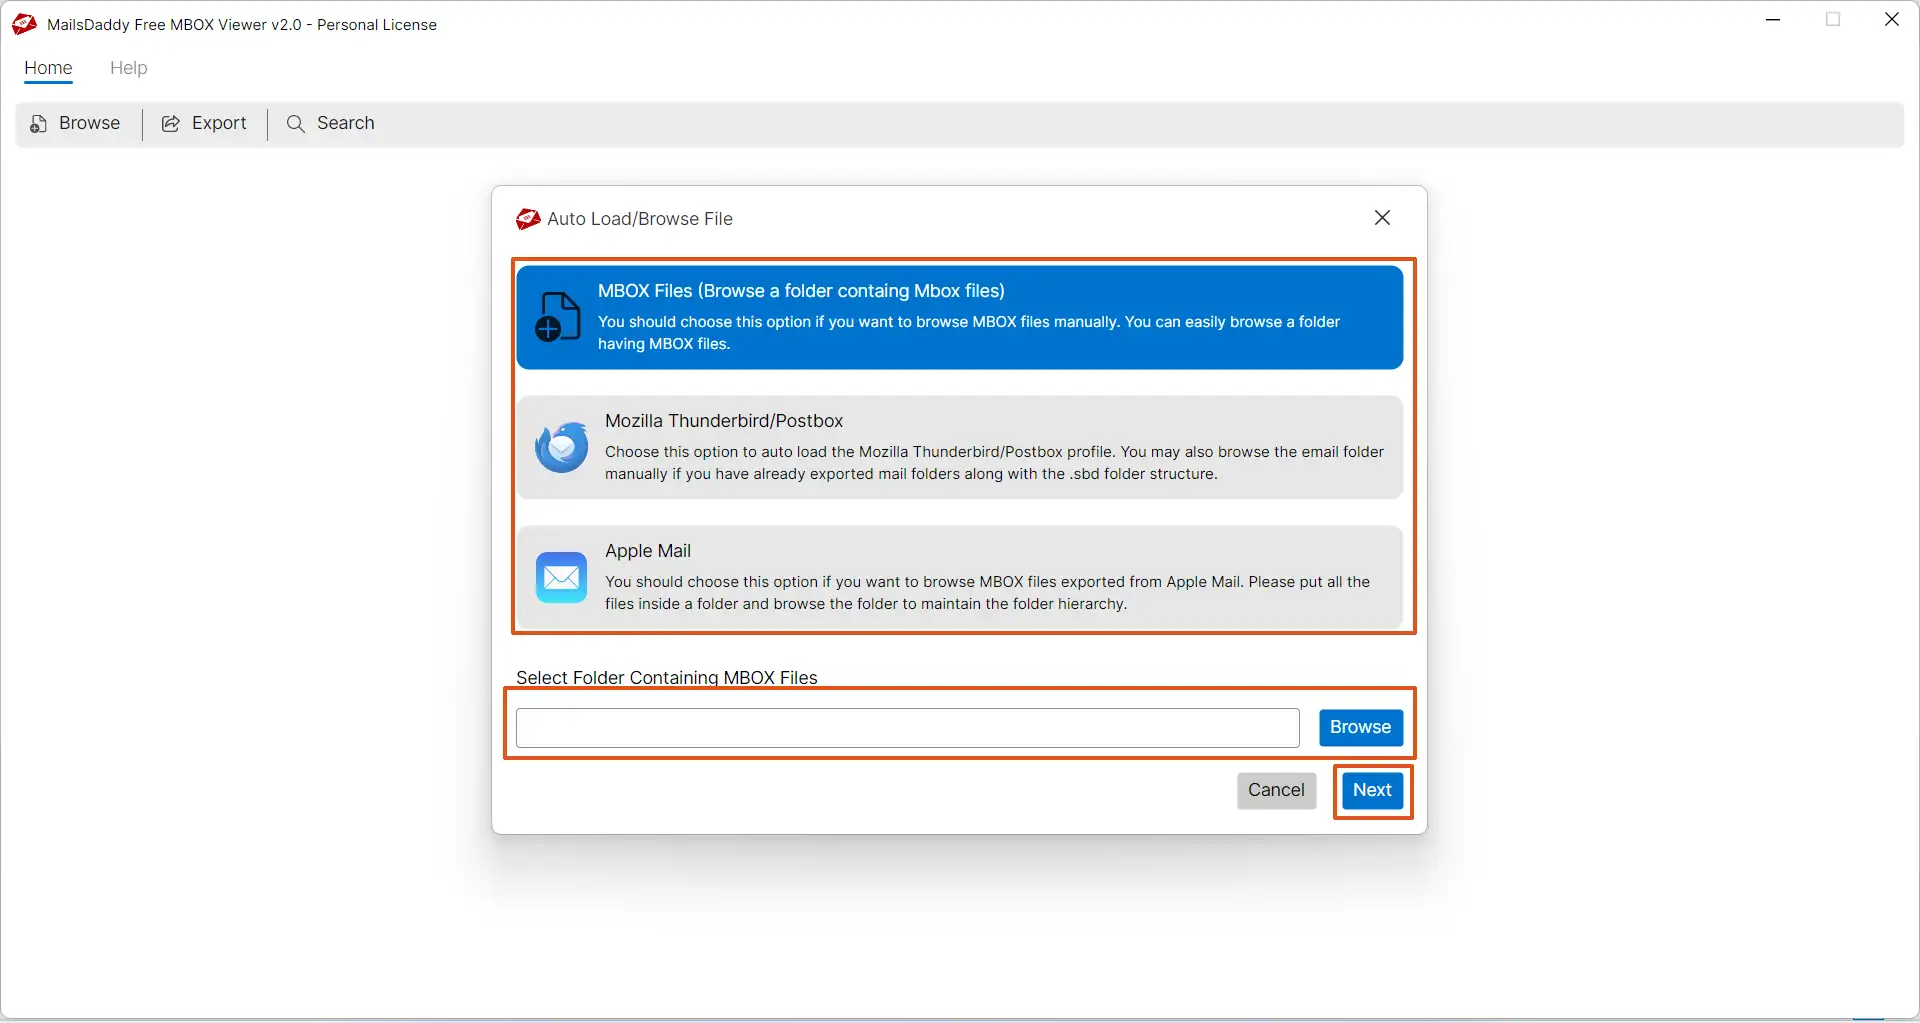
Step 3: You will get three options to add MBOX files: Search folder, Thunderbird (.mbox) & Apple Mail (.mbox). Choose MBOX search folder, if you don't want to add mailbox from Thunderbird and Apple Mail.
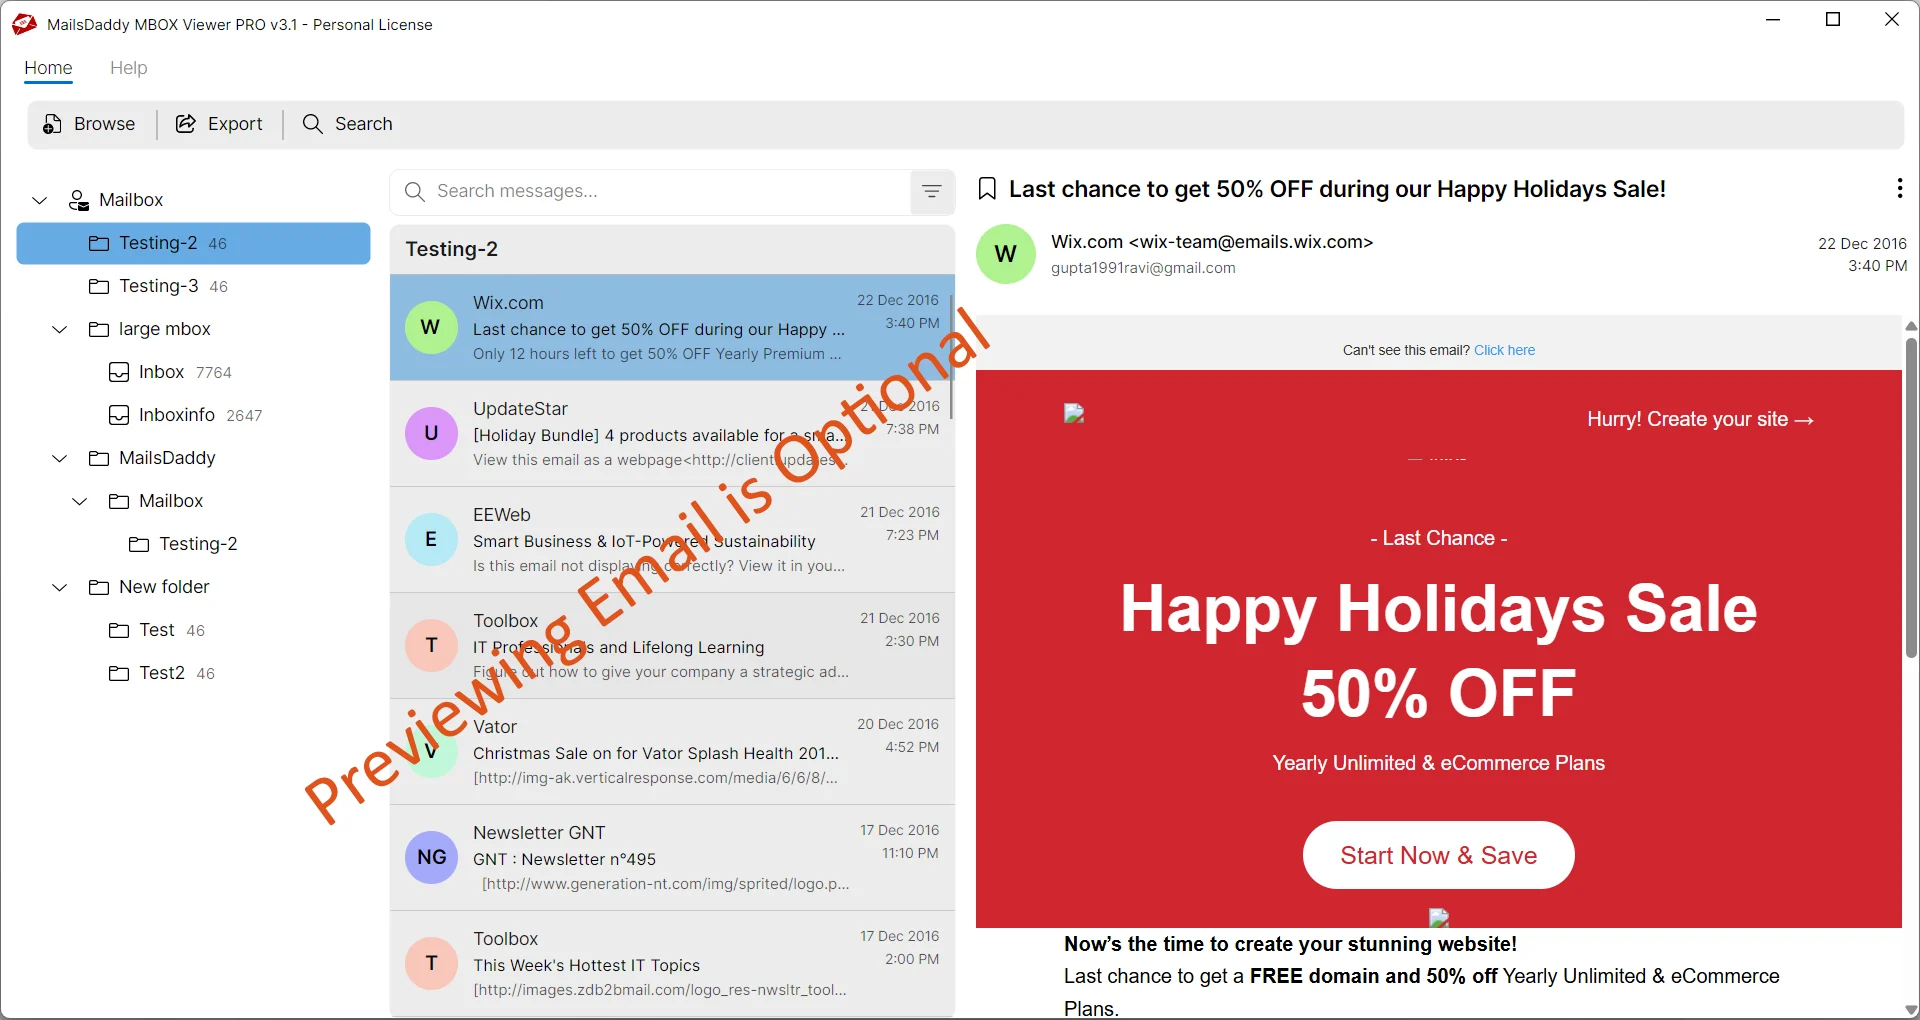
Step 4: The software will load all selected MBOX files and show them on left pane. You just need to click on required MBOX email to view its messages.
Step 5: If you have pro version of MBOX viewer then you can also export the mailbox. Simply click on Export button. Choose desire format (.pst/.eml/.msg etc.) and save the location to export.
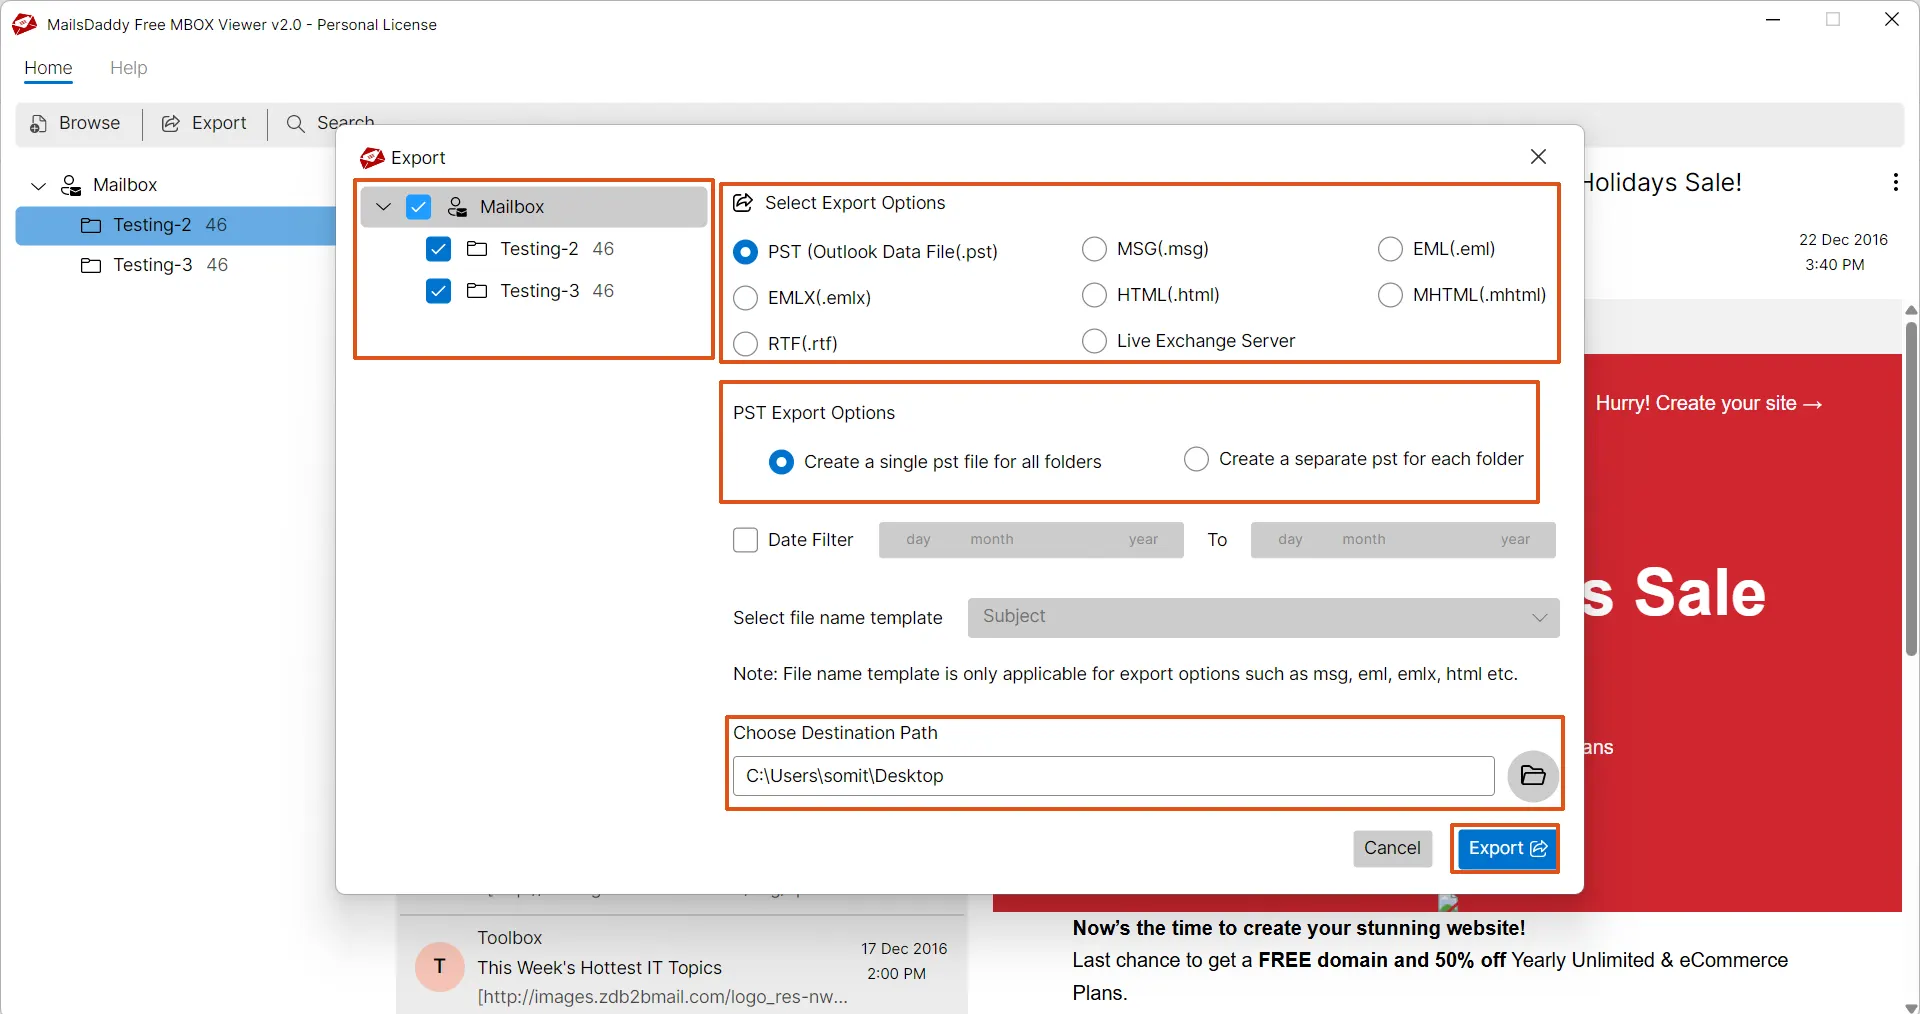
Step 6: Click on the Export button to start conversion form MBOX file to selected format.
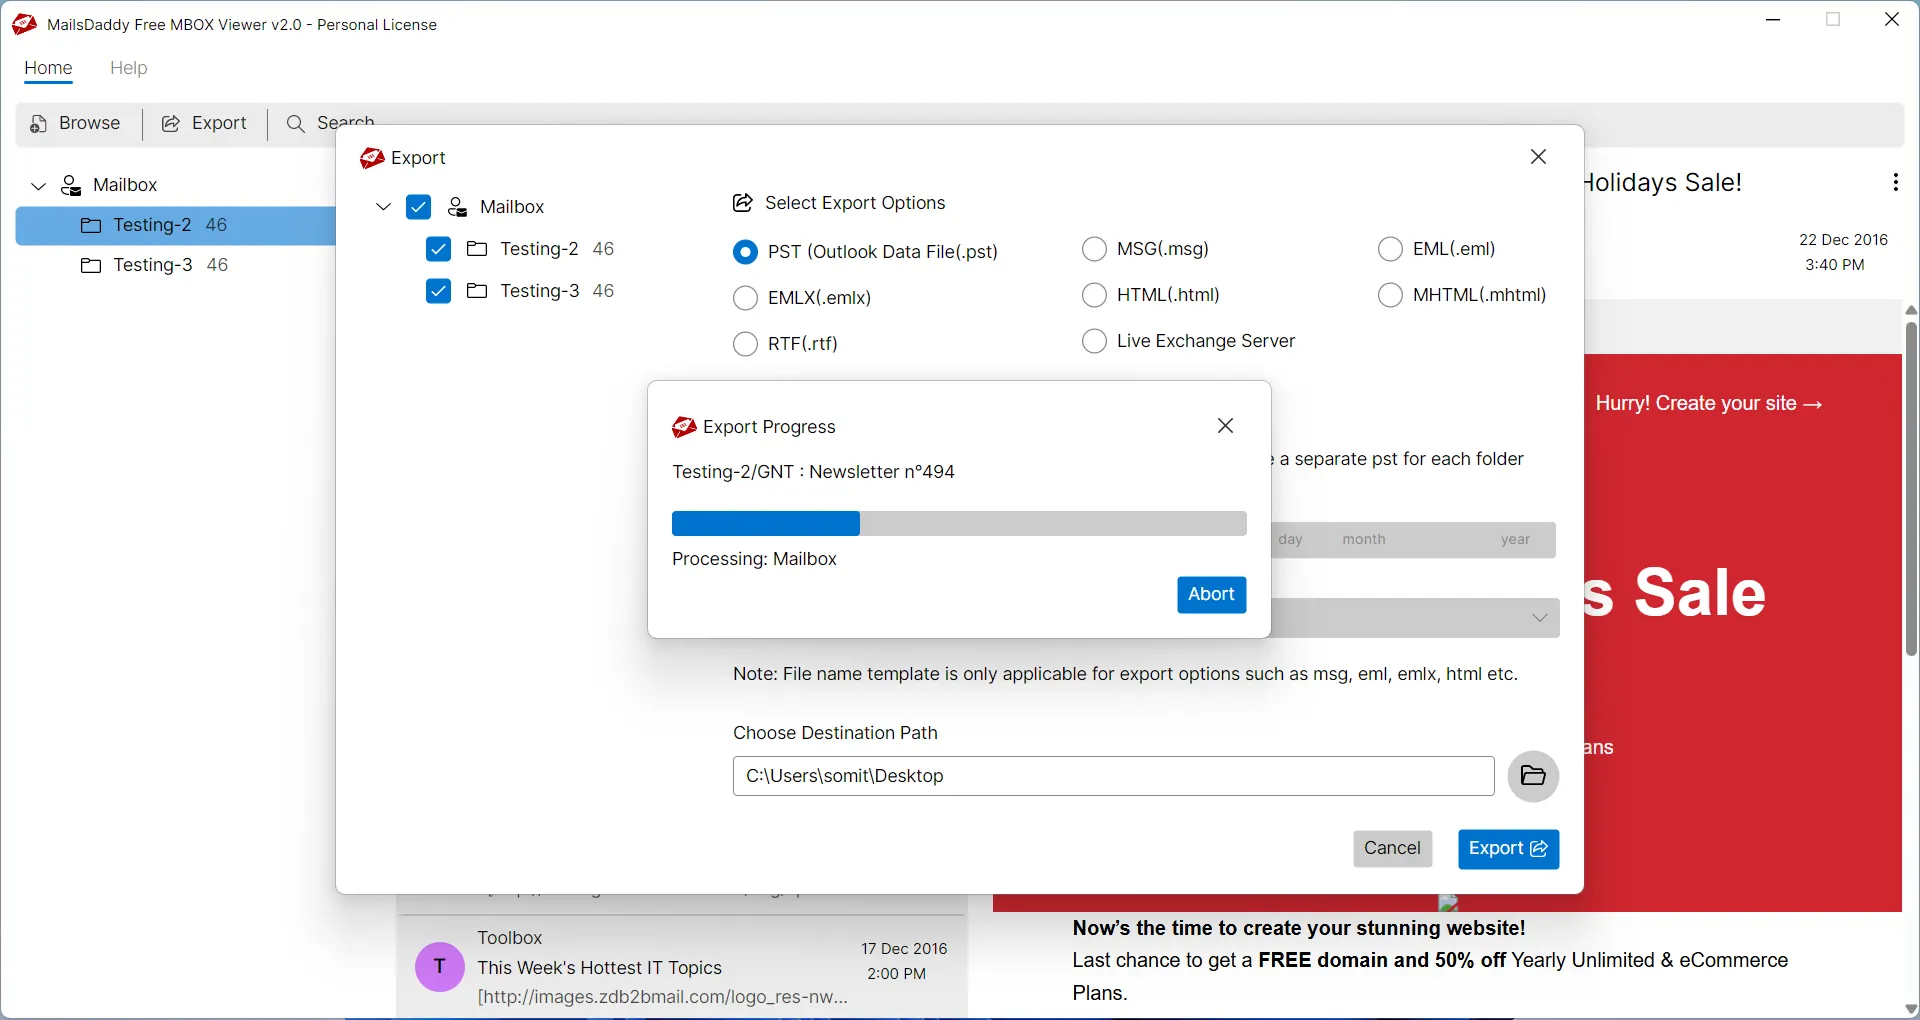
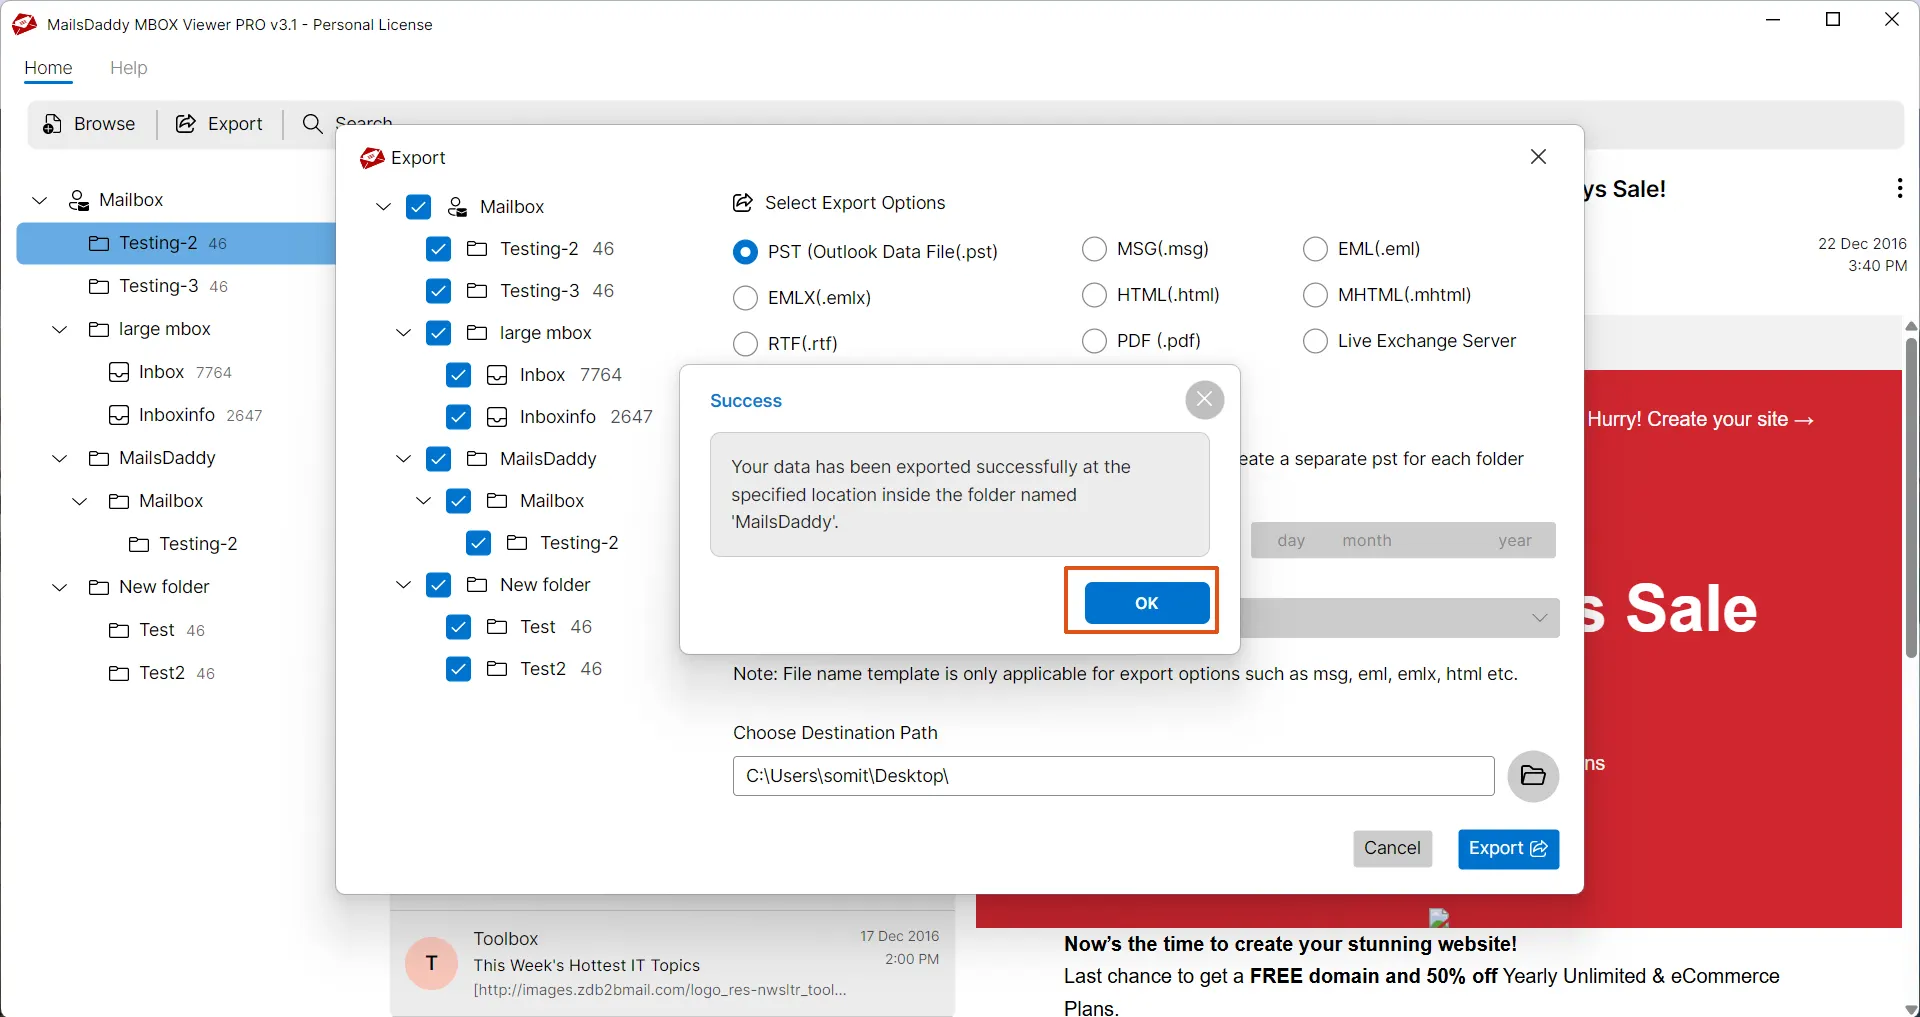
Step 7: Once the migration is done. Click on OK button and visit the location to use converted mailbox with respective email client.
Step 8: From preview window, click on Search button to find and export mails using various search parameters like To, From, Subject etc.
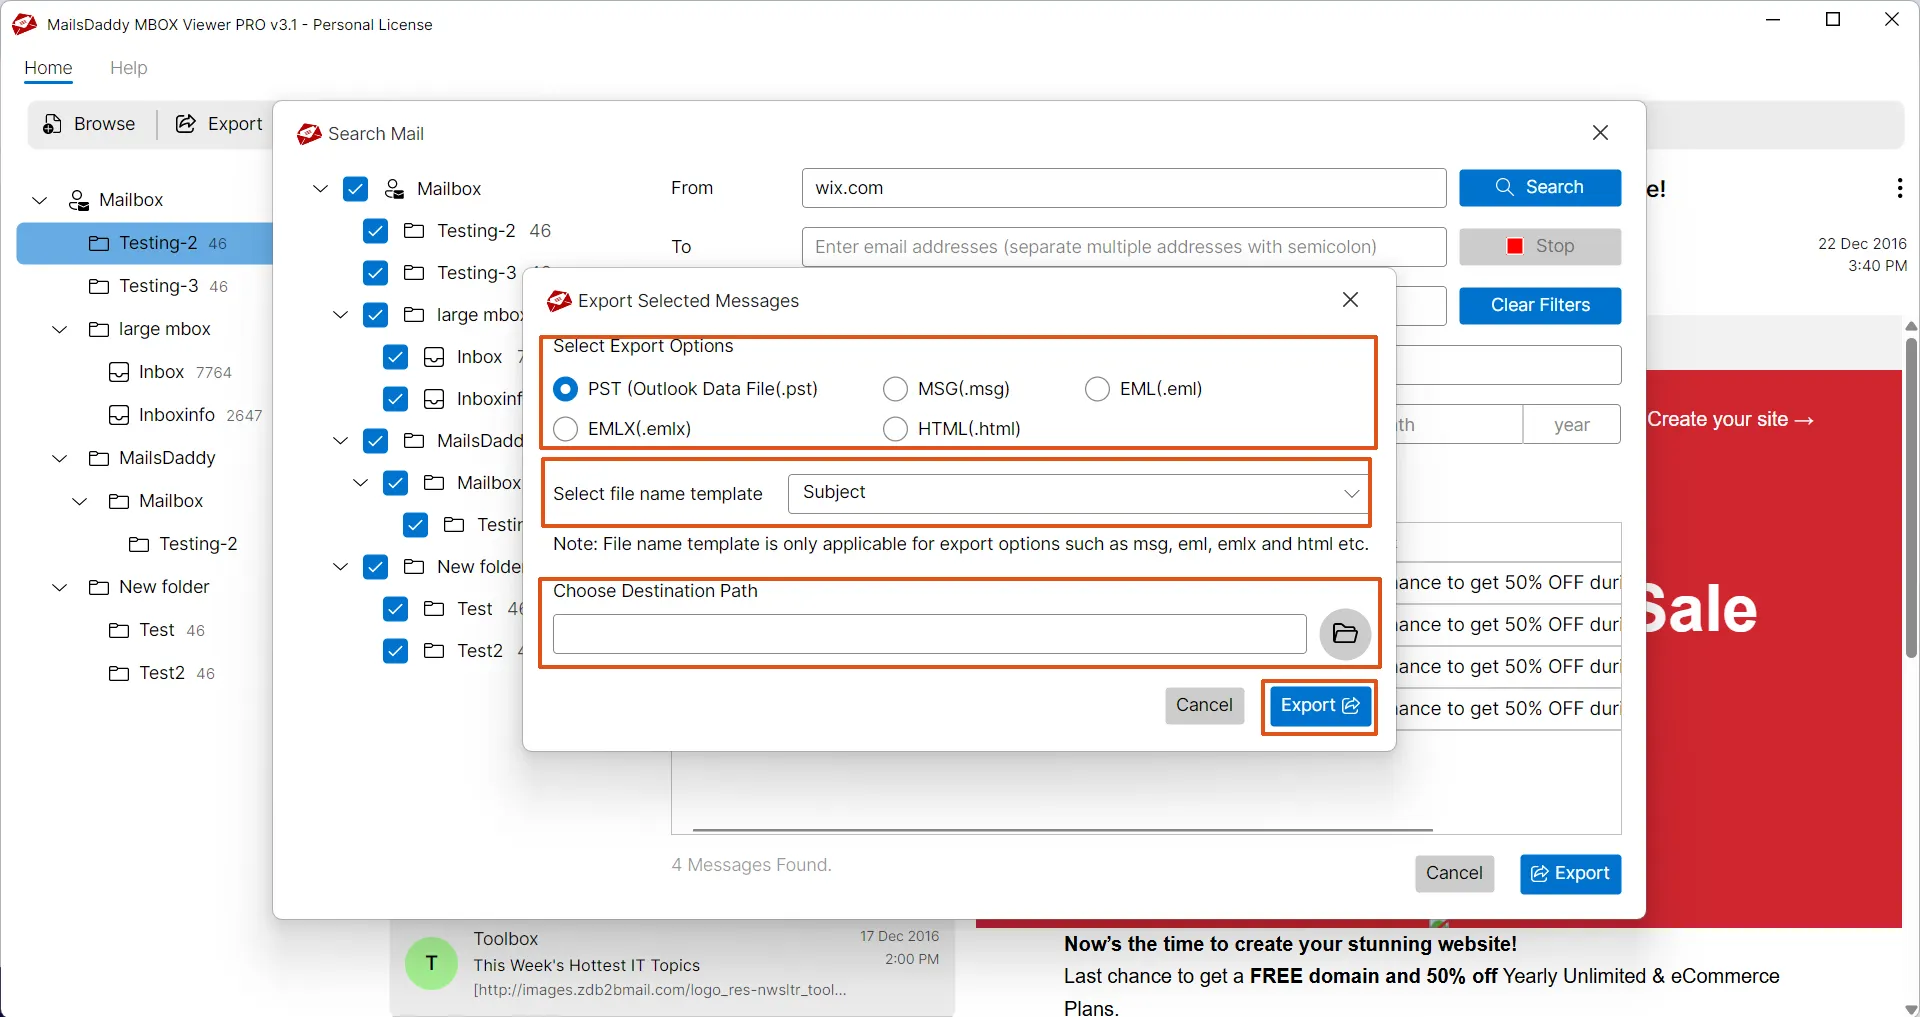
Step 9: Select filter emails and click on Export button.
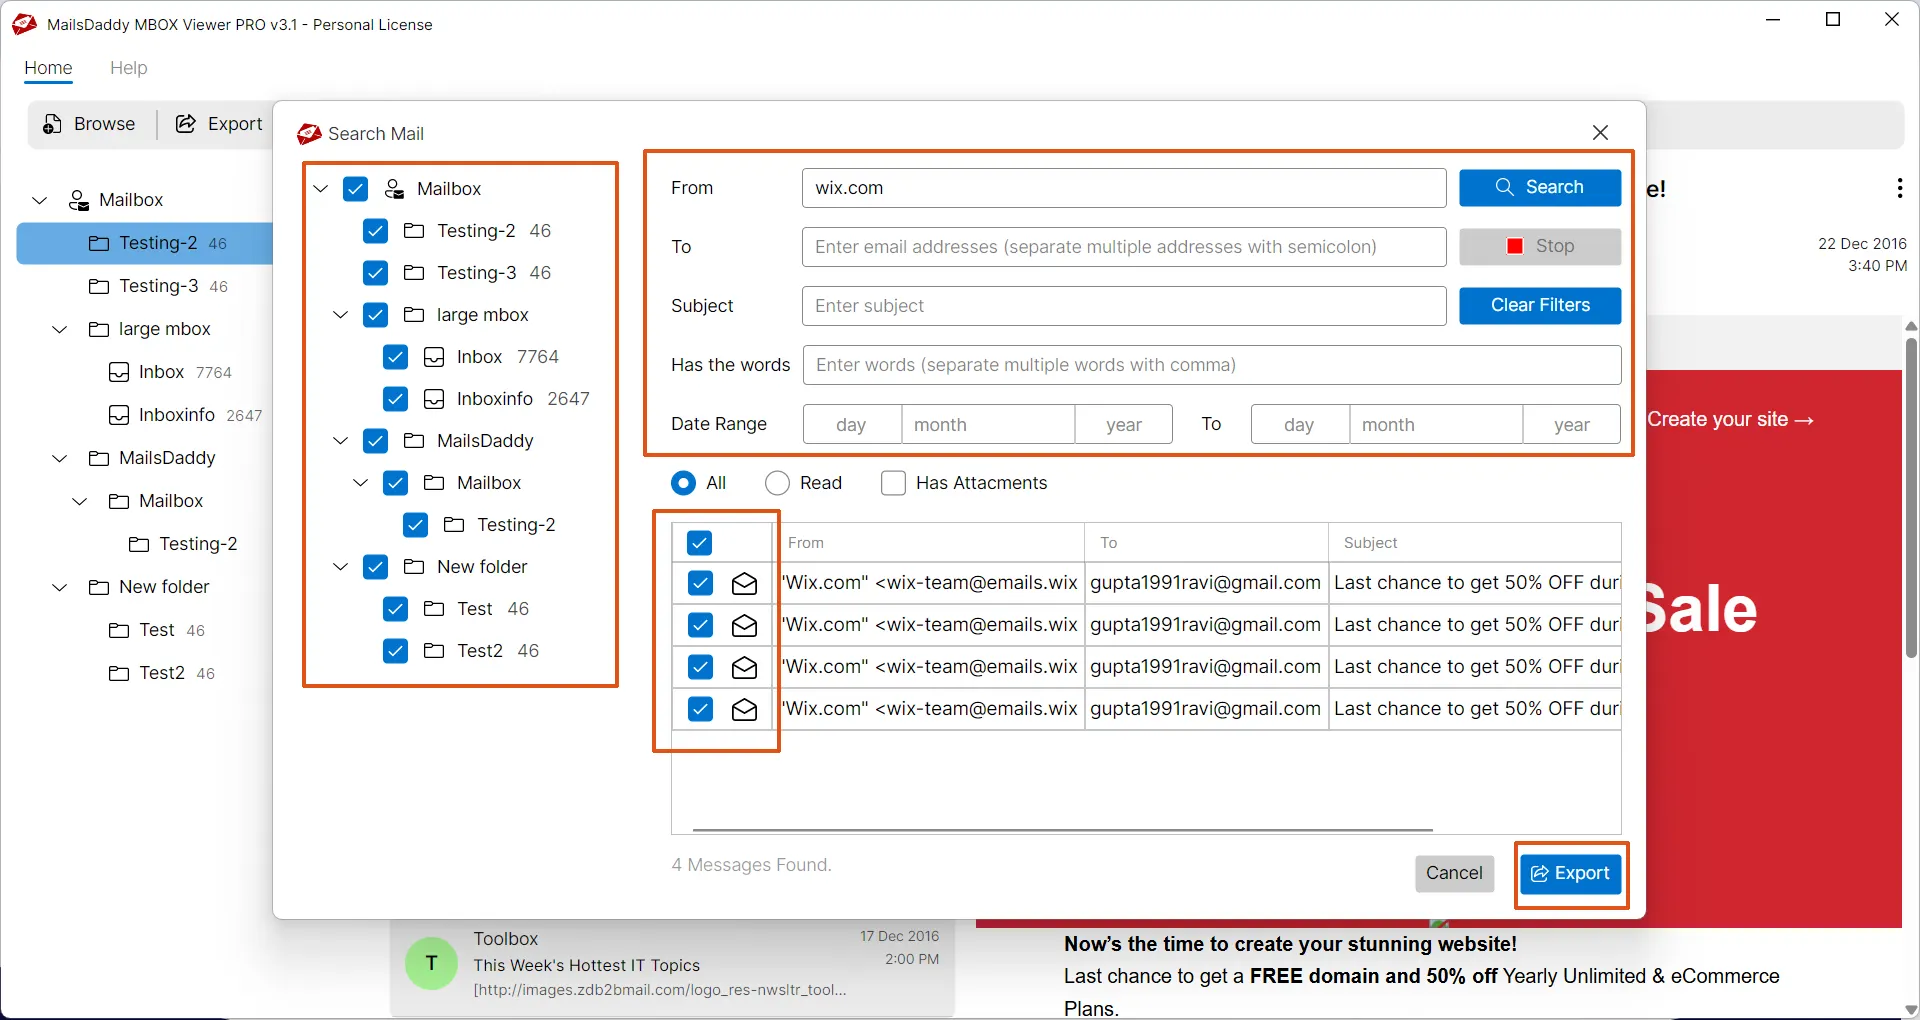
Step 10: Choose desire conversion format then hit on Export button again to start conversion.
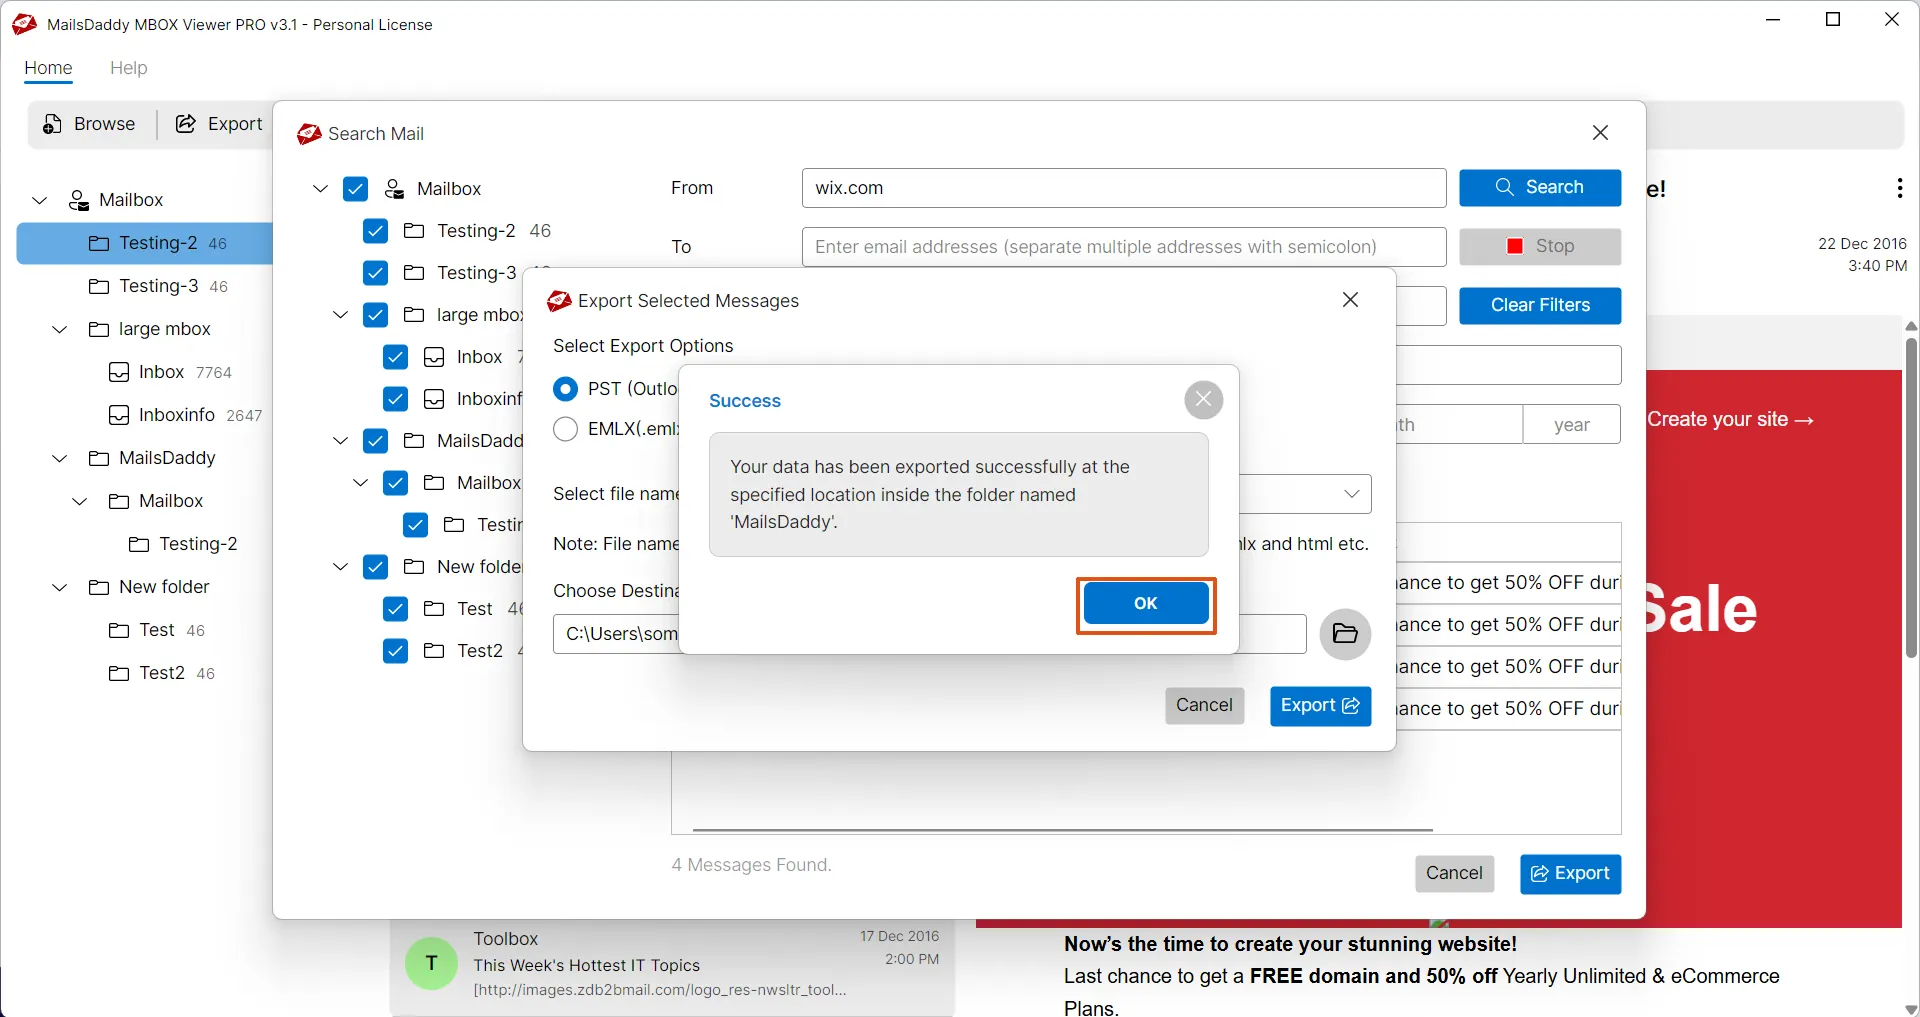
Step 10: Within a few minute, you will see success message, click on Ok button and go to the destination to import mailbox into respective email client.
Note: Free MSg viewer does not allows exporting or saving messages. To enable these features, purchase pro edition of the software