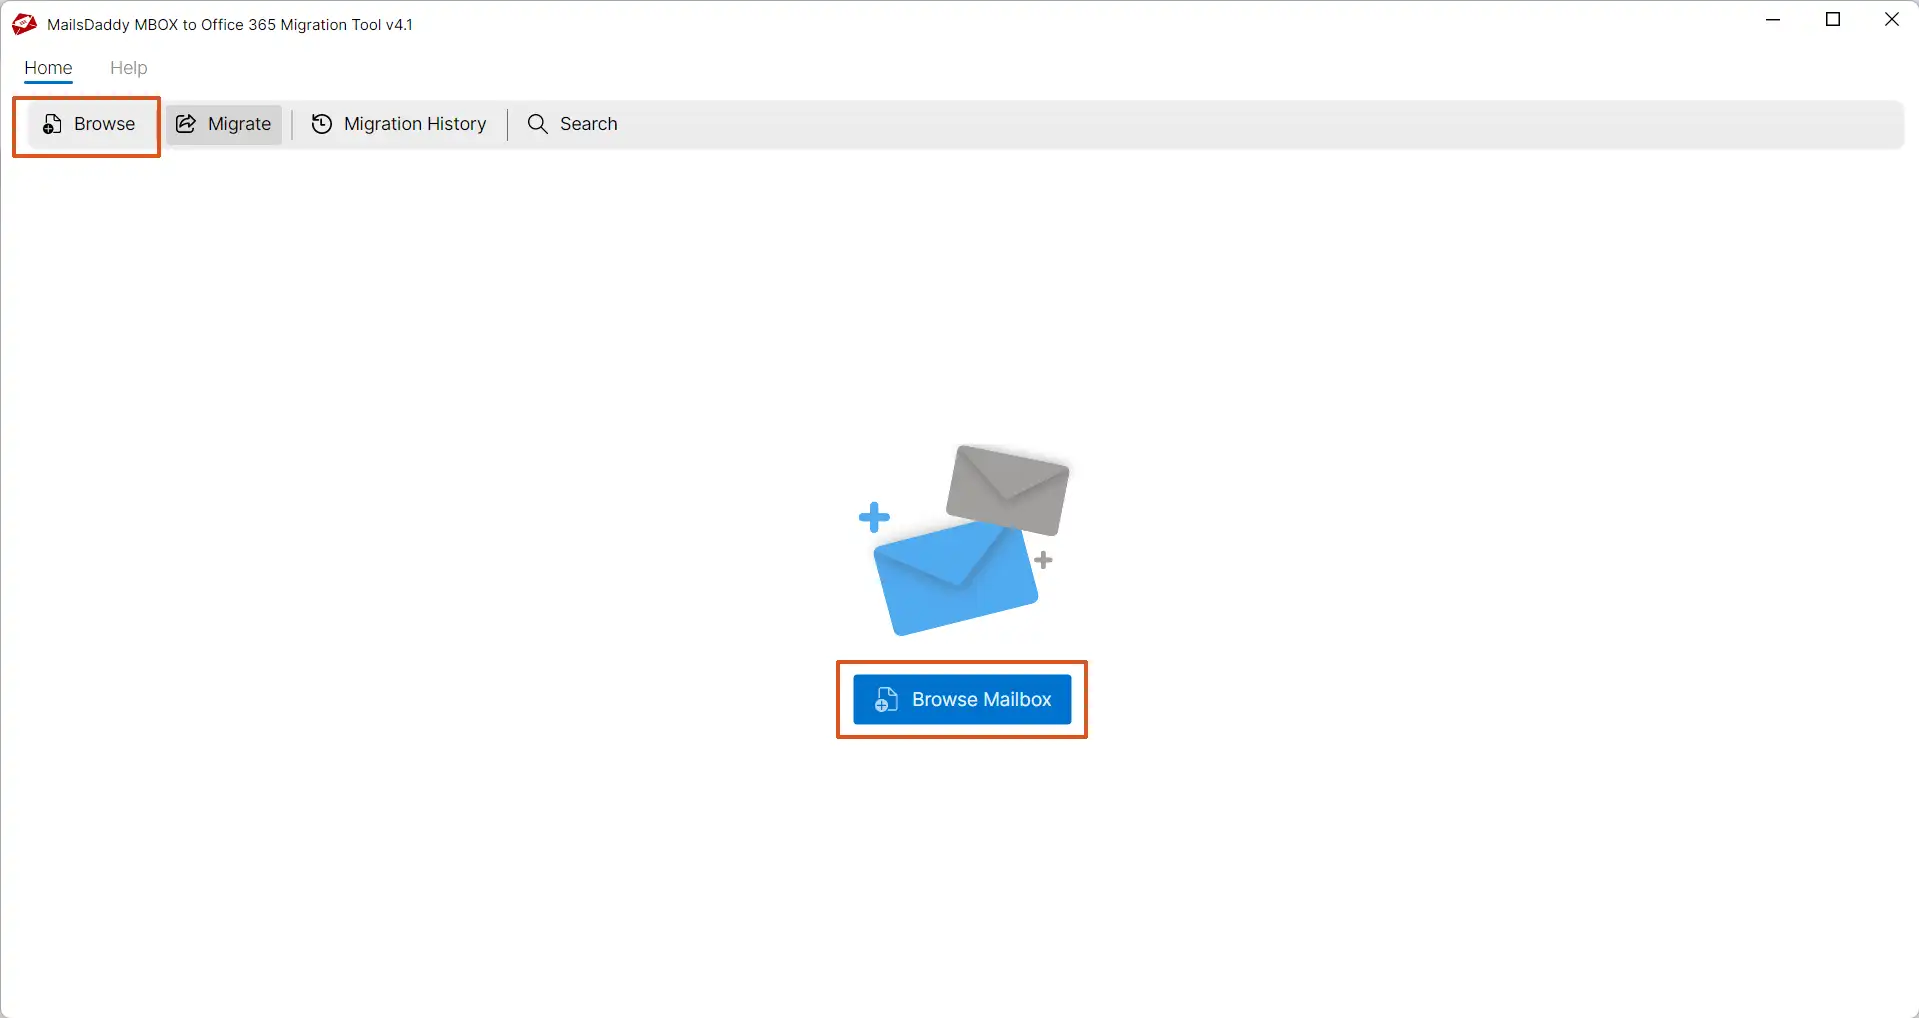
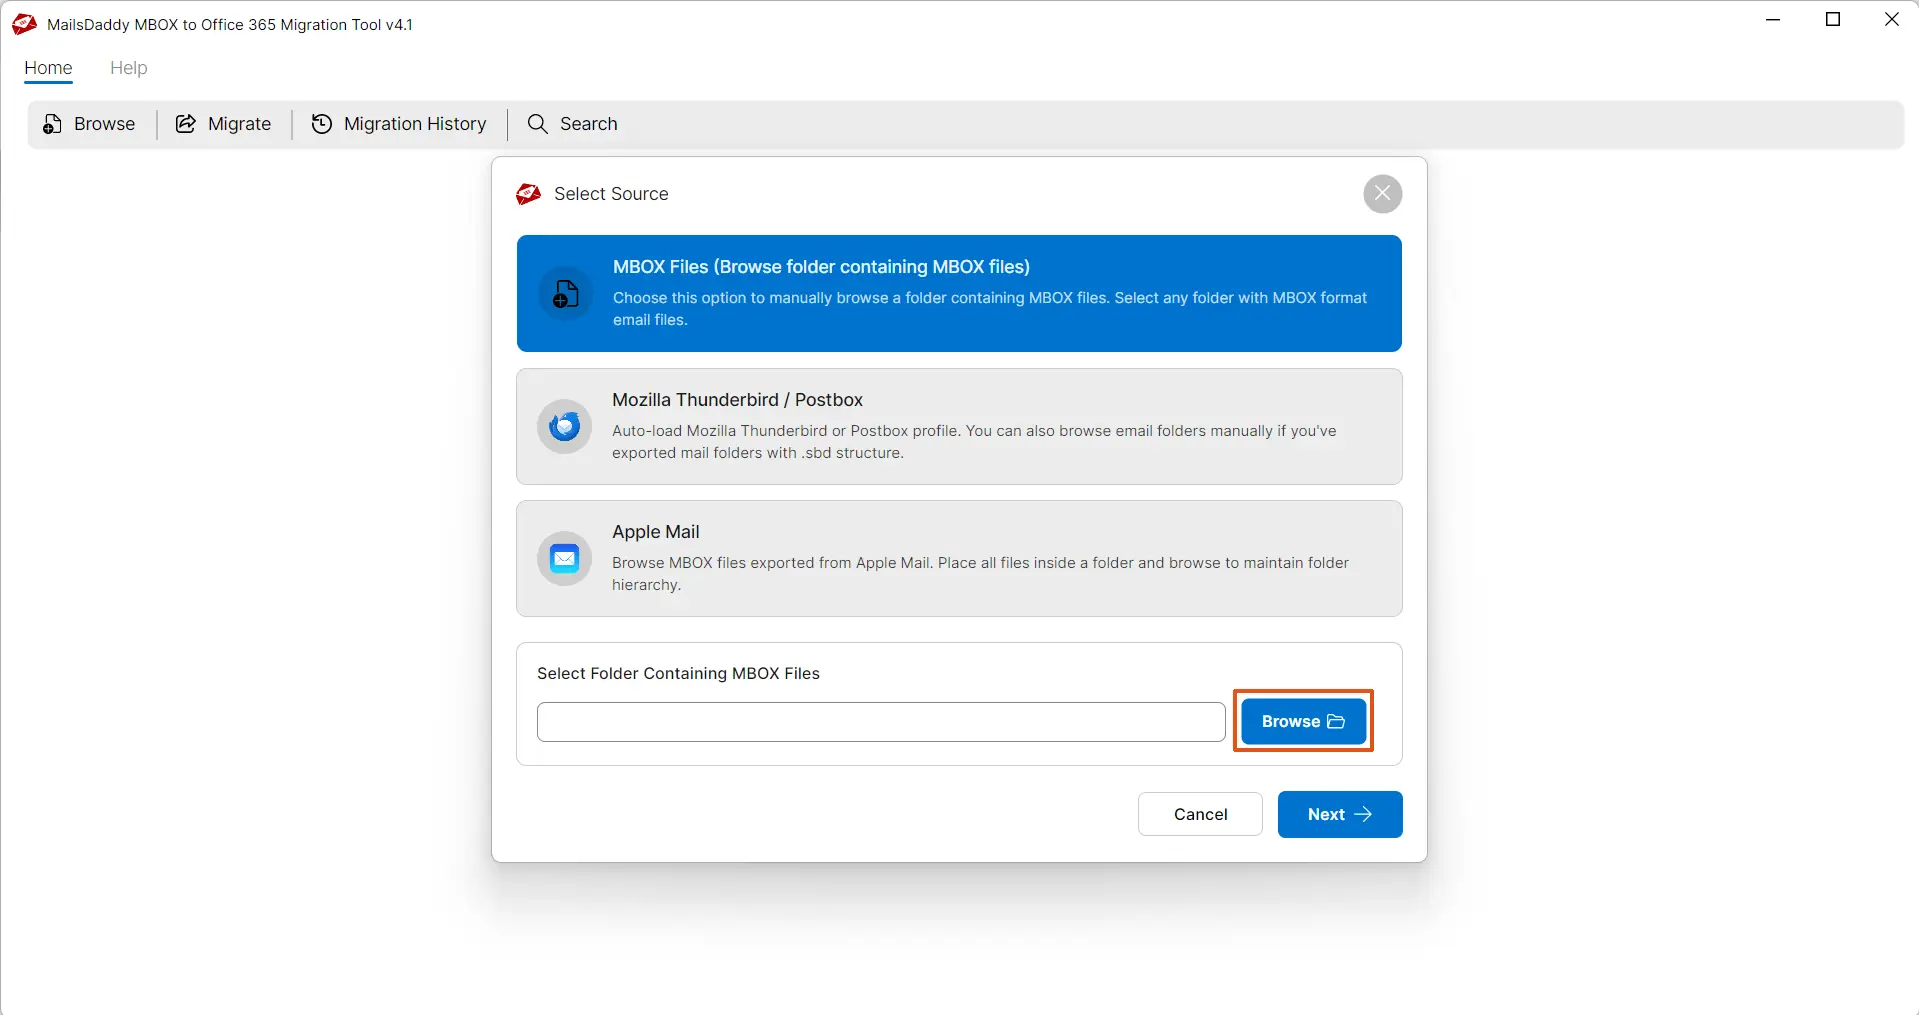
Step 1: Download, install, and launch the application. Click on the Browse mailbox button. A new window will pop up. Now browse to the folder that contains MBOX files. It is recommended to choose Mozilla Thunderbird and Apple Mail for the best output from these two email clients.
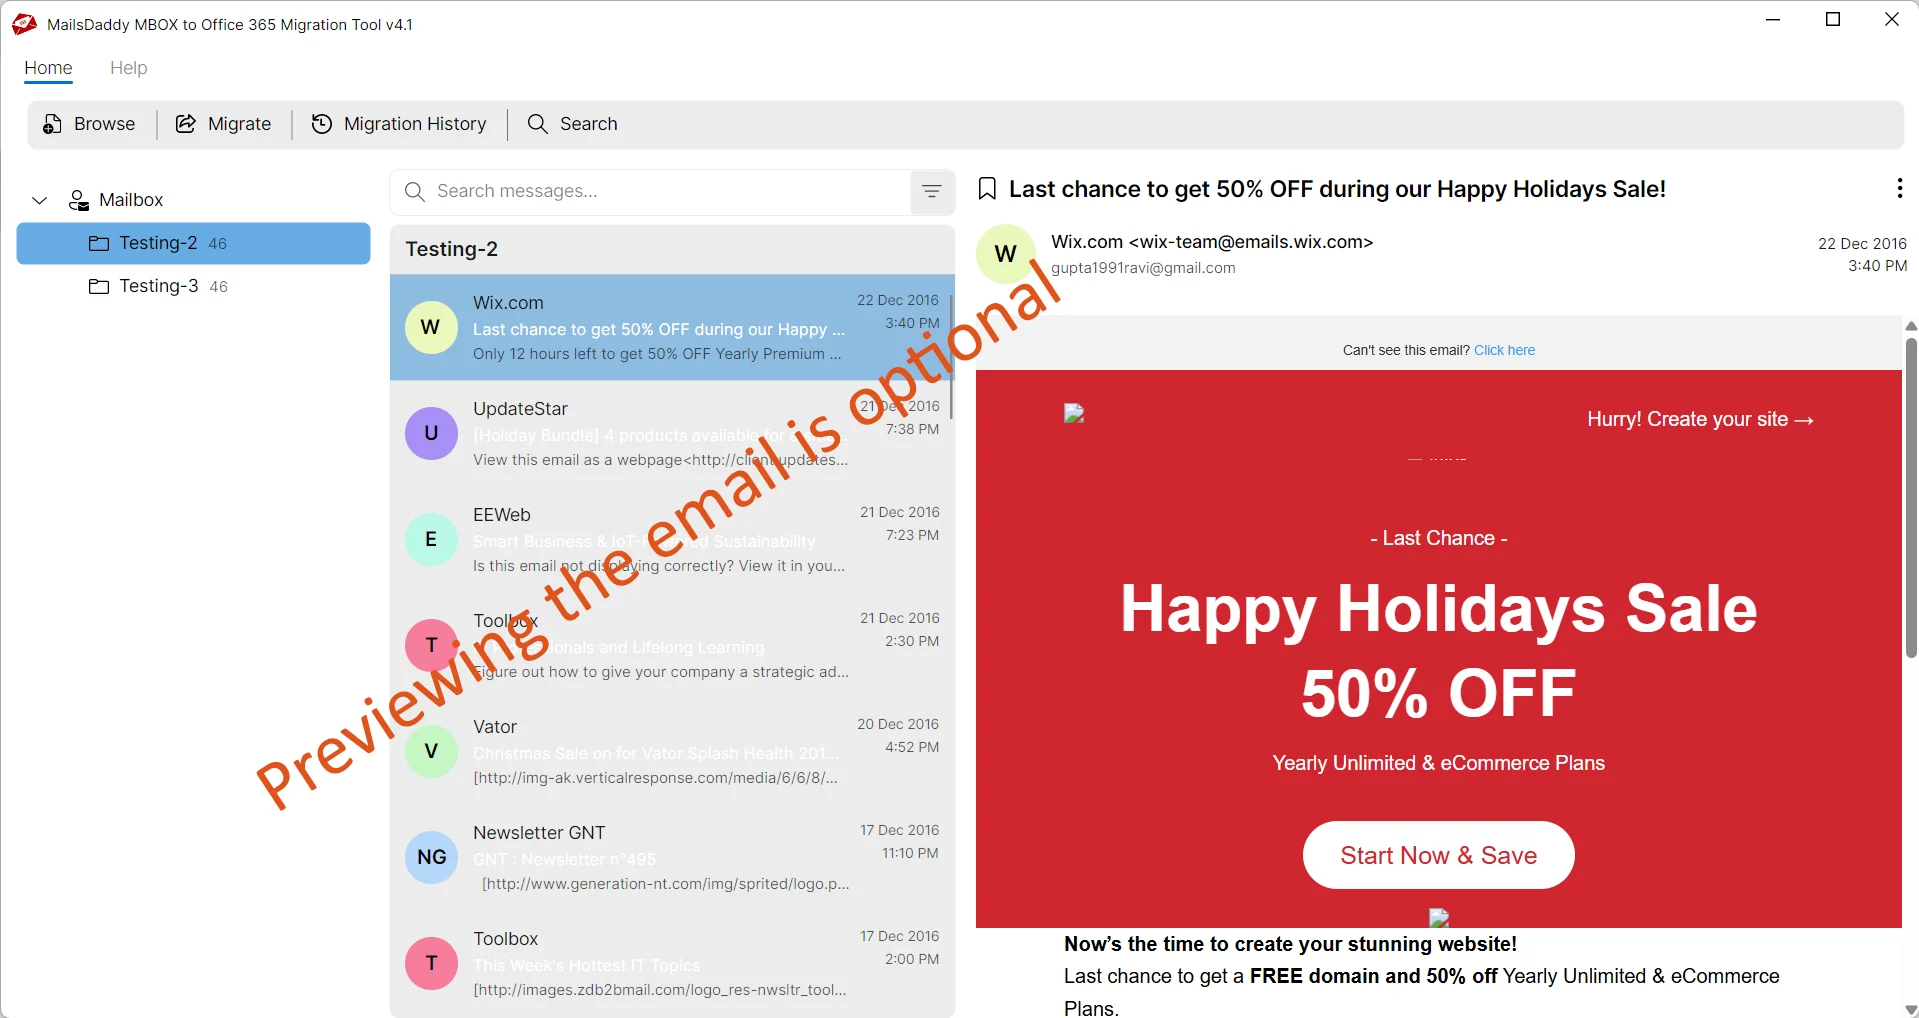
Step 2: After loading the mailbox, the software generates a preview of the selected email on the right side of the pane. Users can skip the preview and move ahead to export the mailbox into Office 365.
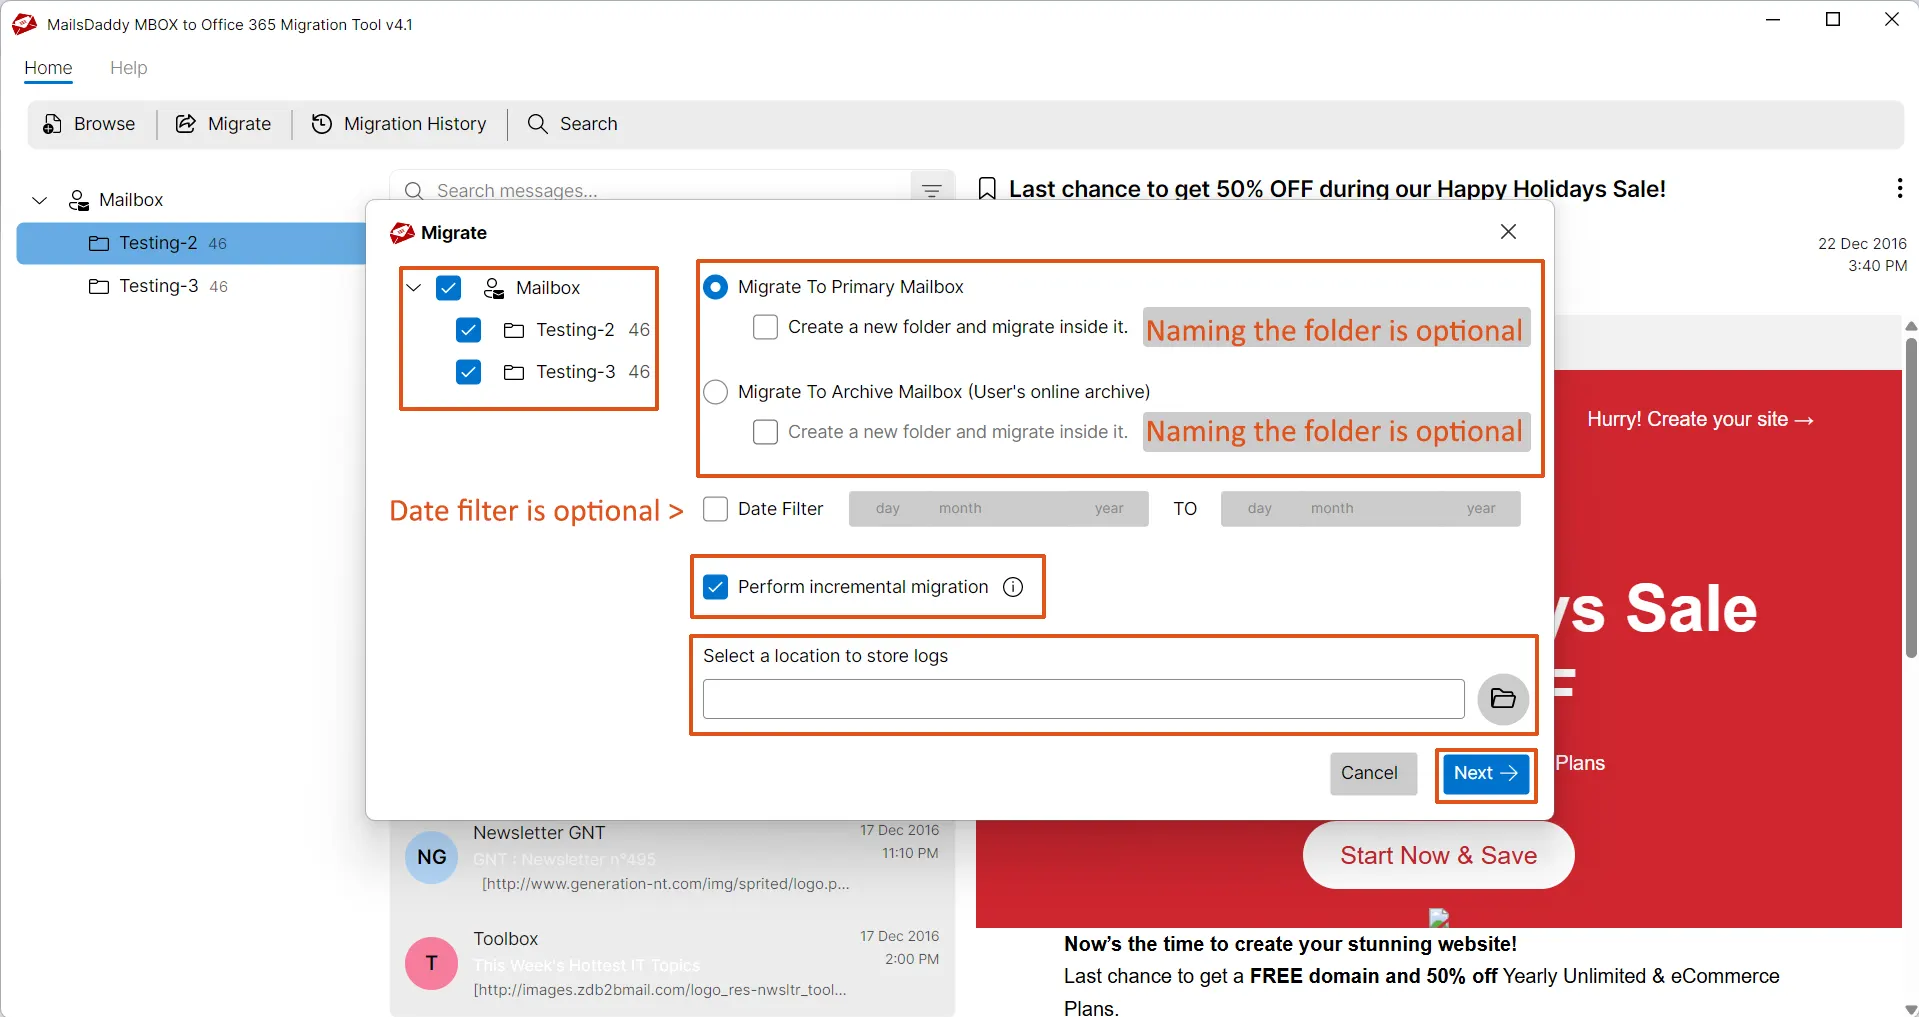
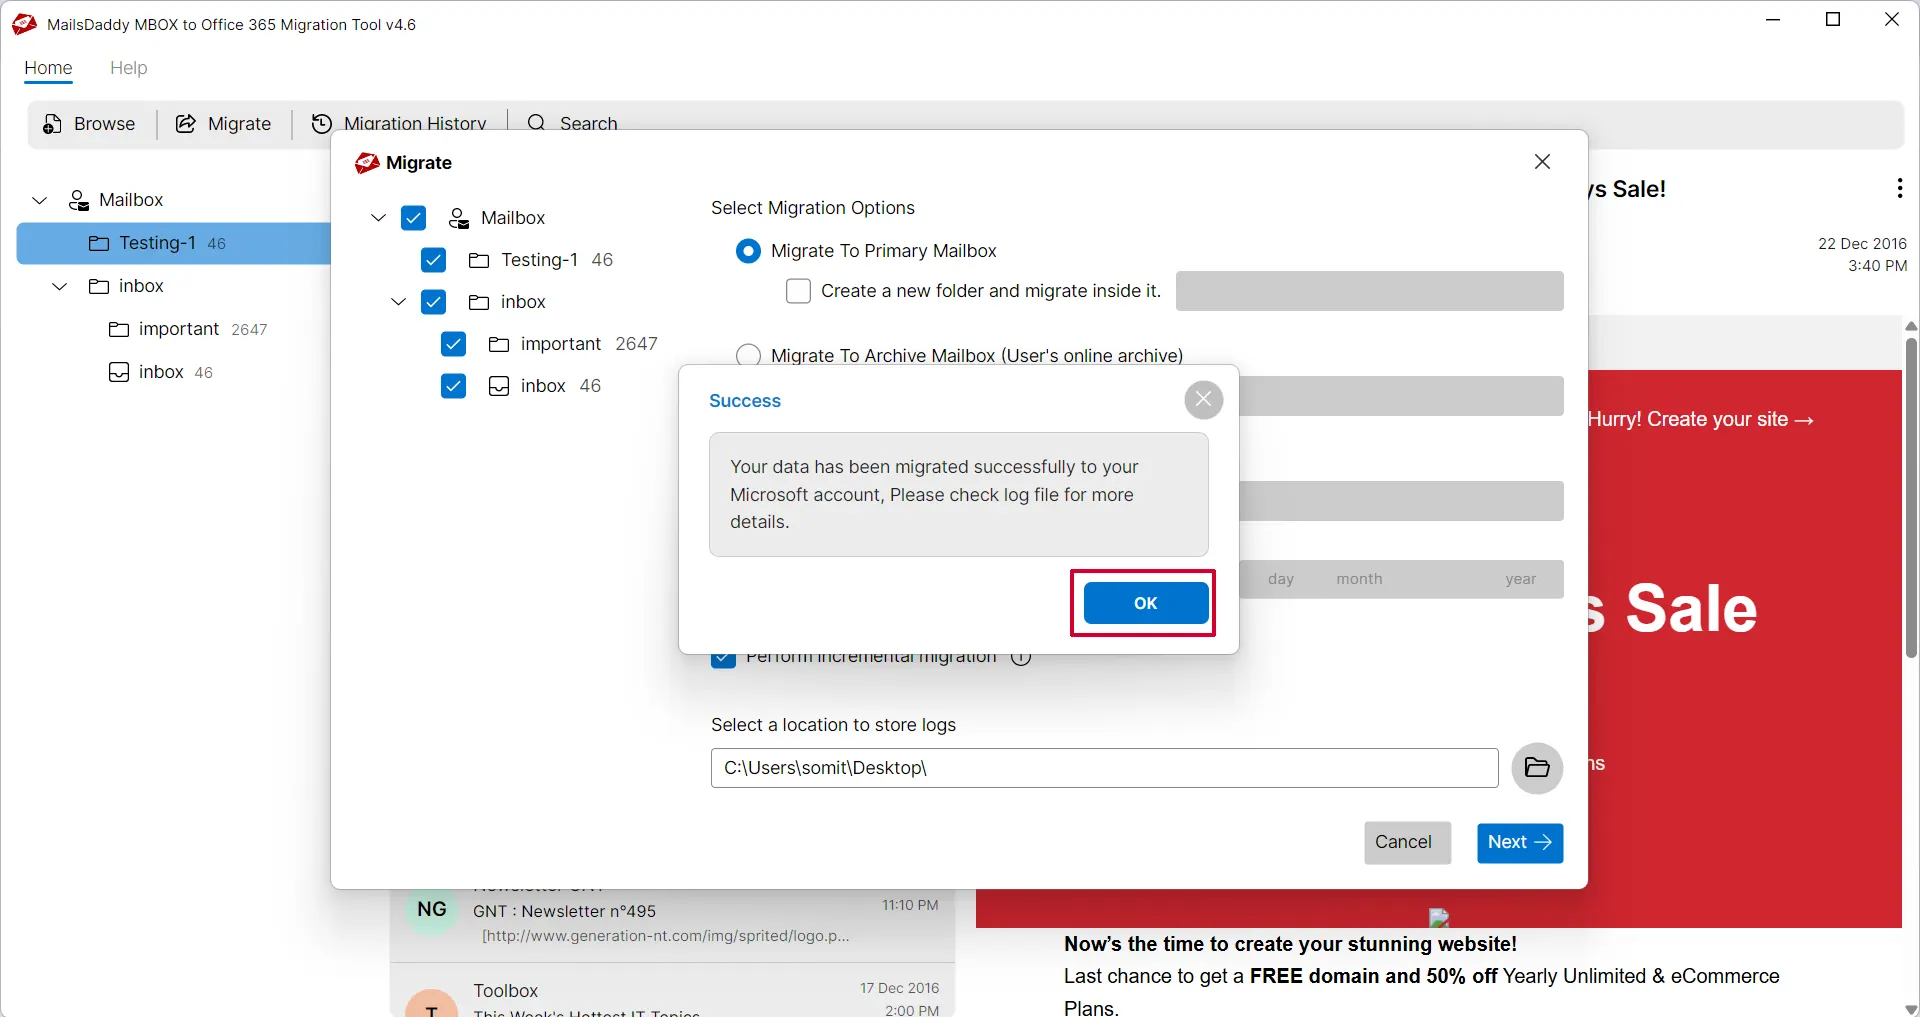
Step 3: Choose mailbox types: Primary, In-Place Archive, Shared, or Group. Users can migrate data to the root folder or assign a new folder for the migration. Folder naming is optional.
You can also enable or disable incremental migration and specify the log file location before authenticating the Office 365 account.
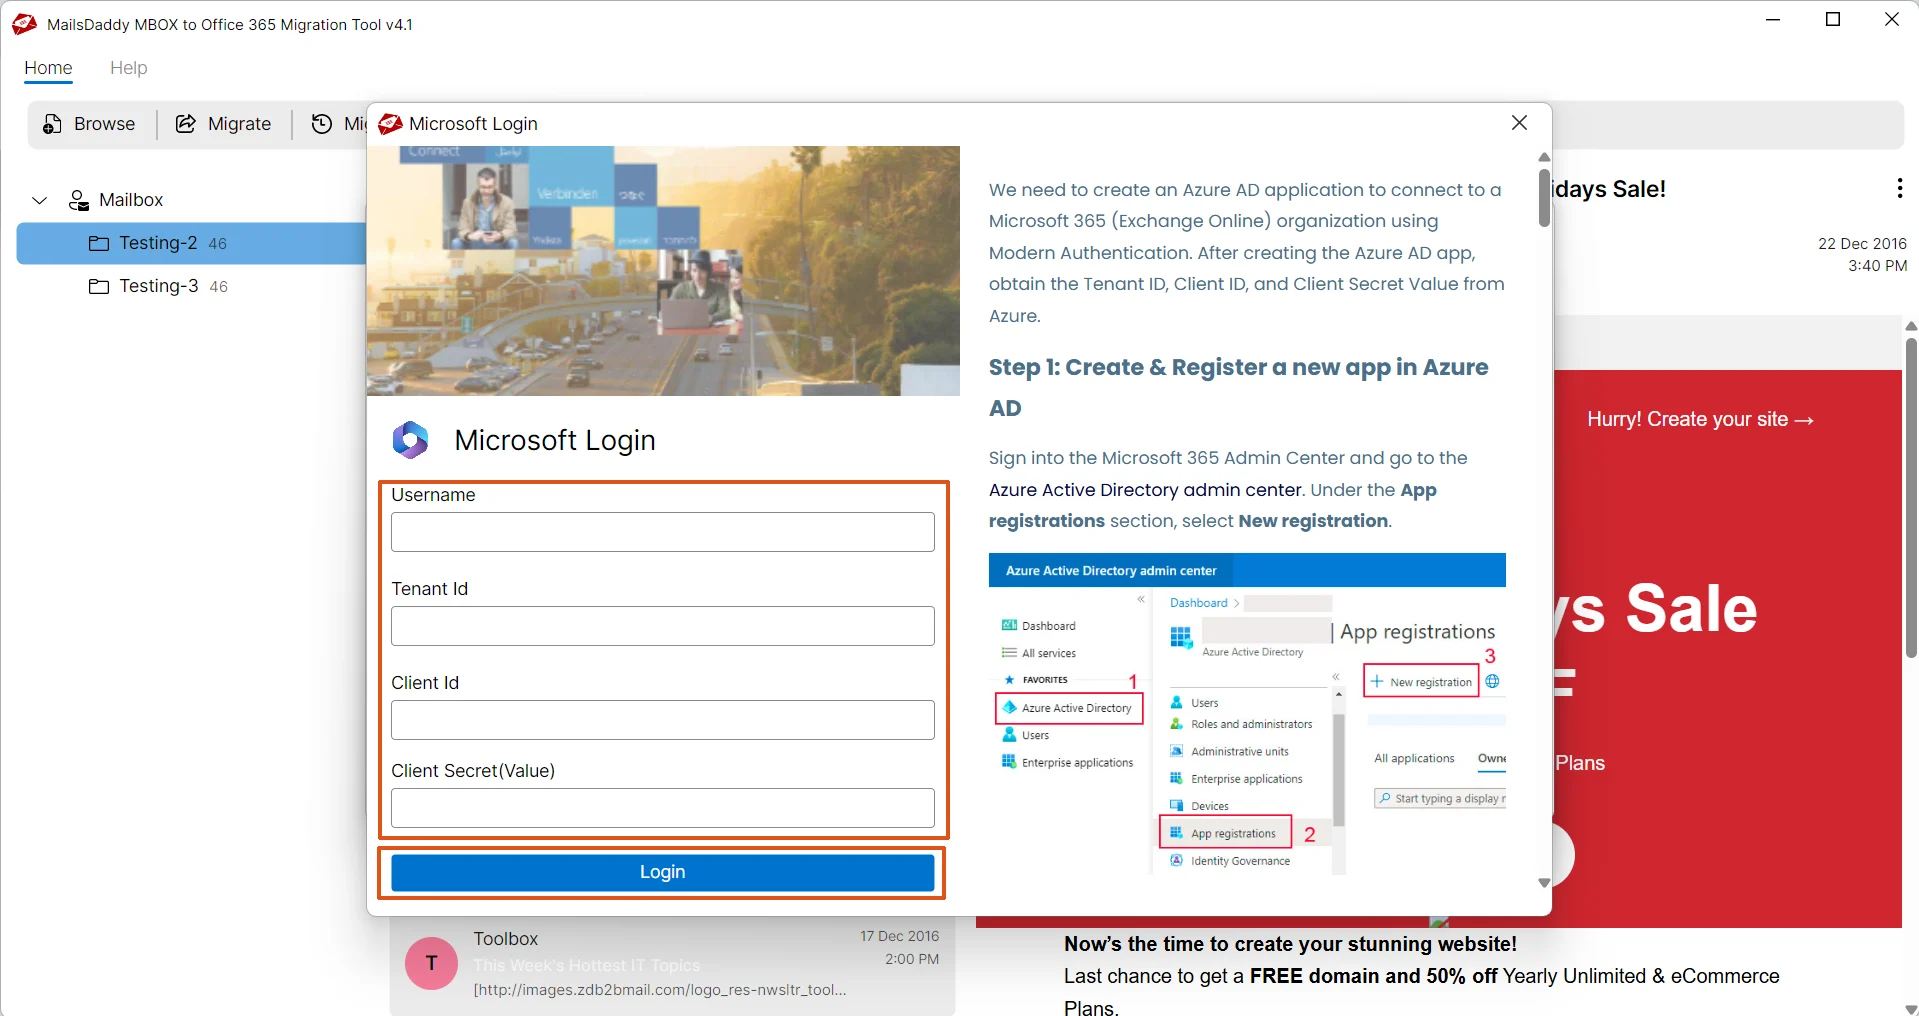
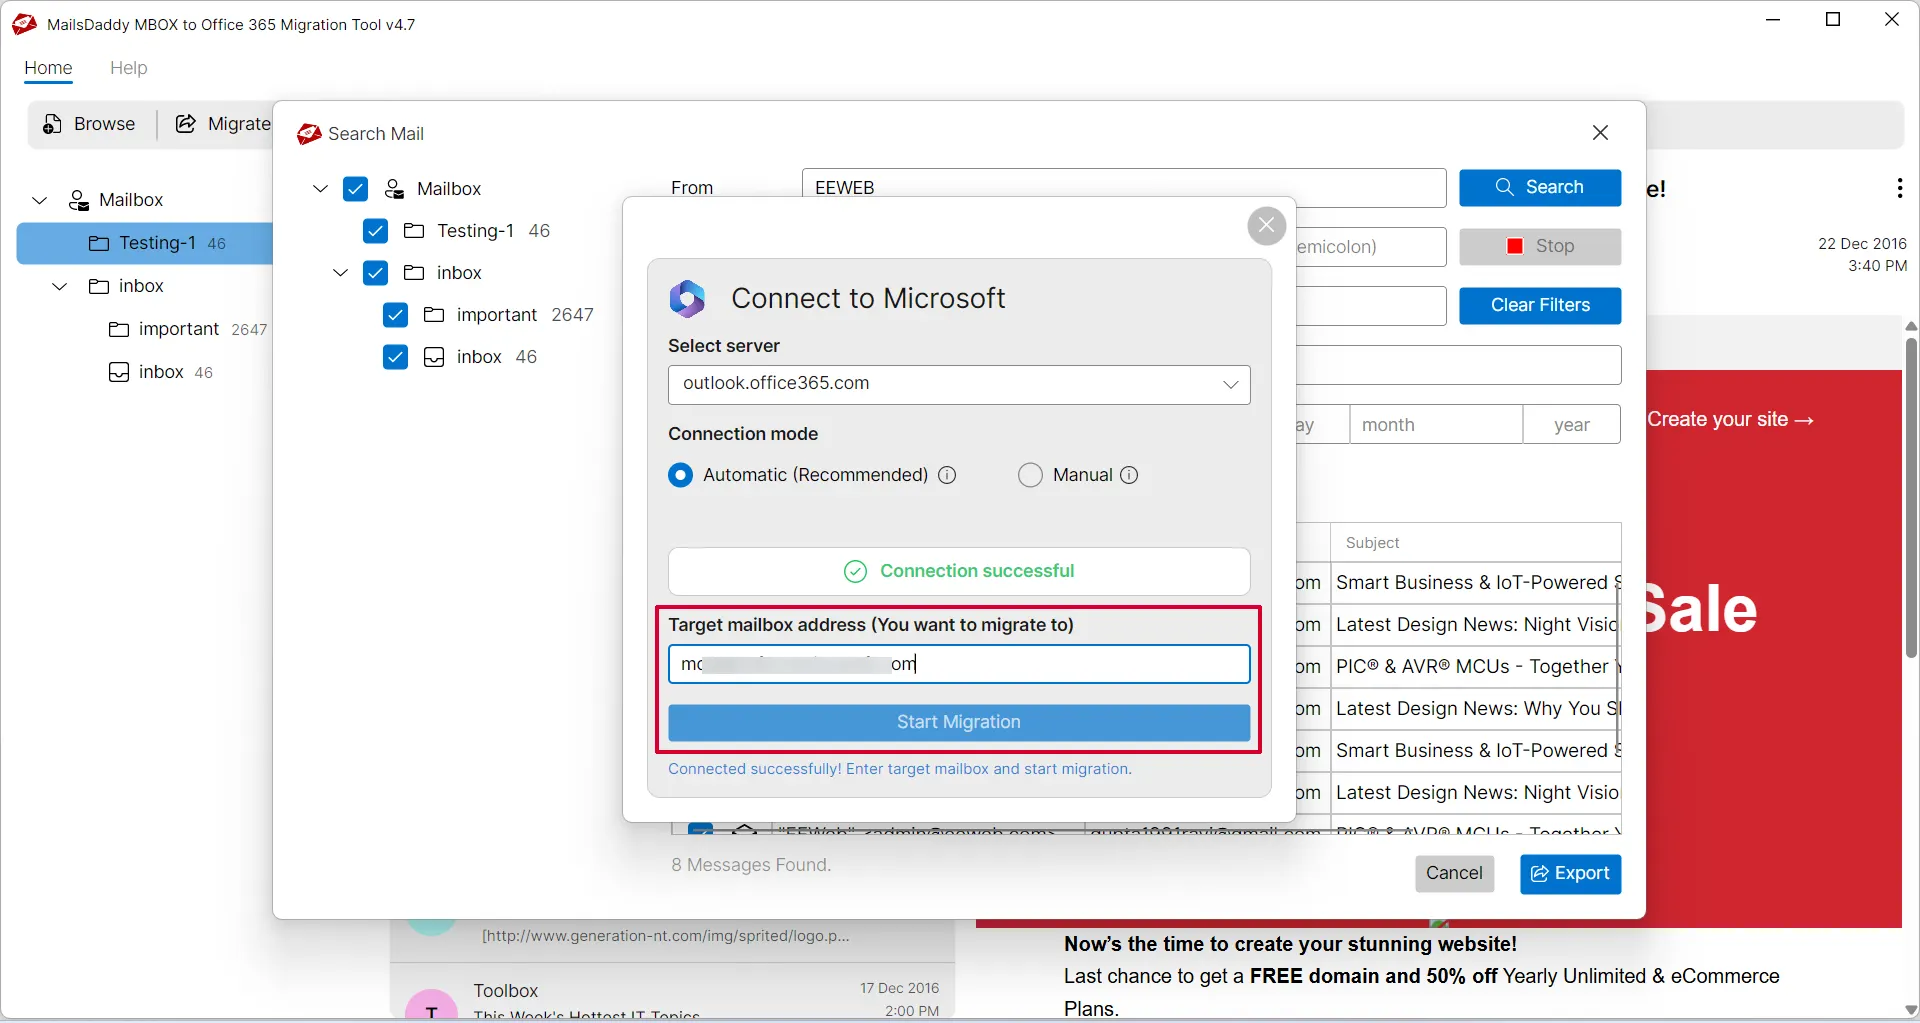
Step 4: Choose an authentication type: Automated or Manual. Both are safe options for authentication and migration to the Office 365 cloud.
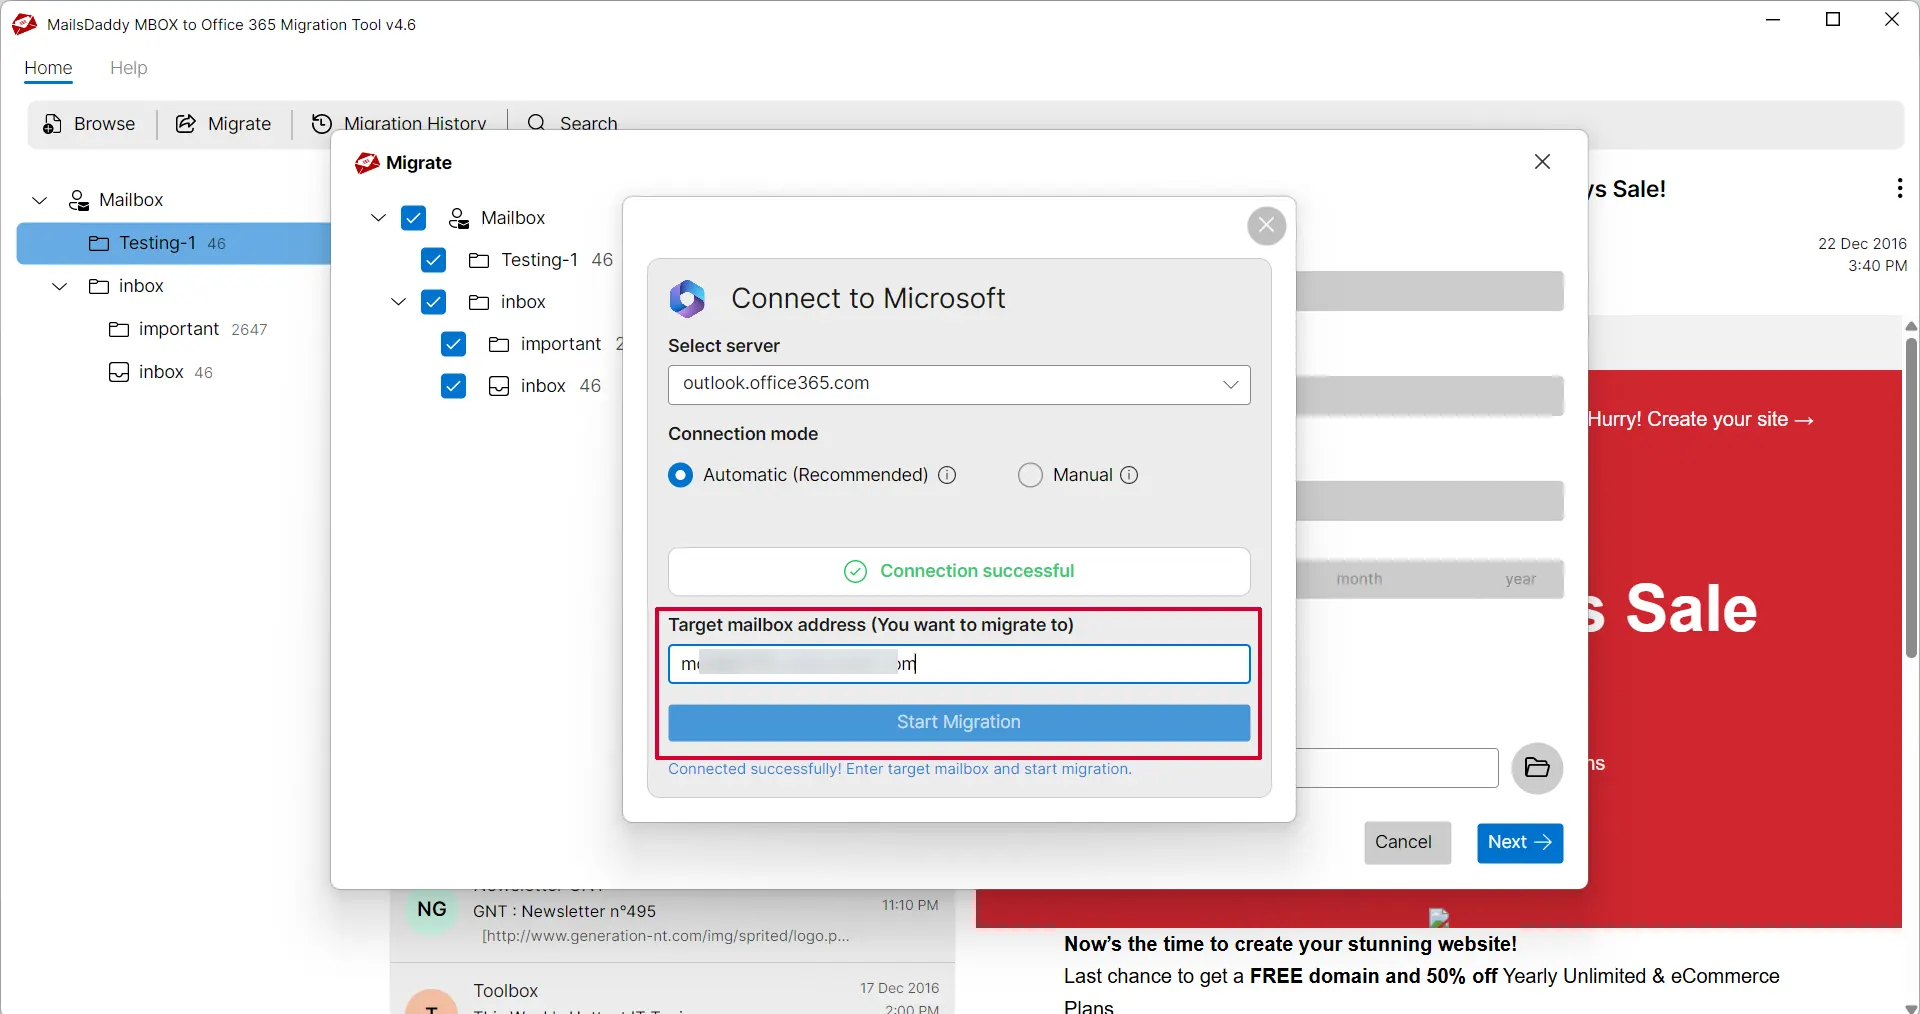
Step 5: After successful authentication, provide the target email address to start the migration
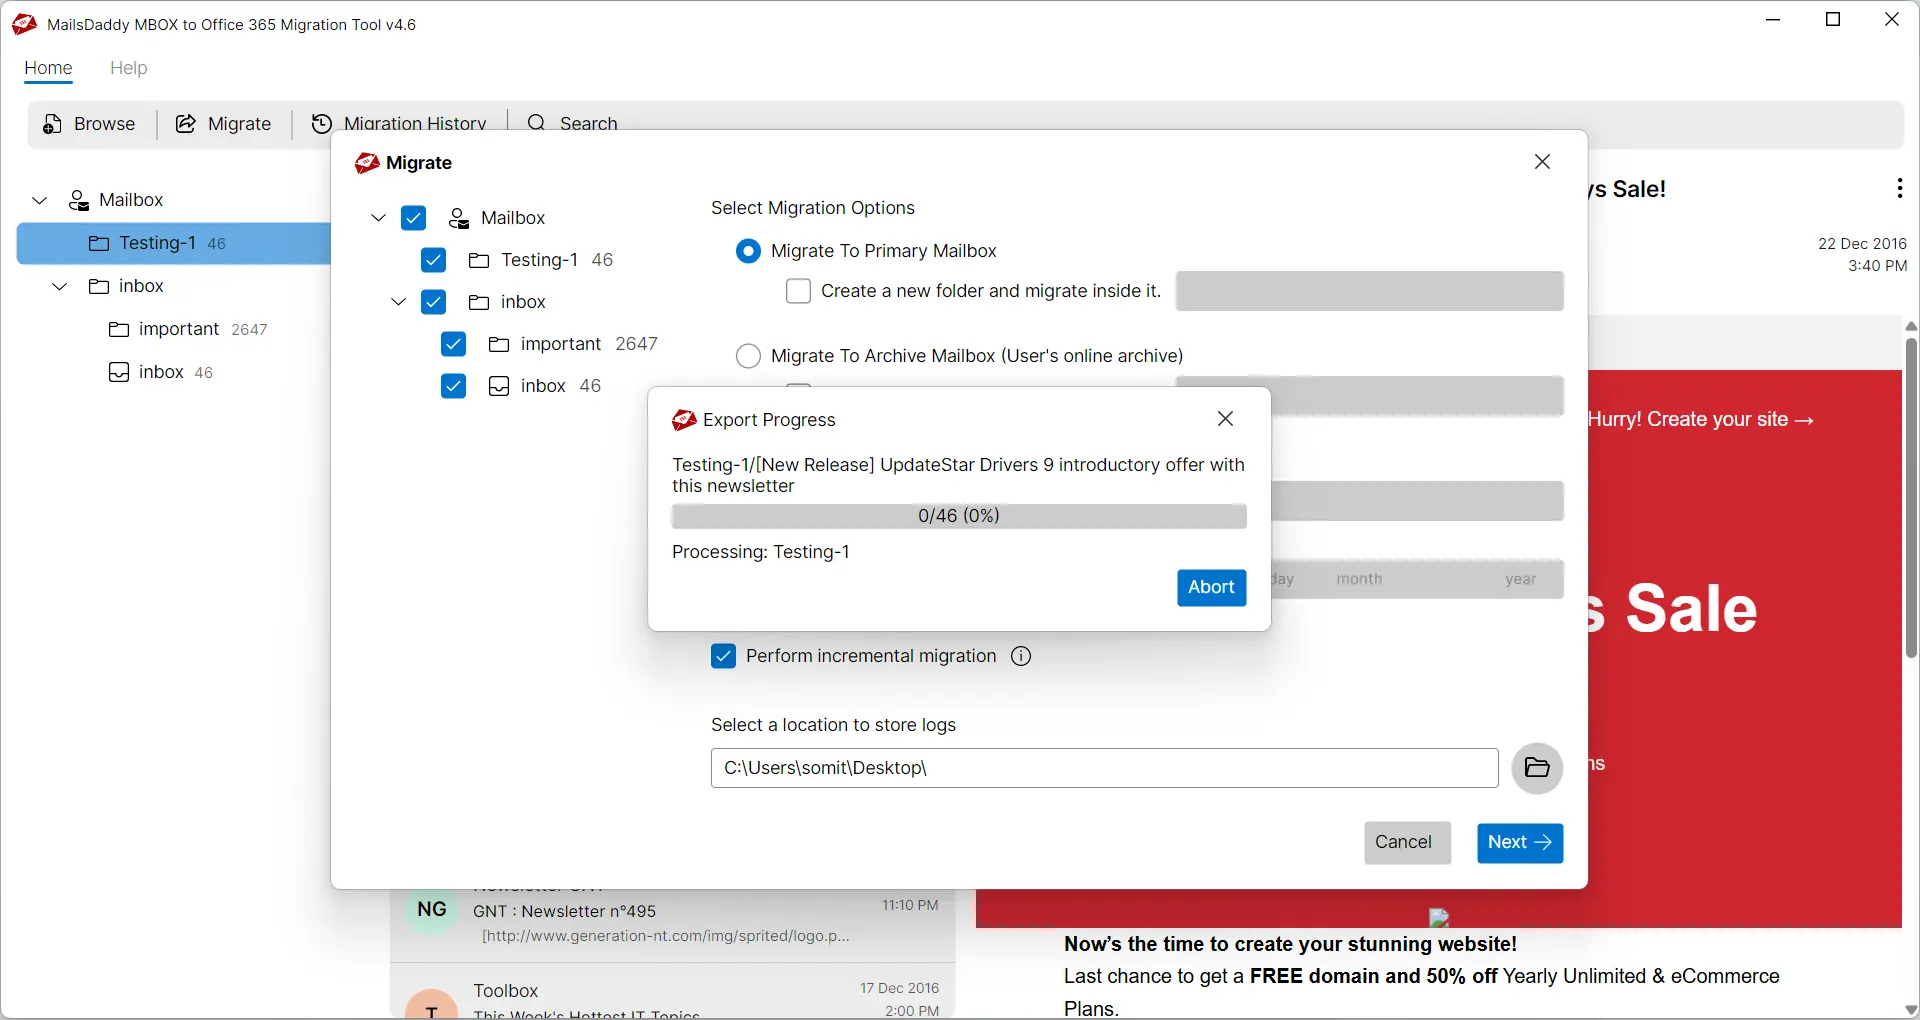
Step 6: Now you will see the migration window, so wait until the process is complete.
That's it. Wait for the confirmation window.
After loading the malibox you can follow below steps to export filter emails to Office 365.
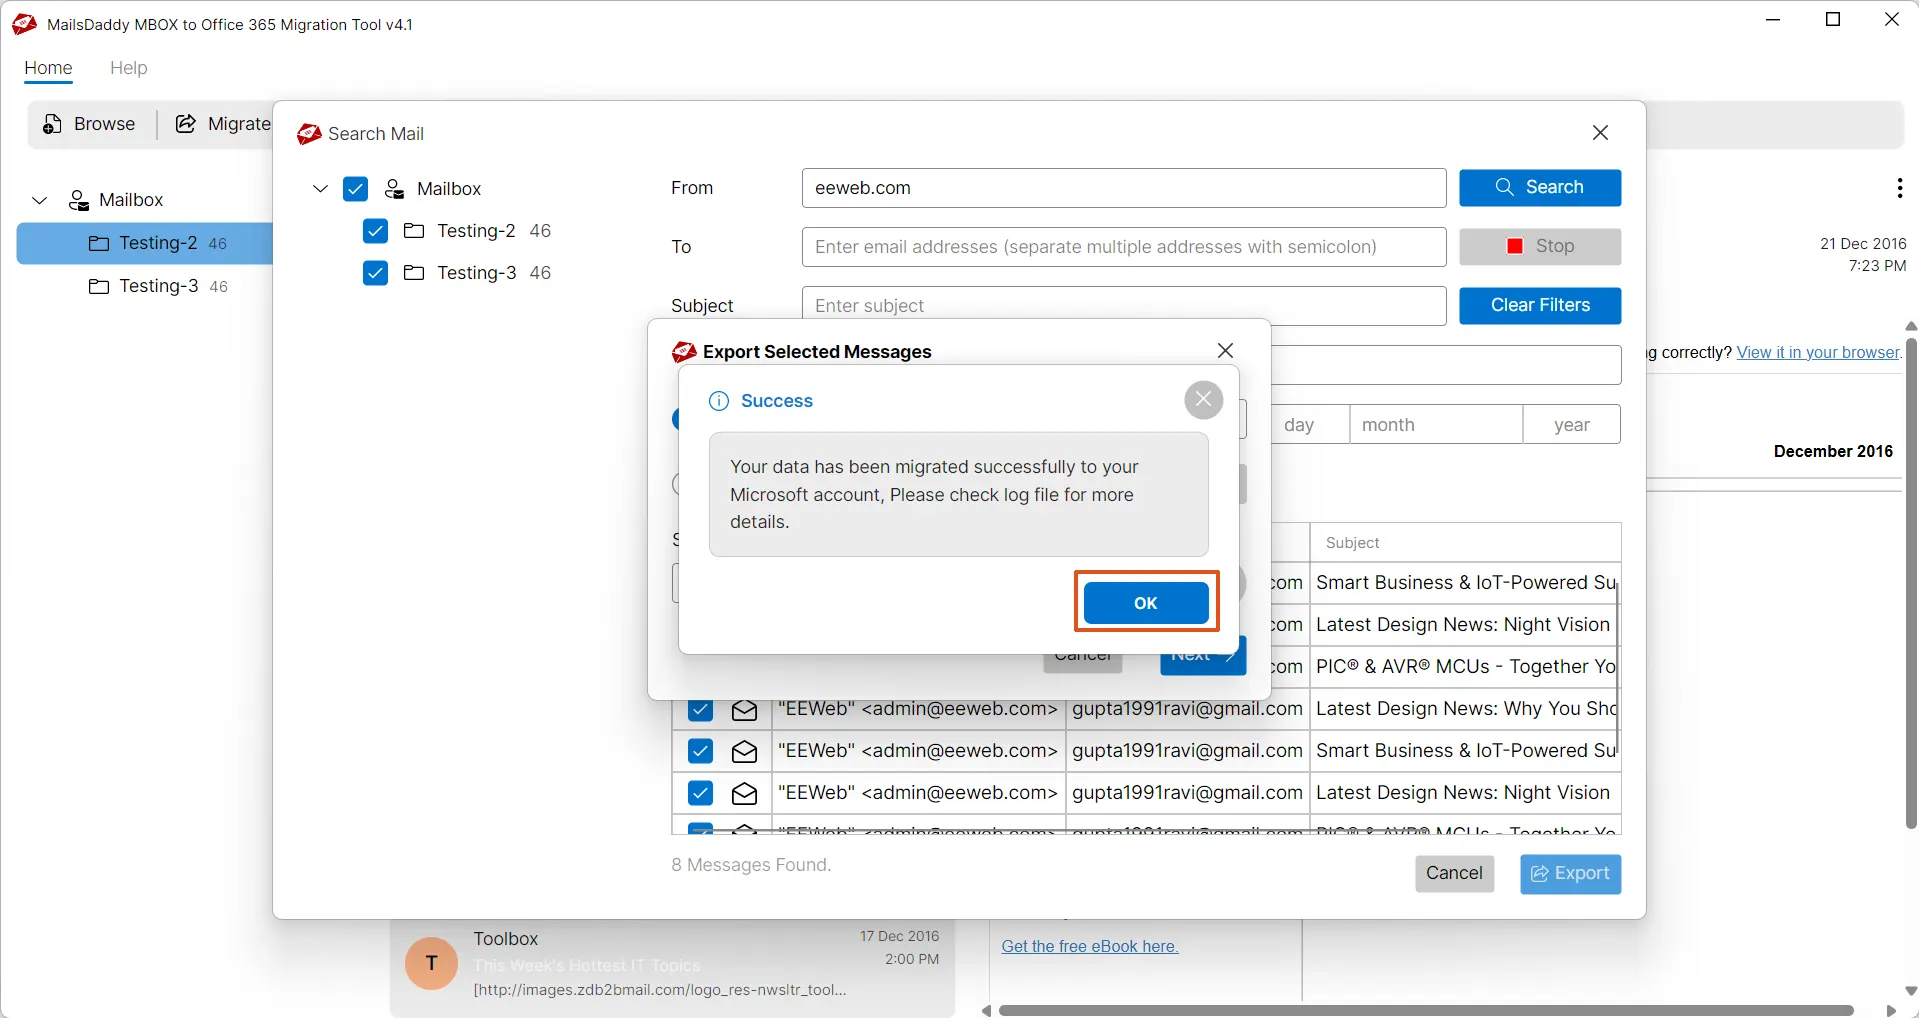
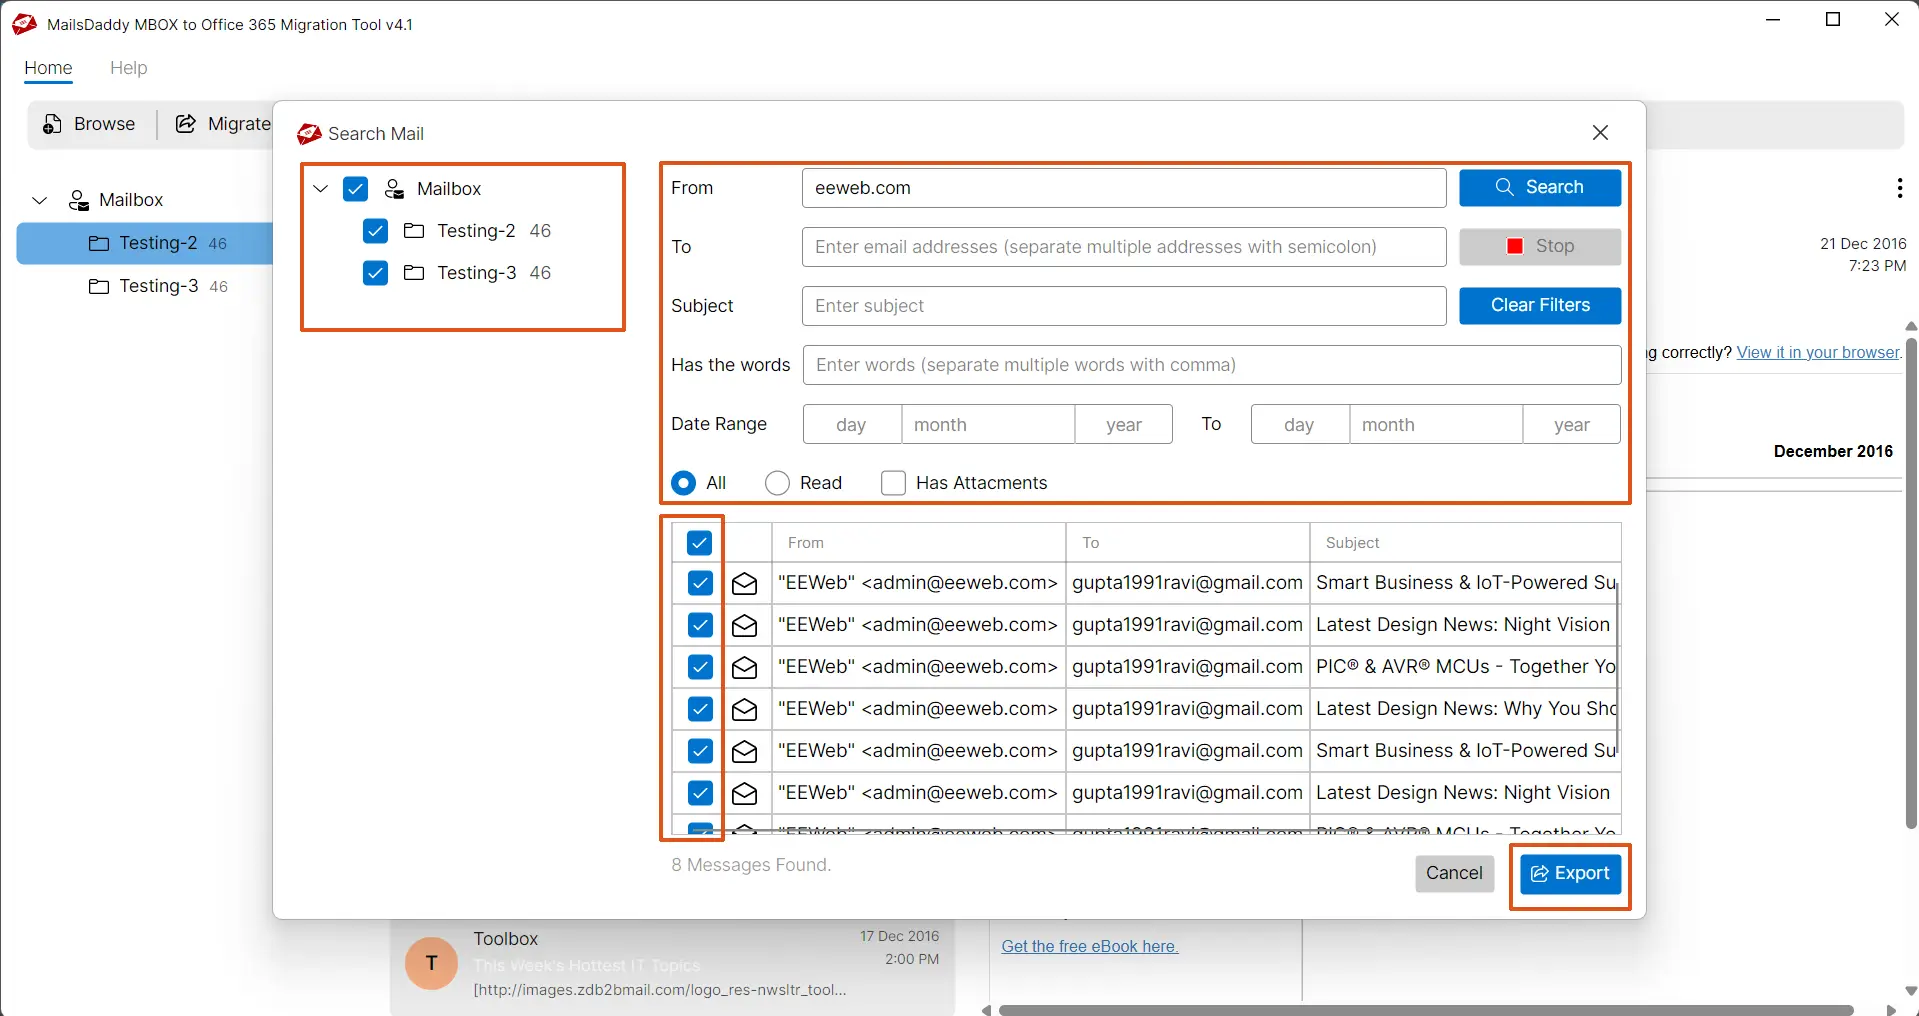
Step 1: To migrate filter emails from MBOX to Microsoft 365 platform, click on search button.

Step 2: Select all folders, and search keyword using single or multiple parameters like To, From, Subject etc. Once you get the filter emails, click on Export button.
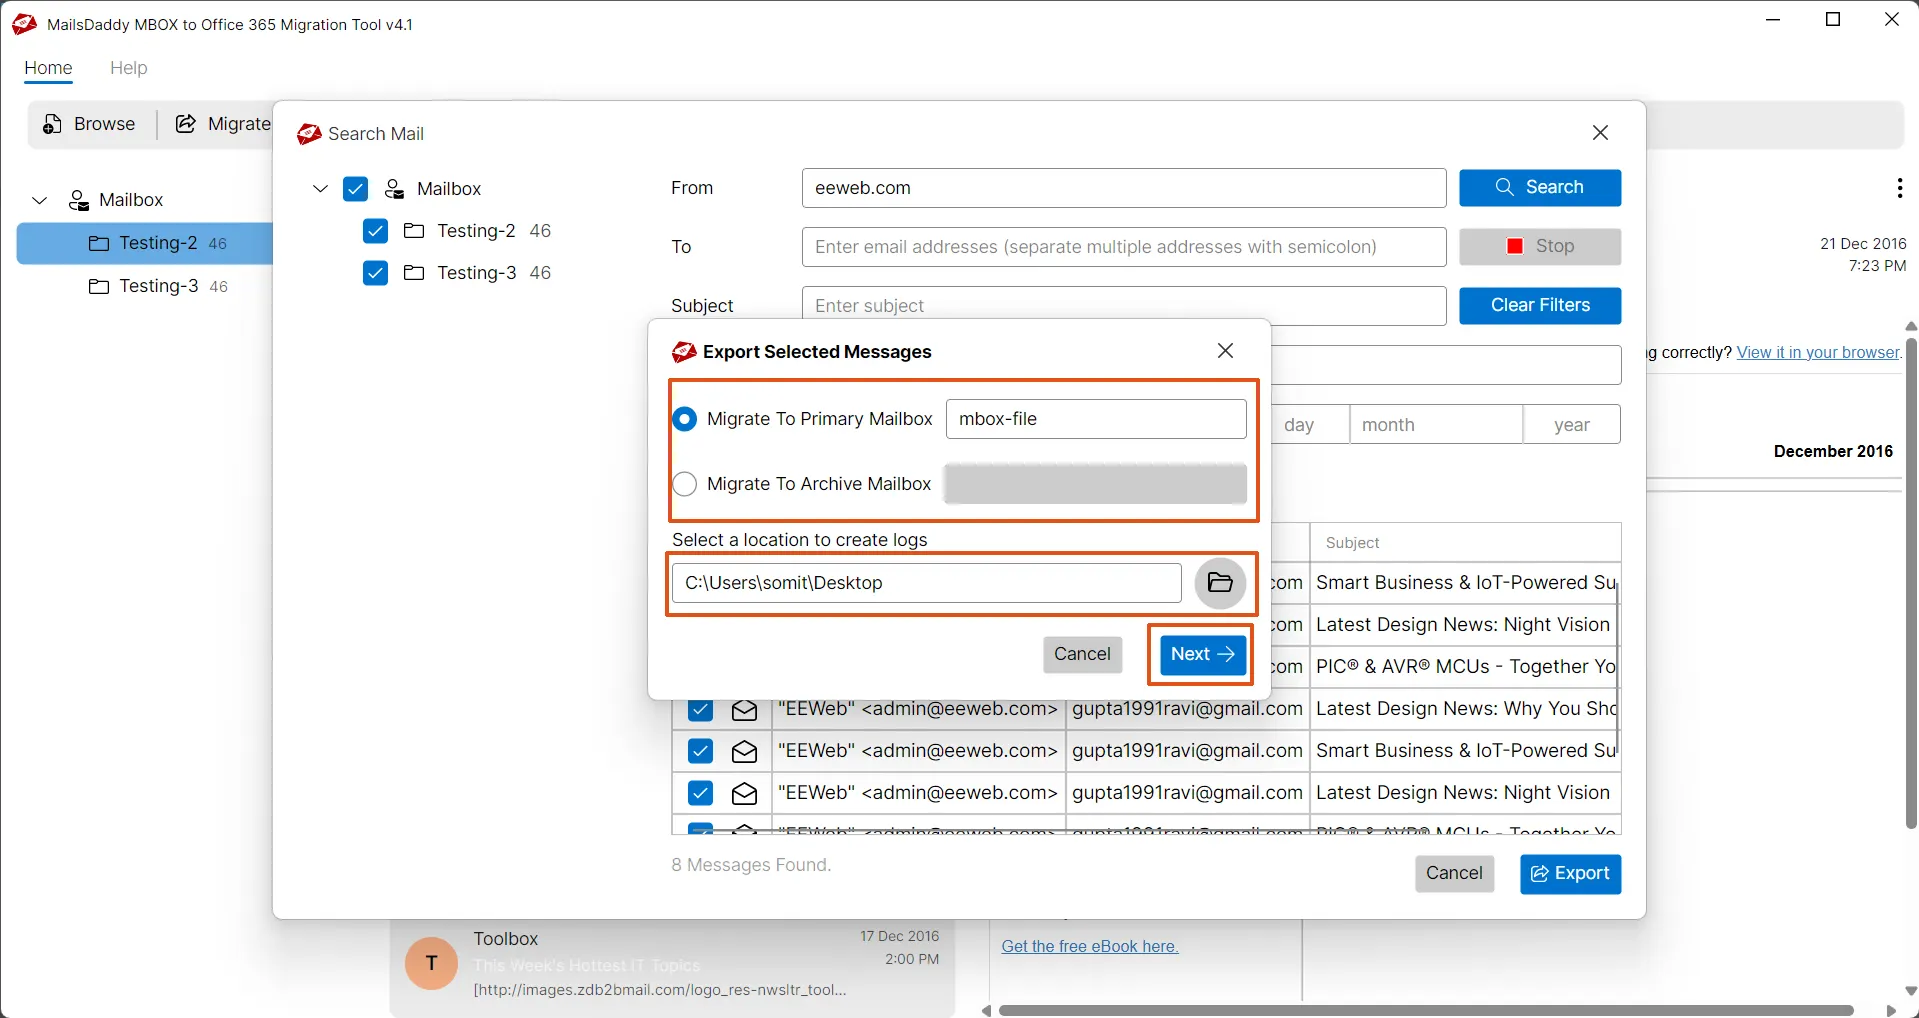
Step 3: Choose Primary, In-Place Archive, Shared, or Group mailbox and assign a name to the folder. Save the location of Log file then hit on Next button.
Step 4: Choose an authentication type: Automated or Manual. Both are safe options for authentication and migration to the Office 365 cloud.
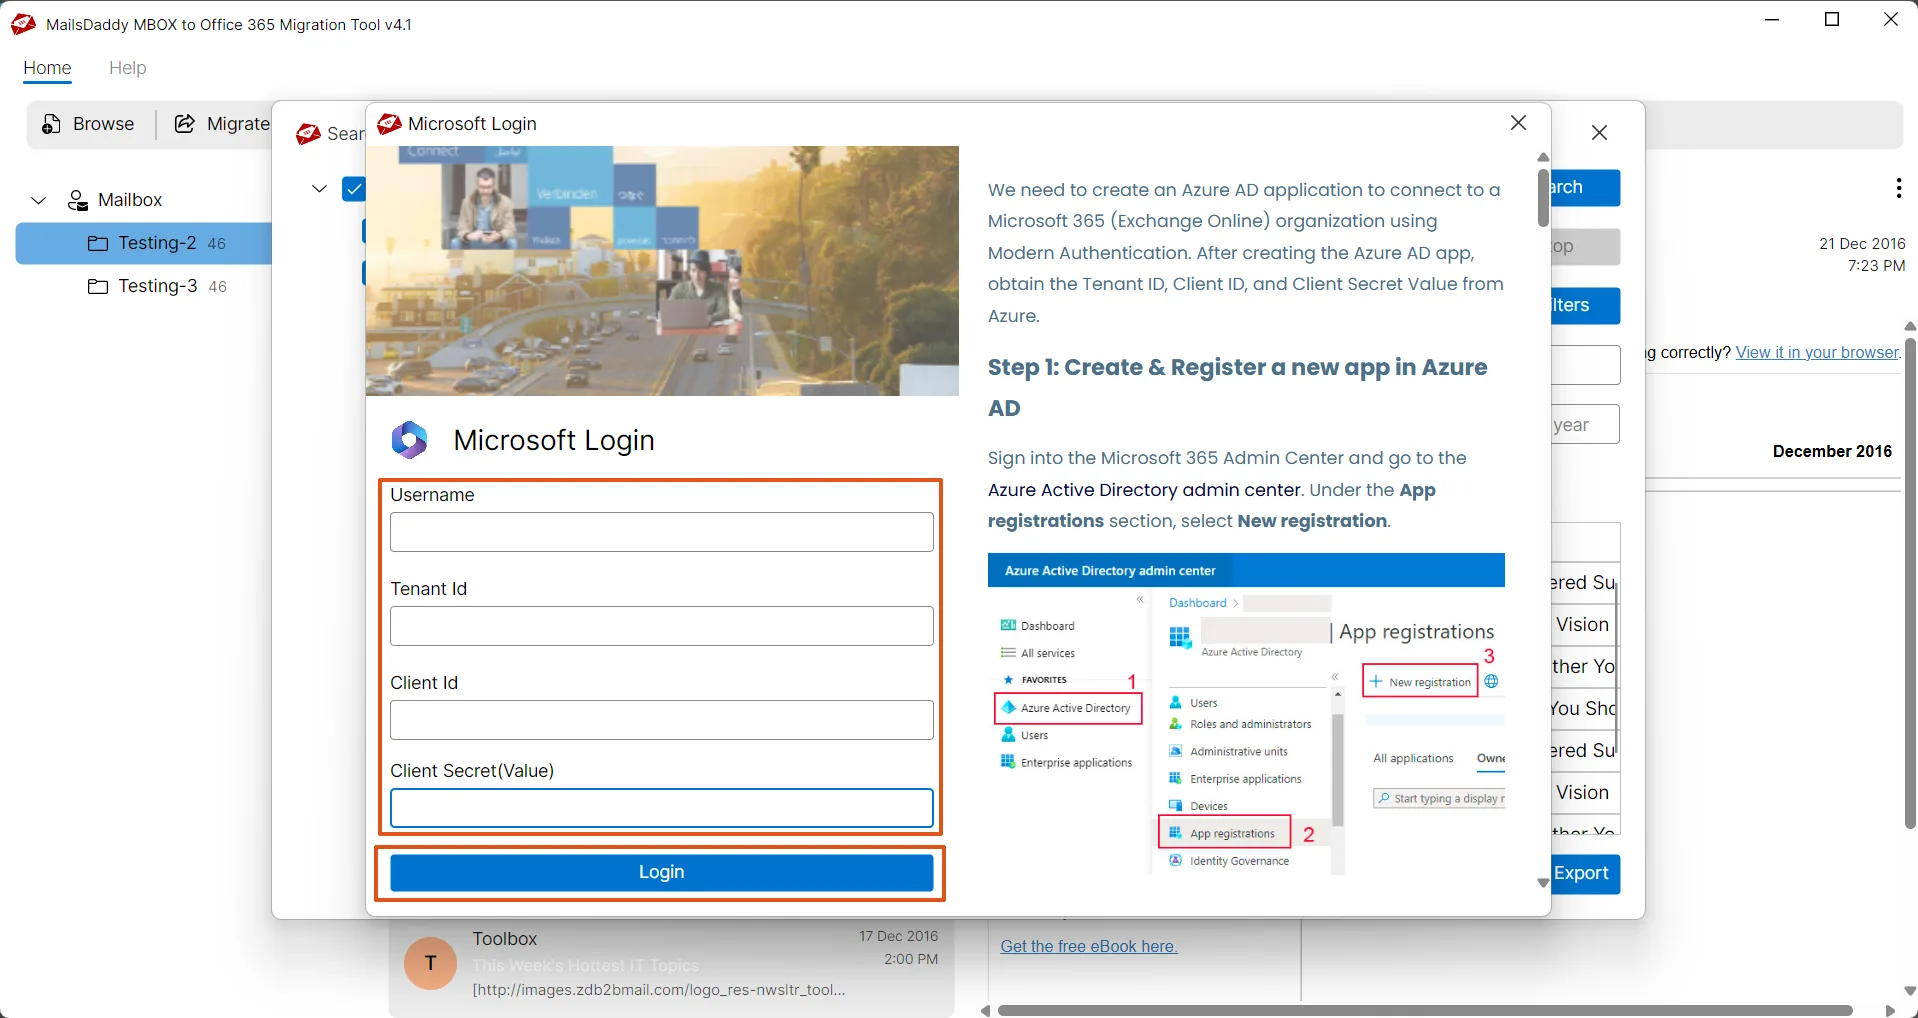
Step 5: After successful authentication, provide the target email address to start the migration
Step 6: Now you will see the migration window, so wait until the process is complete.
Step 7: Once it is done, click on Ok button and visit your Office 365 account to verify data.