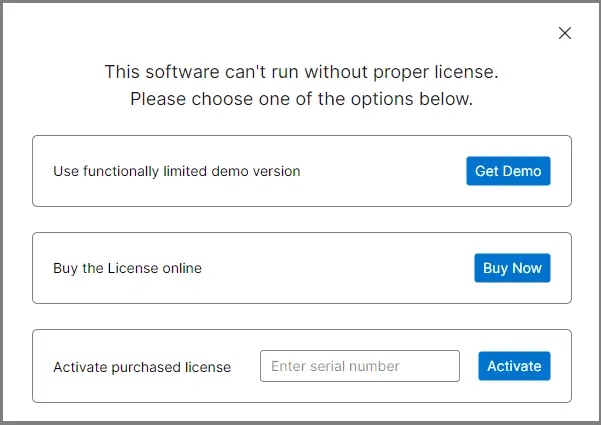
Step 1: Download MSG to Office 365 Migration tool, click on Get demo or activate it (if the license key is available)and launch it.
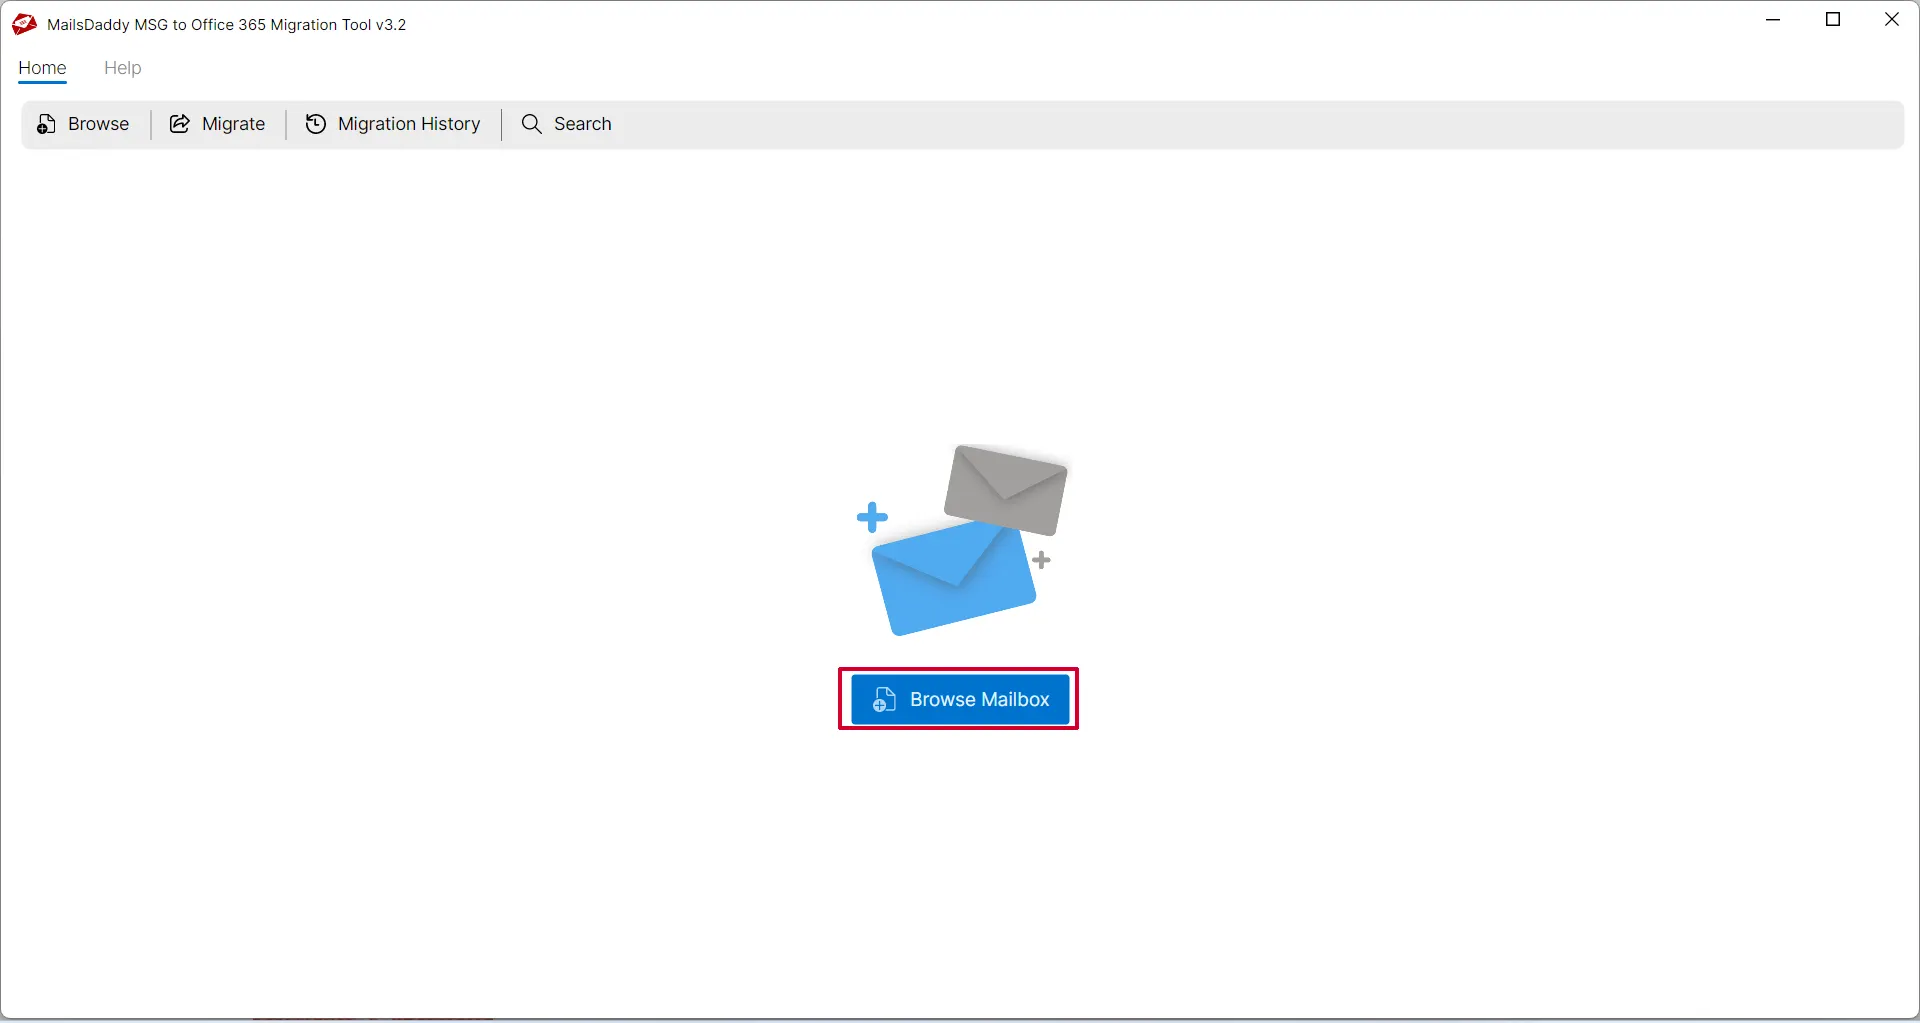
Step 2: Click on Browse Button to add a file from the local machine.
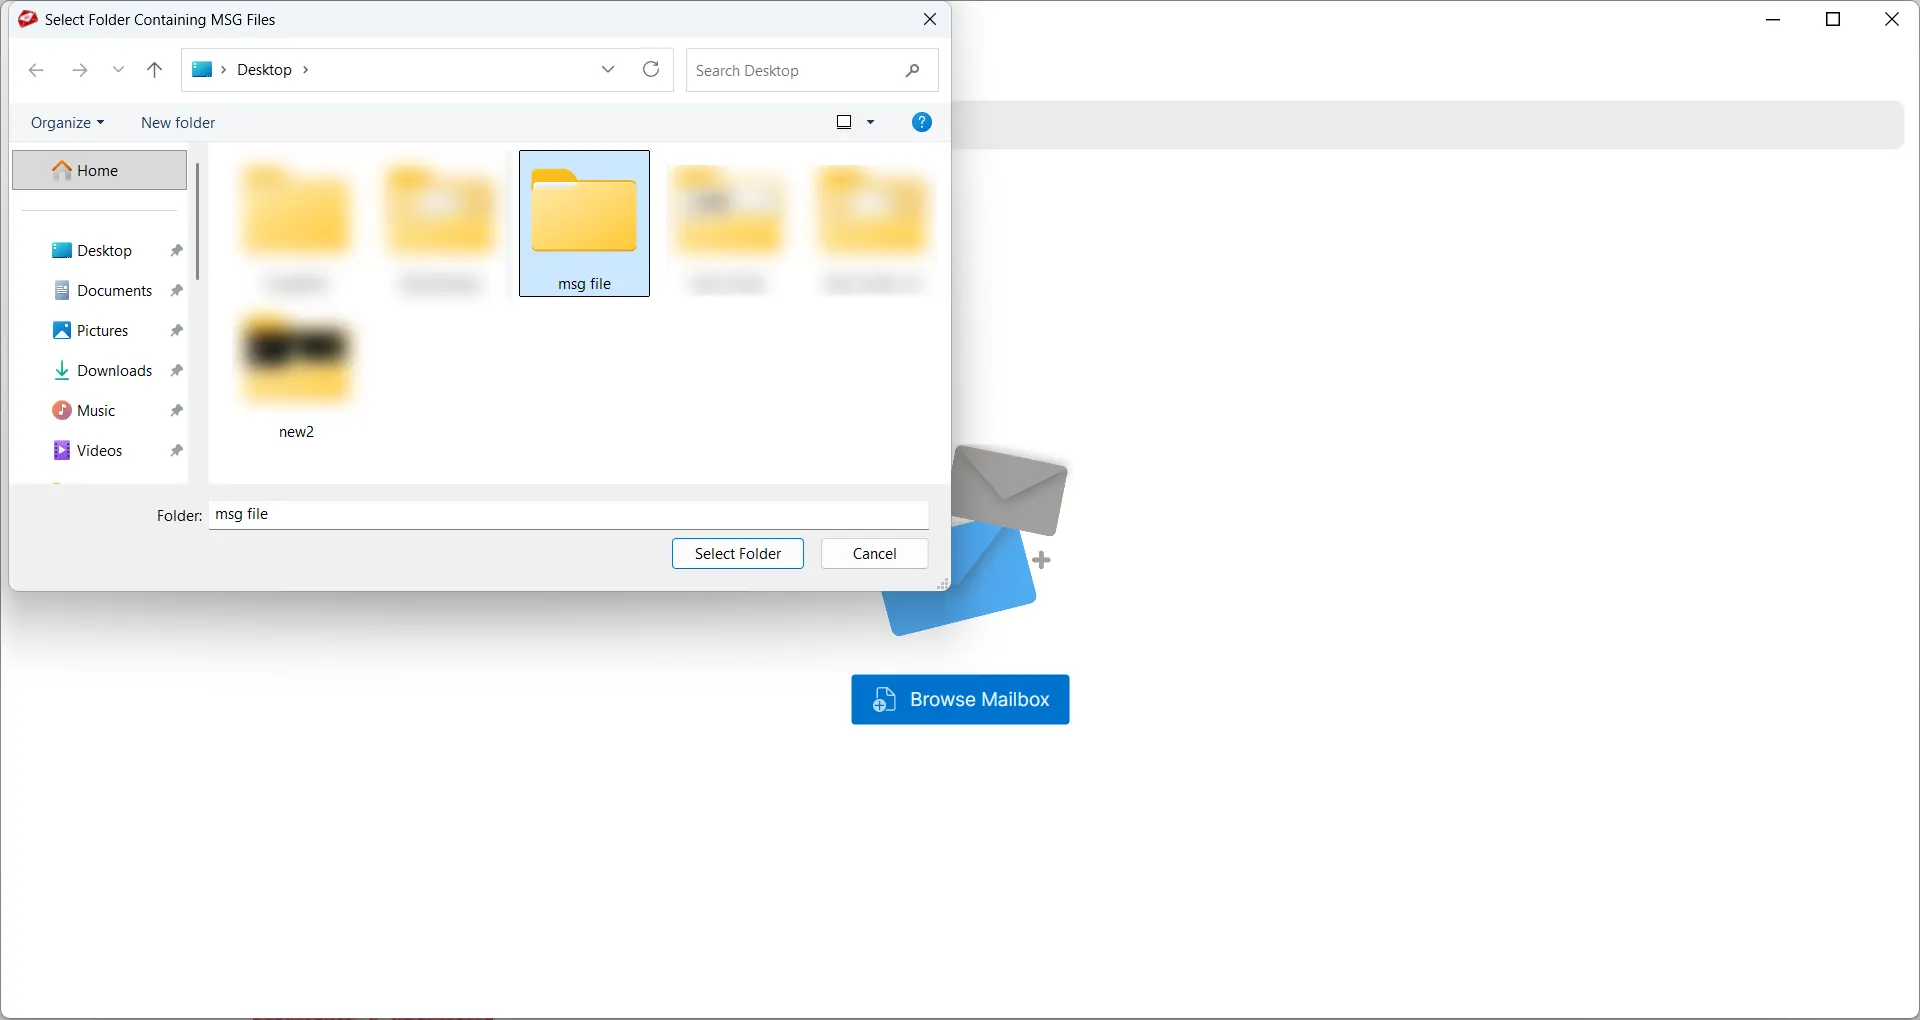
Step 3: Select the folder where MSG files have been saved.
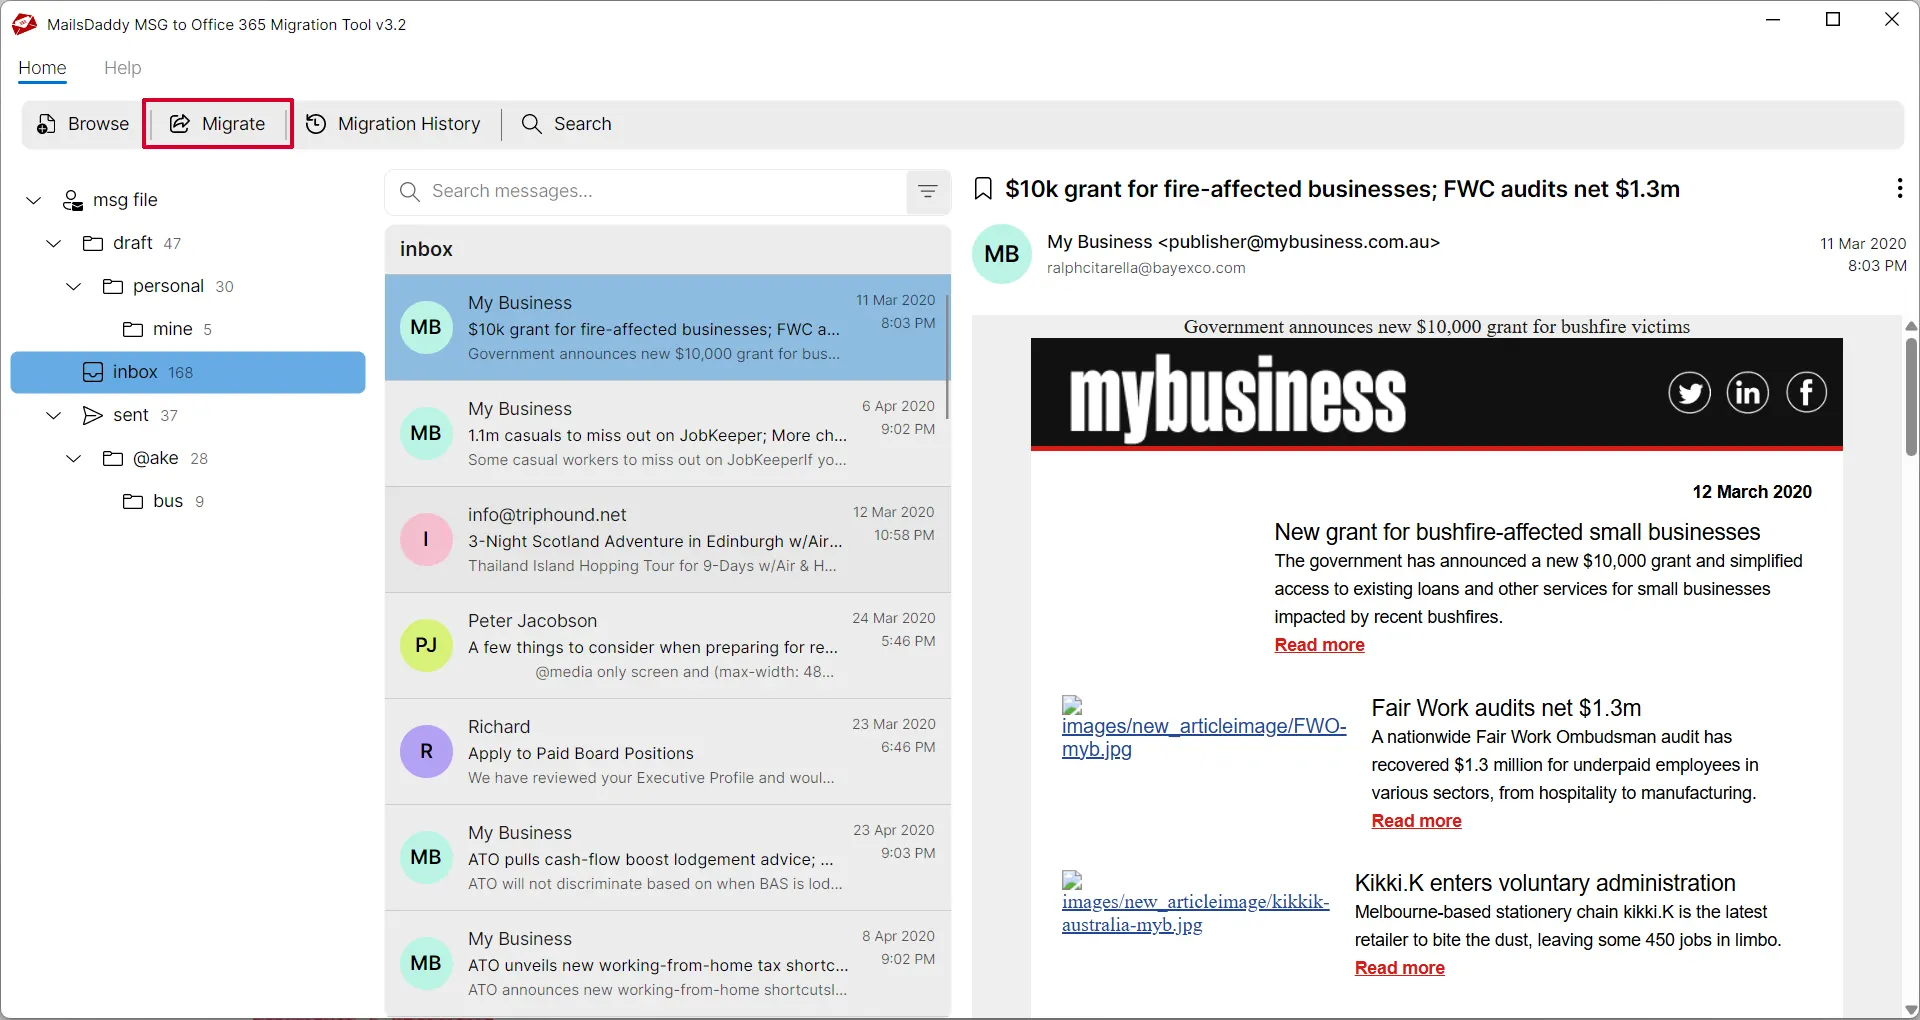
Step 4: The software generate a Preview of the selected email file.

Step 5: Click Migrate button to go the export window.
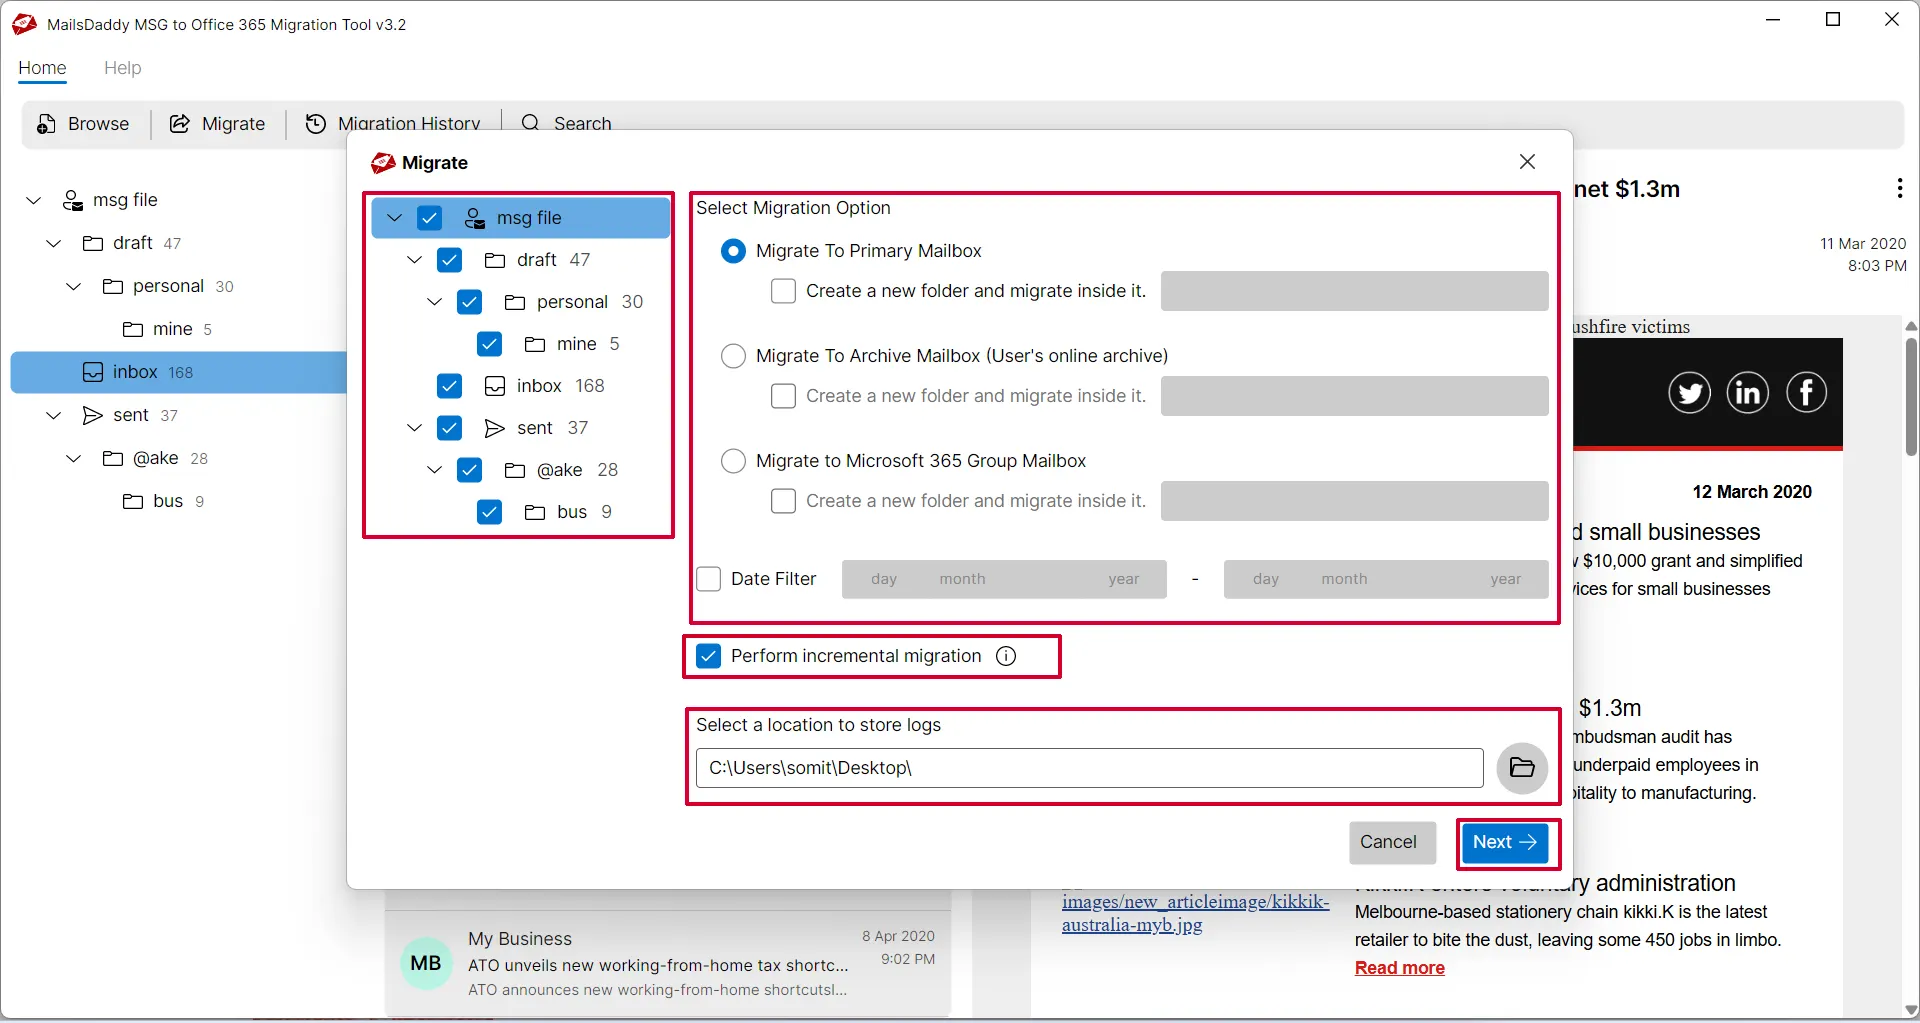
Step 6: Choose mailbox types: Primary, In-Place Archive, Shared, or Group. Users can migrate data to the root folder or assign a new folder for the migration. Folder naming is optional.
You can also enable or disable incremental migration and specify the log file location before authenticating the Office 365 account.
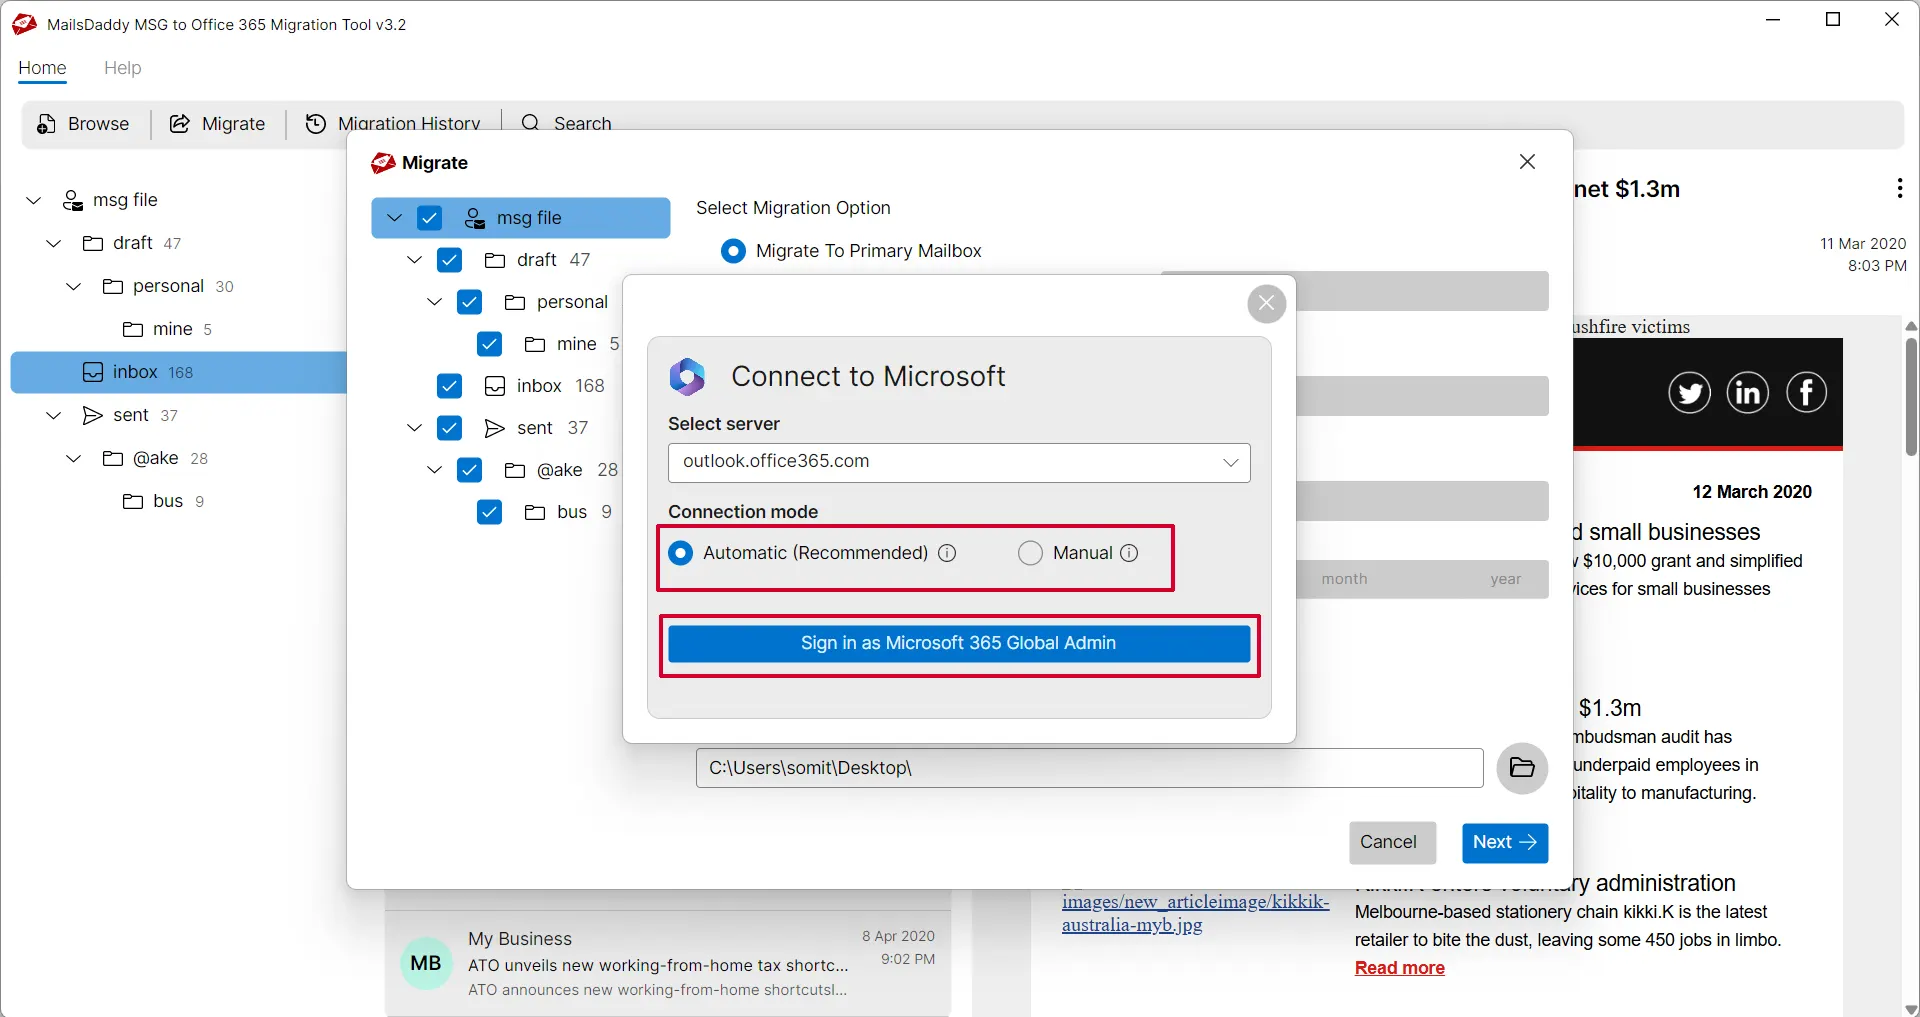
Step 7: Choose an authentication type: Automated or Manual. Both are safe options for authentication and migration to the Office 365 cloud.
Step 8: After successful authentication, provide the target email address to start the migration

