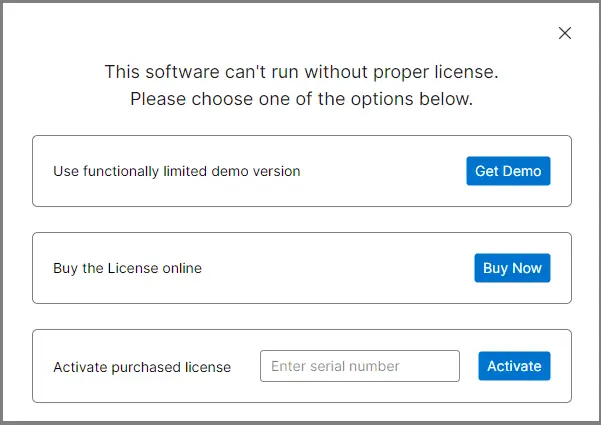
Step 1: First,Download, install, and launch the MailsDaddy PST to Yandex mail migration Tool on your Windows system. Click Get Demo or activate it if you have a license. The software will relaunch automatically.
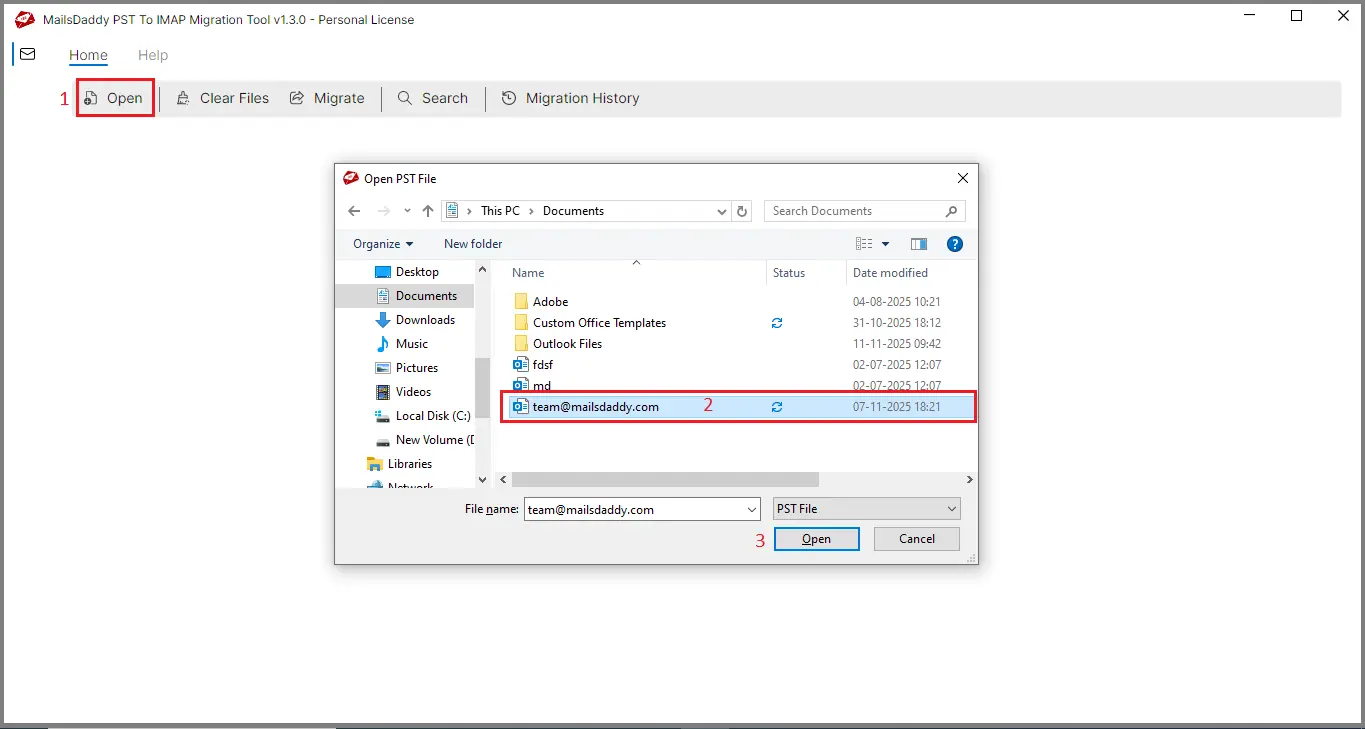
Step 2: Click Open and select the Outlook PST file you want to import into your Yandex Mail account.
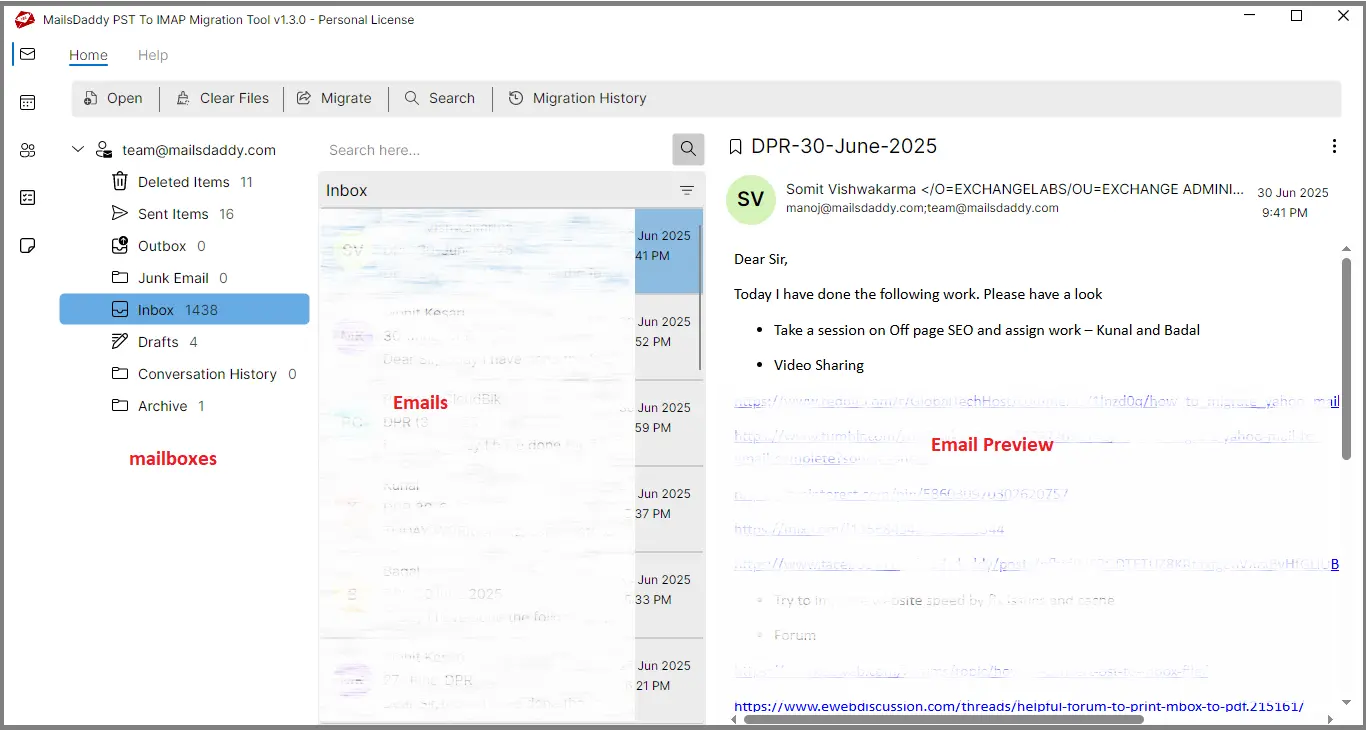
Step 3: The software will scan the PST file and display the complete mailbox data in the preview section.
Step 4: Click the Migration button and select all folders or only the folders you want to migrate from the left panel.
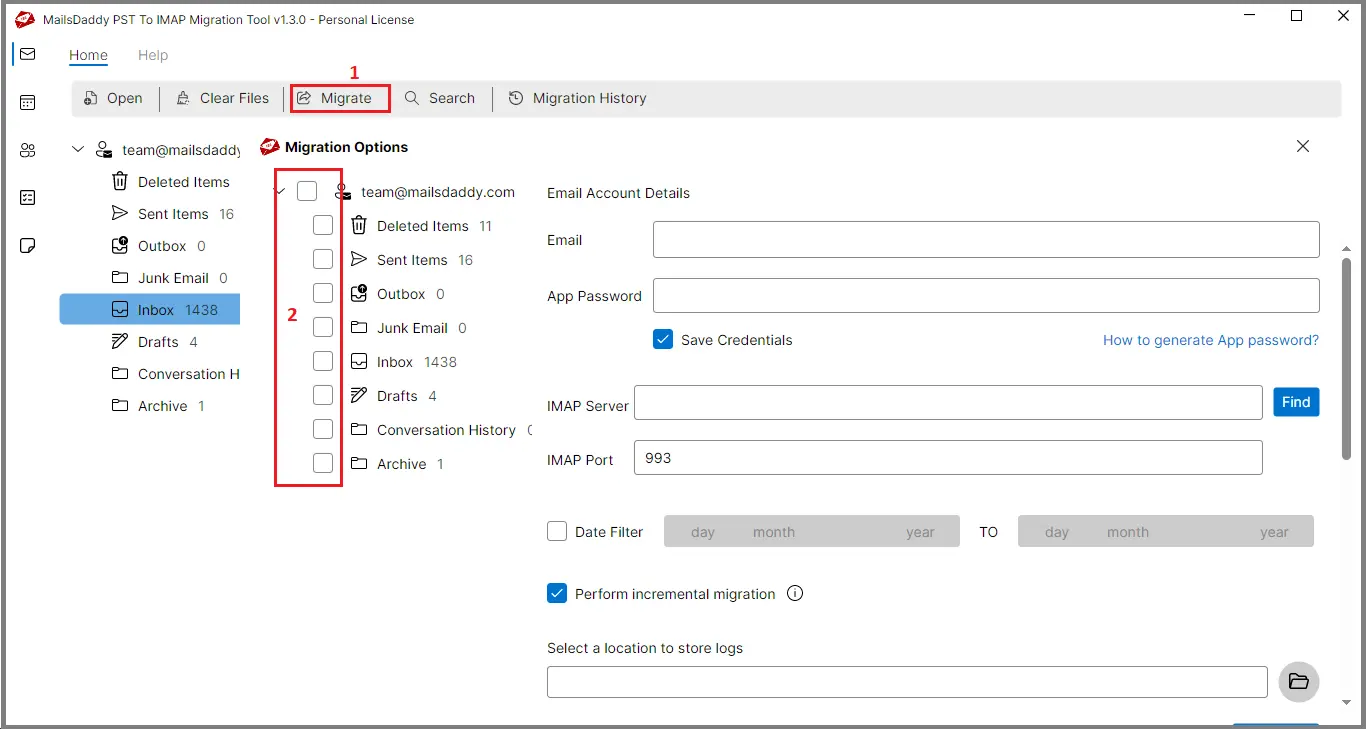
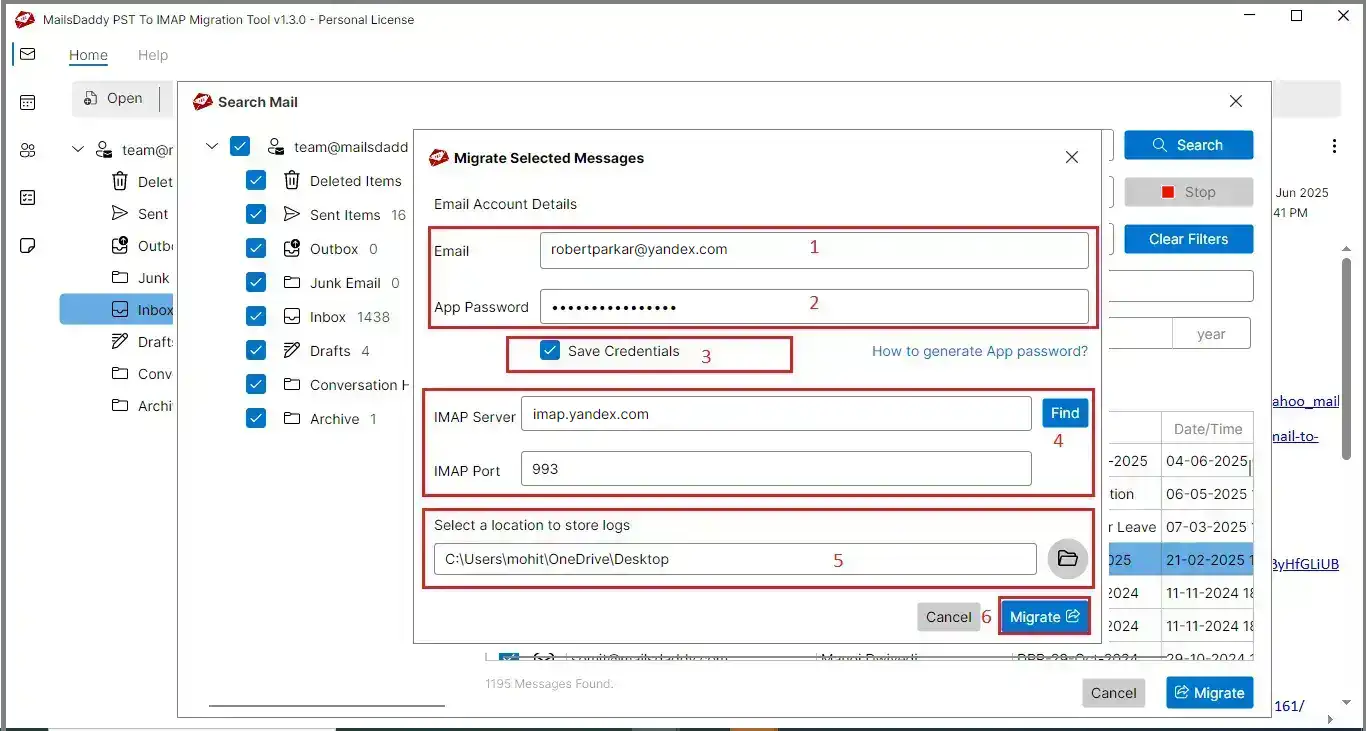
Step 5: Enter your Yandex Mail email address and password. If you need help generating an app-specific password, click on How to generate App Password.
Step 6: Choose whether to save your credentials for future migrations by enabling or disabling the option.
Step 7: The tool will automatically fetch Yandex Mail server details. If it does not appear, click Find to locate the server settings.
Step 8: If you want to migrate emails from a specific time-period, use the Date Filter option; otherwise, you can skip this step.
Step 9: Enable the Perform Incremental Migration option if you want the software to skip emails that already exist in Yandex Mail, preventing duplicates. Select this option according to your requirements.
Step 10: Click the Browse icon to choose the location where the log report will be saved.
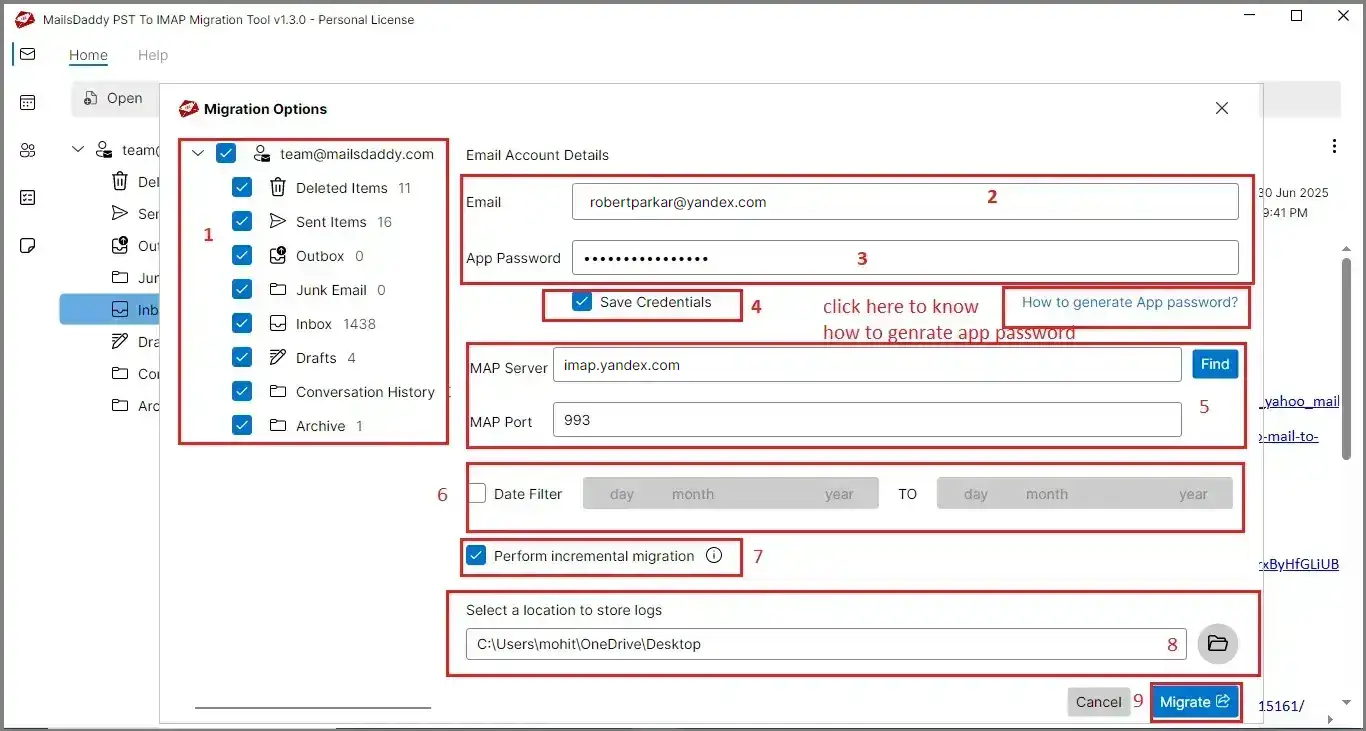
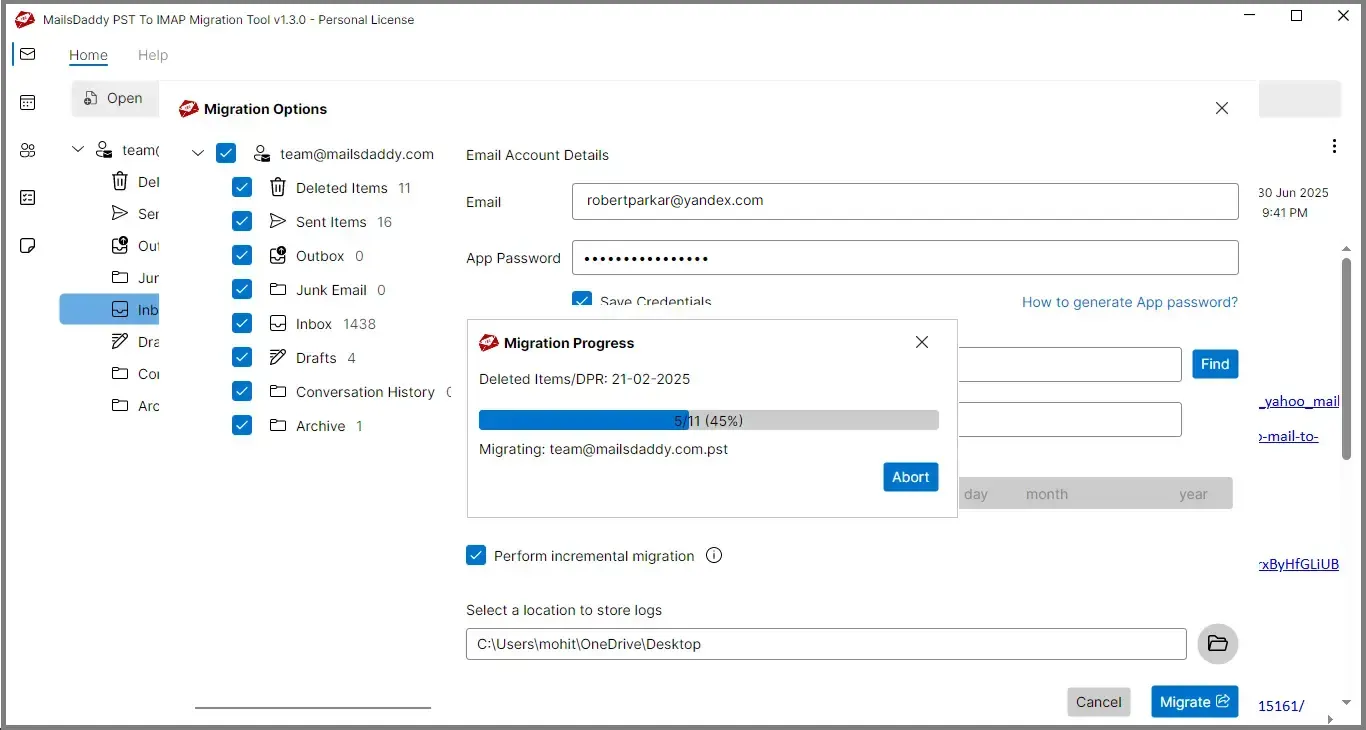
Step 11: Finally, click Migrate to start the migration process and wait until it completes.
This will show you all the filtered data, but you need a valid license to migrate the filtered data.
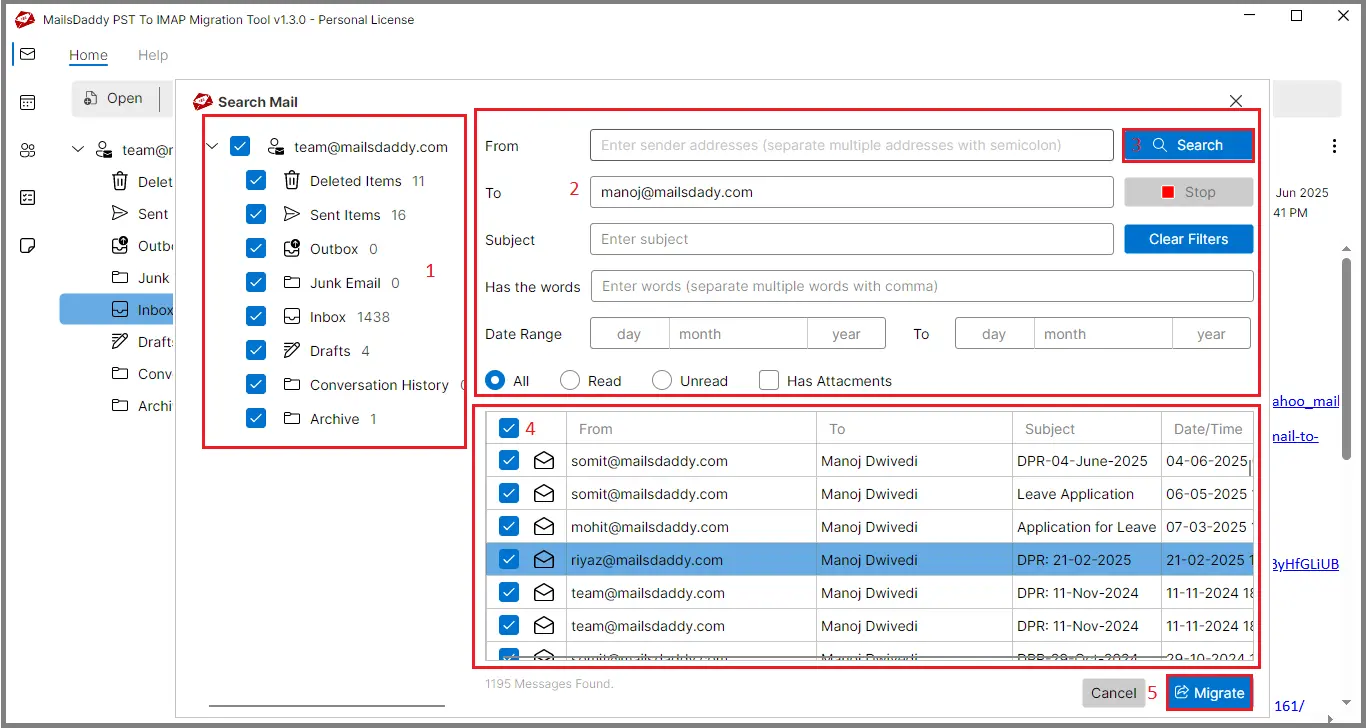
Step 1: To migrate specific emails from PST to Yandex Mail, go to the Search tab.
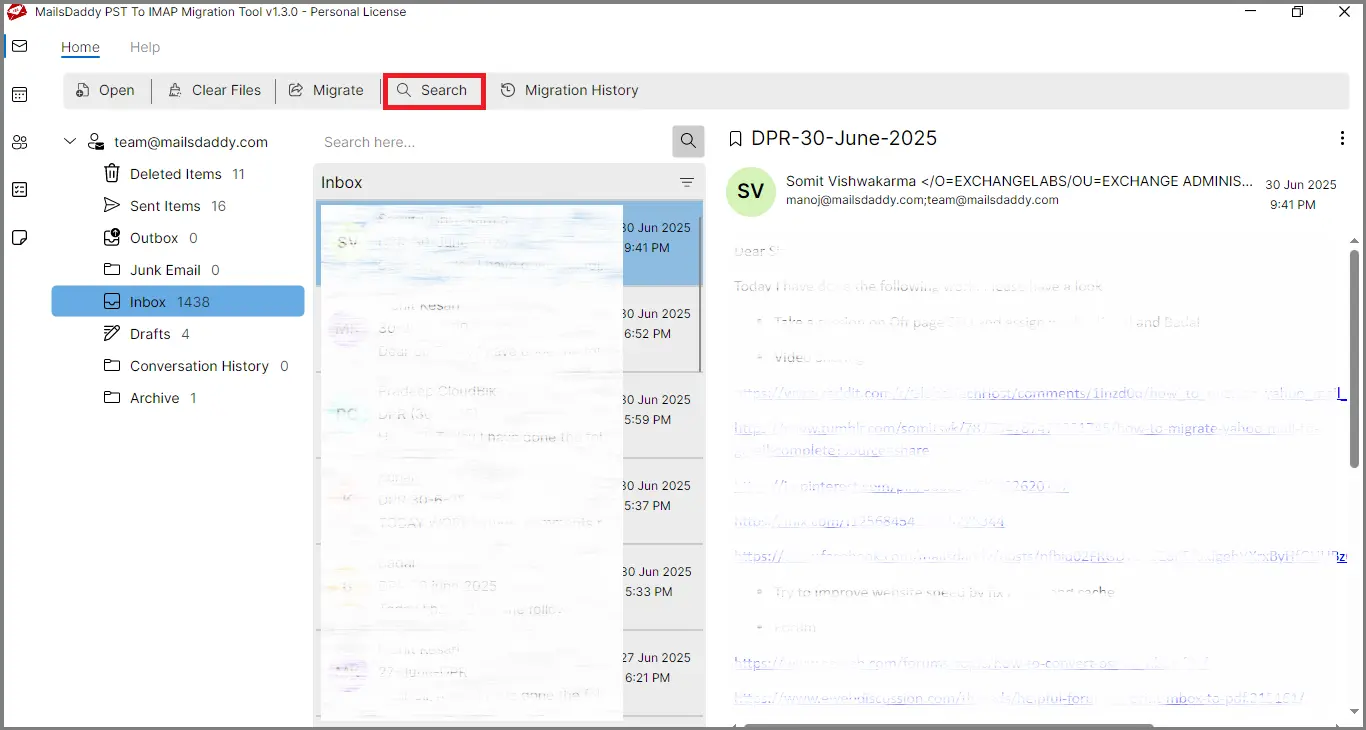
Step 2: From the left panel, select the folders you want to migrate (all or specific folders). Apply filters such as From, To, Subject, has a Word, Date Range, or other criteria according to your needs, and click Search.
Step 3: The filtered emails will appear below. Double-click any email to view a preview.
Step 4: Select the emails you want to migrate and click the Migrate button.
Step 5: Enter your Yandex Mail credentials, verify the server details, confirm the log file saving location, and click Migrate to start the migration process.
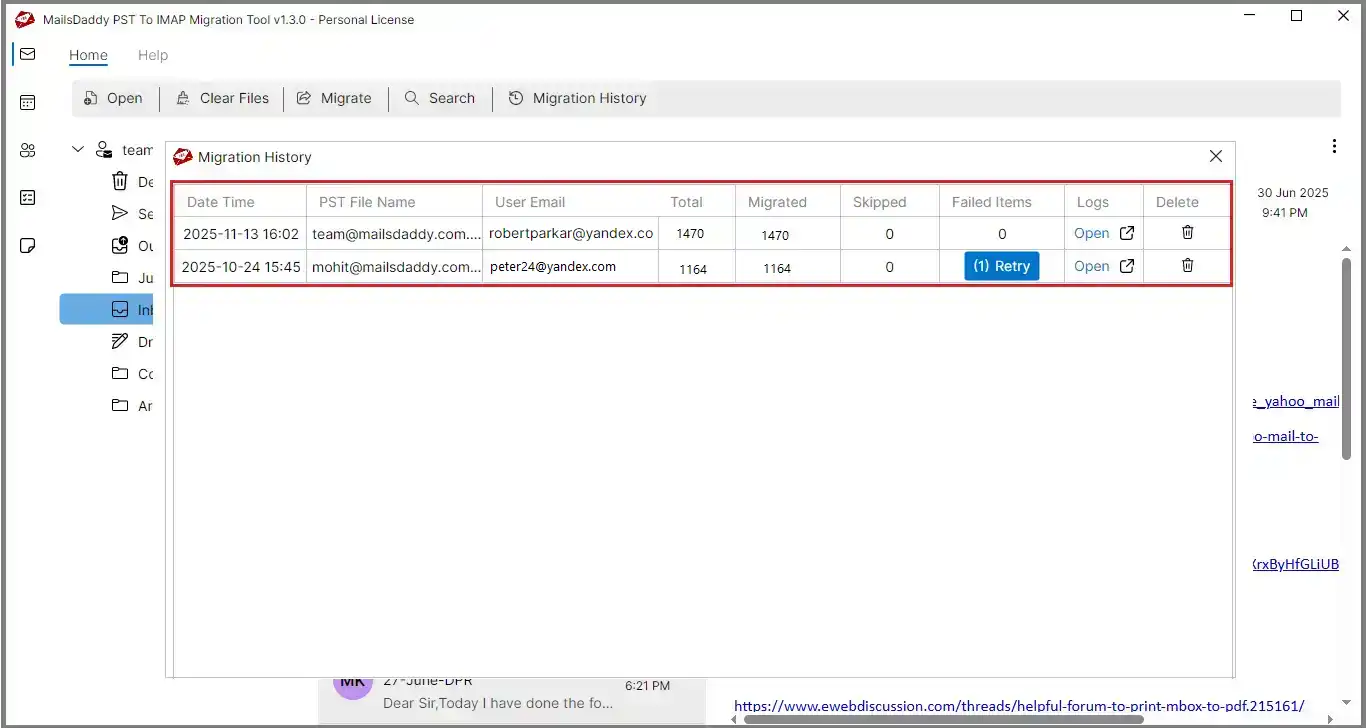
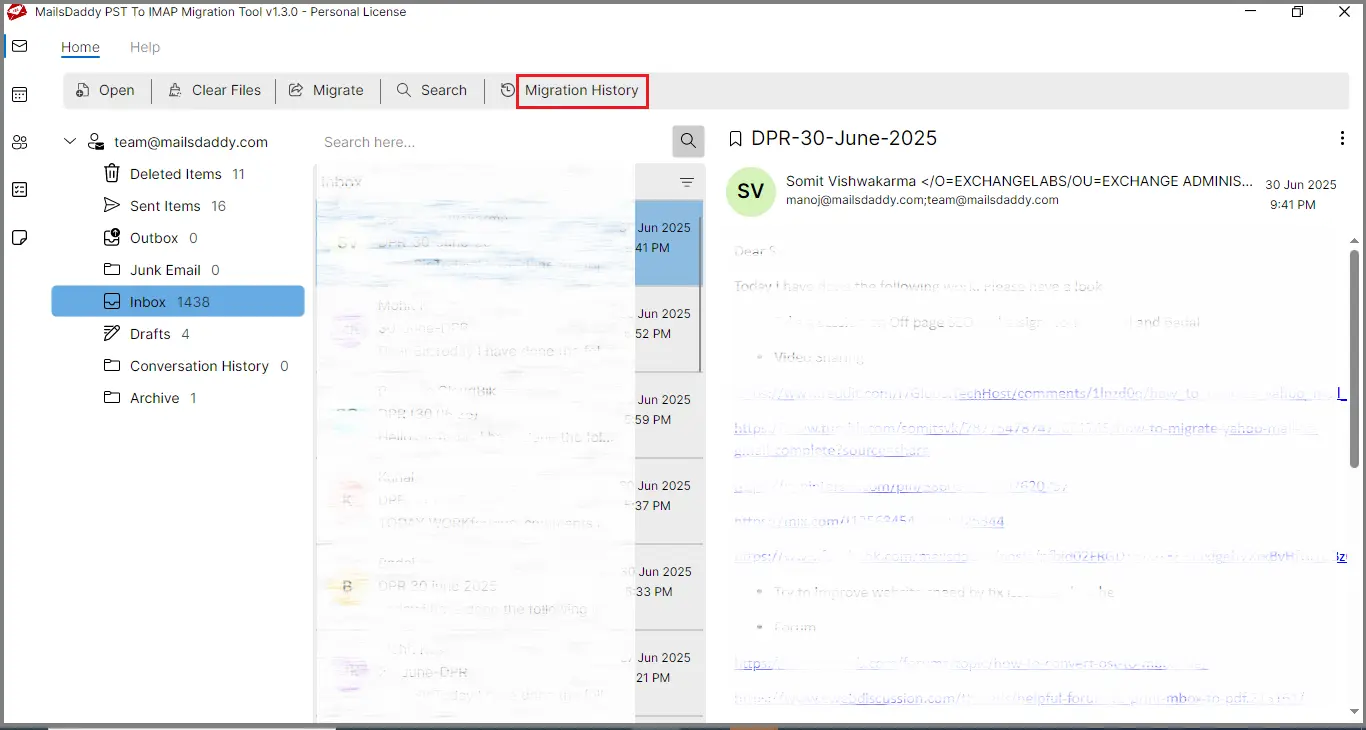
Step 1:After completing the migration, you can check the status by going to the Migration History tab. Here, you will find details such as the migration start time, PST file name, Yandex Mail account, total message count, migrated email count, skipped emails, and failed emails.
Step 2: If any emails failed to migrate, click the Retry button. Verify all credentials and other required information, then click Migrate to retry only the failed items.