Gmail/G Suite IMAP Backup Tool
Check all settings and troubleshooting steps before backing up Gmail account.
Watch Now: How to create Gmail app password?
Step 1: Enable 2-Step Verification to Generate Password
- Go to Gmail account icon >> click on it and press on Manage your Goolge Account.
- Go to Security tab >> Scroll down and Enable 2-Step Verification.
- Once you enable it, visit here: https://myaccount.google.com/apppasswords
- Re-enter your Gmail password
- Provide the app Name and click on Create button
- Save it in your notepad or anywhere.
Step 2: Enable IMAP Protocol
- Login your Gmail Account and click on Gear icon.
- Click on "See All Settings" then open "Forwarding and POP/IMAP" tab
- Enable IMAP protocol under IMAP Access then scroll down and press on save button.
Yahoo IMAP Backup Tool
Use new app password in the software field for taking a back up of Yahoo Mail account.
Watch Now: How to create Yahoo mail app password?
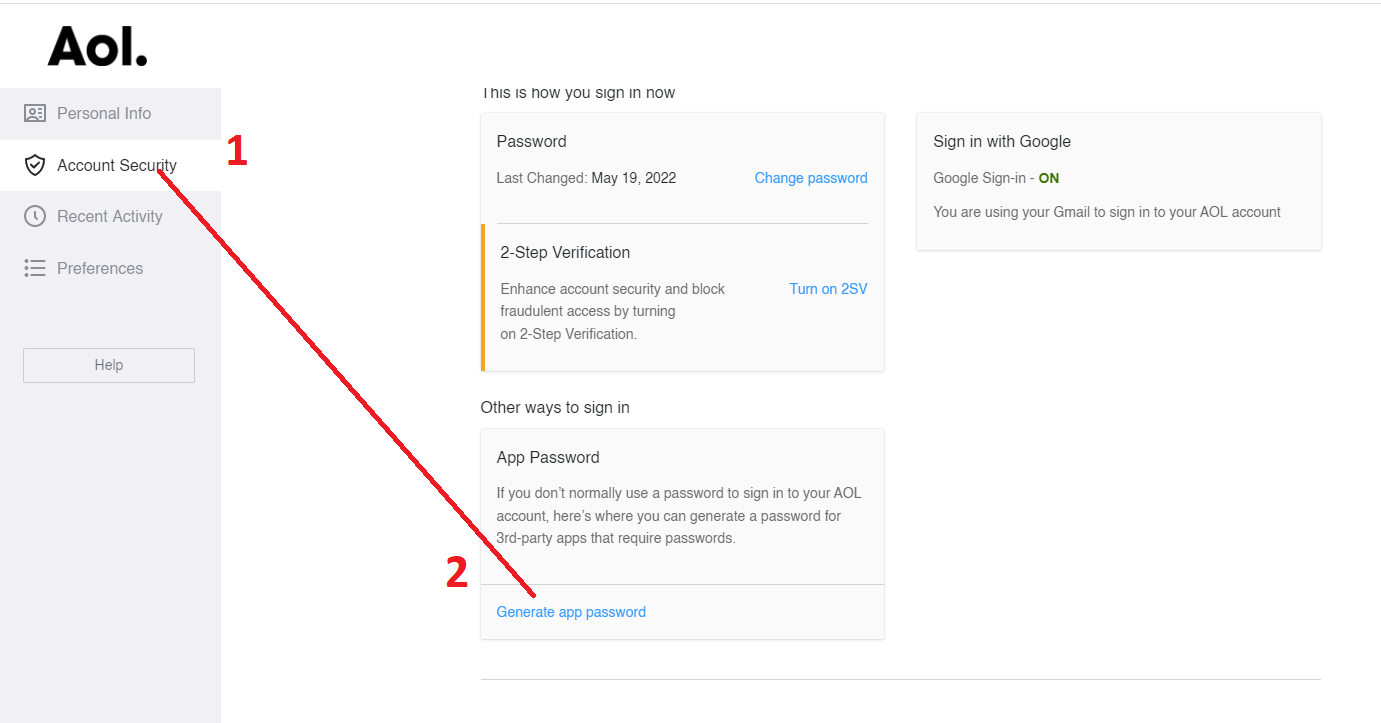
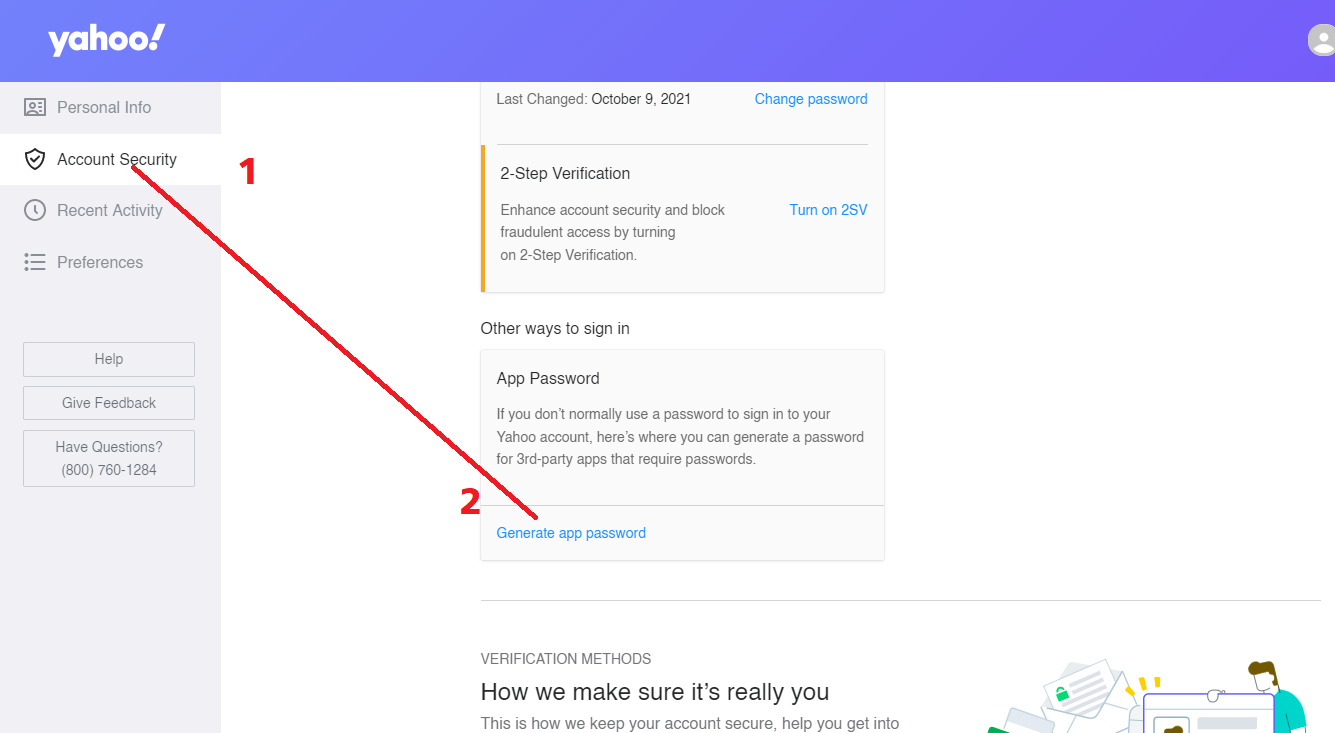
Generate Yahoo App Password
- Sign-in (Yahoo Account Security Page) >>Press Generate app password.
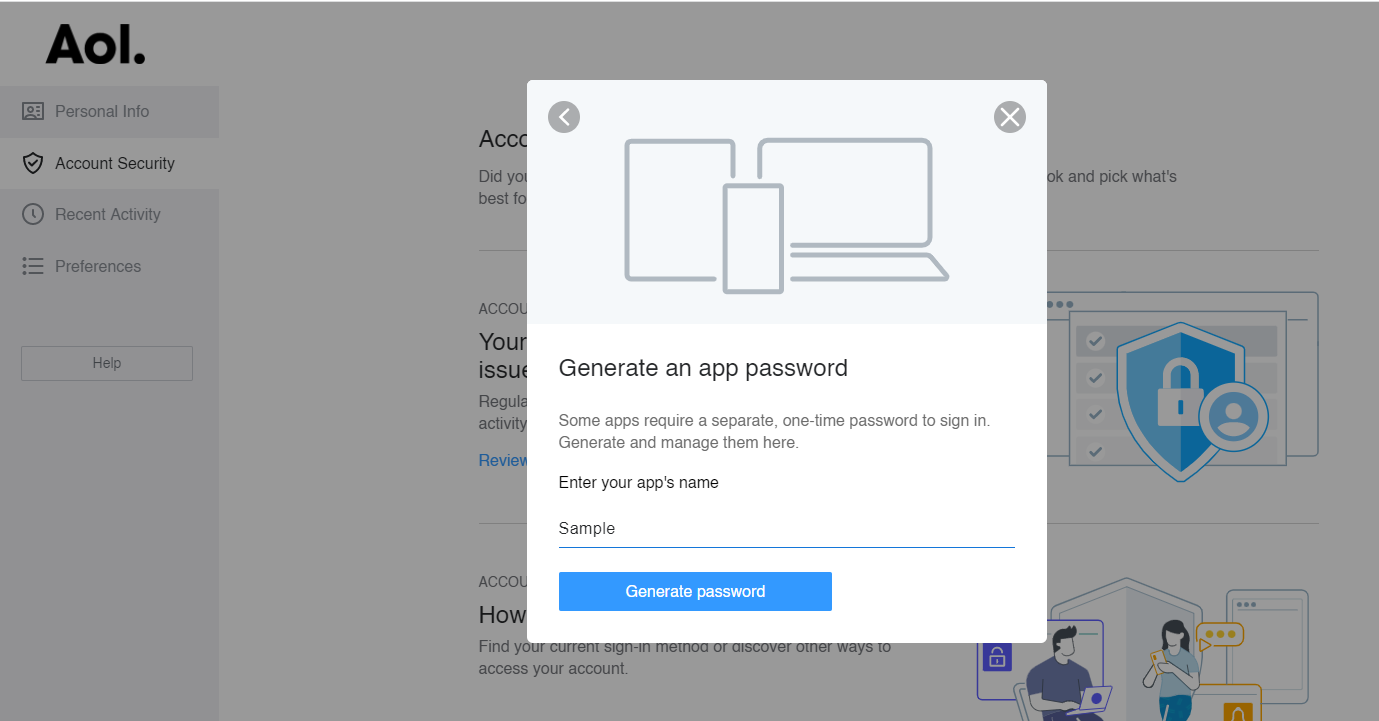
- Enter app's name and Click Generate password.
- Follow the instructions below the app password and last Click on the Done button.
Yandex Setting for IMAP Backup
Read here all the steps before taking a backup of Yandex email client.
Enable IMAP option
- Login to Yandex mail >> Click on the “ gear icon”.
- Click on “Other” >>Select “Email Clients” Menu.
- Enable “From the imap.yandex.com server via IMAP” then click on Save changes.
Generate App Password
- Login to Yandex mail >> “Profile icon” top-right corner.
- Select the “Account Settings” option >> click on “Create an app password”.
- Select “Mail” and enter the name of the password for access to Mail.
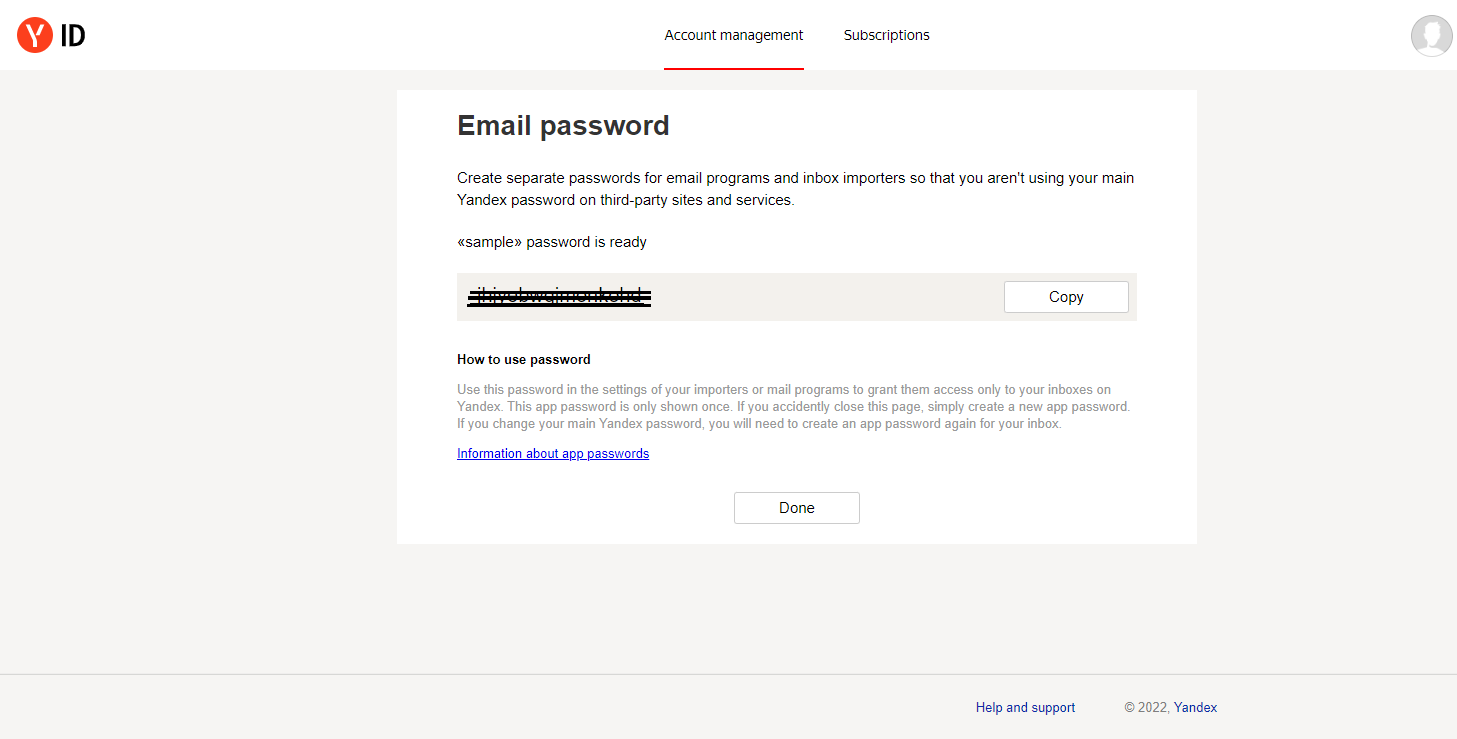
- Hit on the “Create” button then copy and use this password in the software field.
Zoho IMAP Backup Setting
Before proceeding with the backup, check all the settings and troubleshooting steps here.
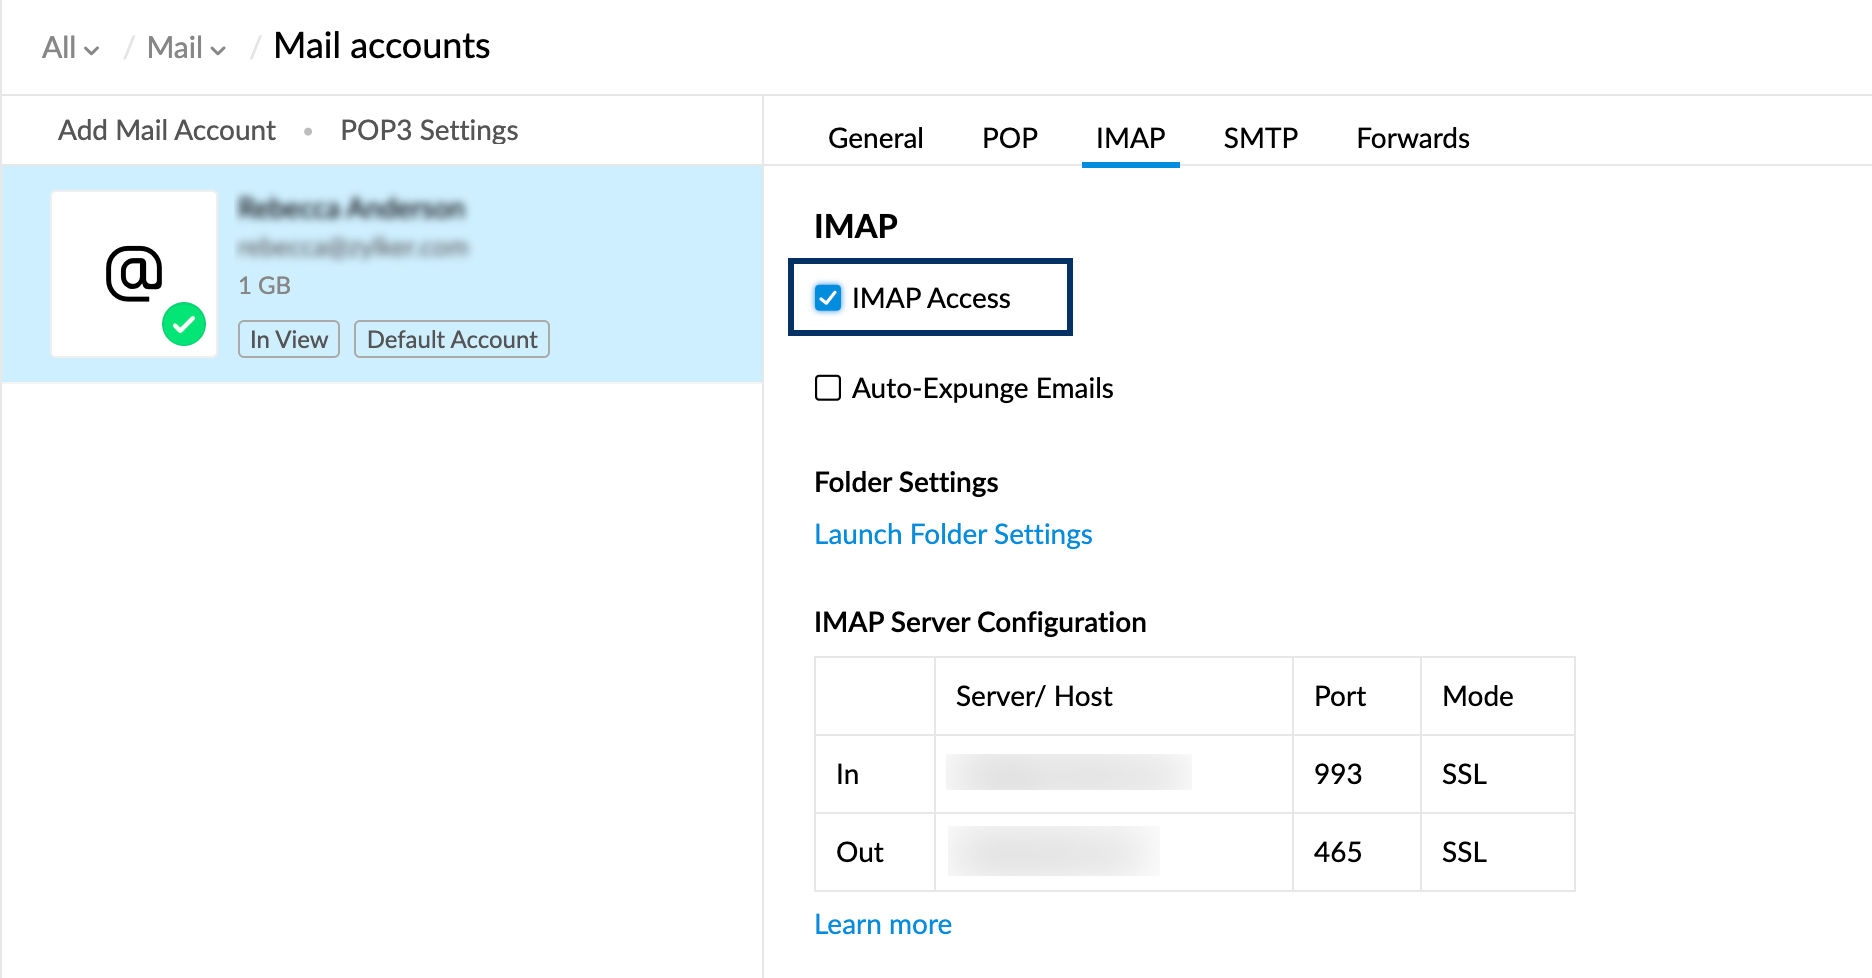
Enable IMAP protocol
- Open Zoho Mail >> Go to the upper right-side corner and click on the Gear icon for settings.
- Select IMAP Access under Mail accounts then, select IMAP under your email address.
- Enable IMAP Access by ticking the box.
Create Password
- Open Zoho Account >> Security >> App Password.
- Click on Generate New Password >> Enter the software or whatever you can keep remember and then click on the Generate button.
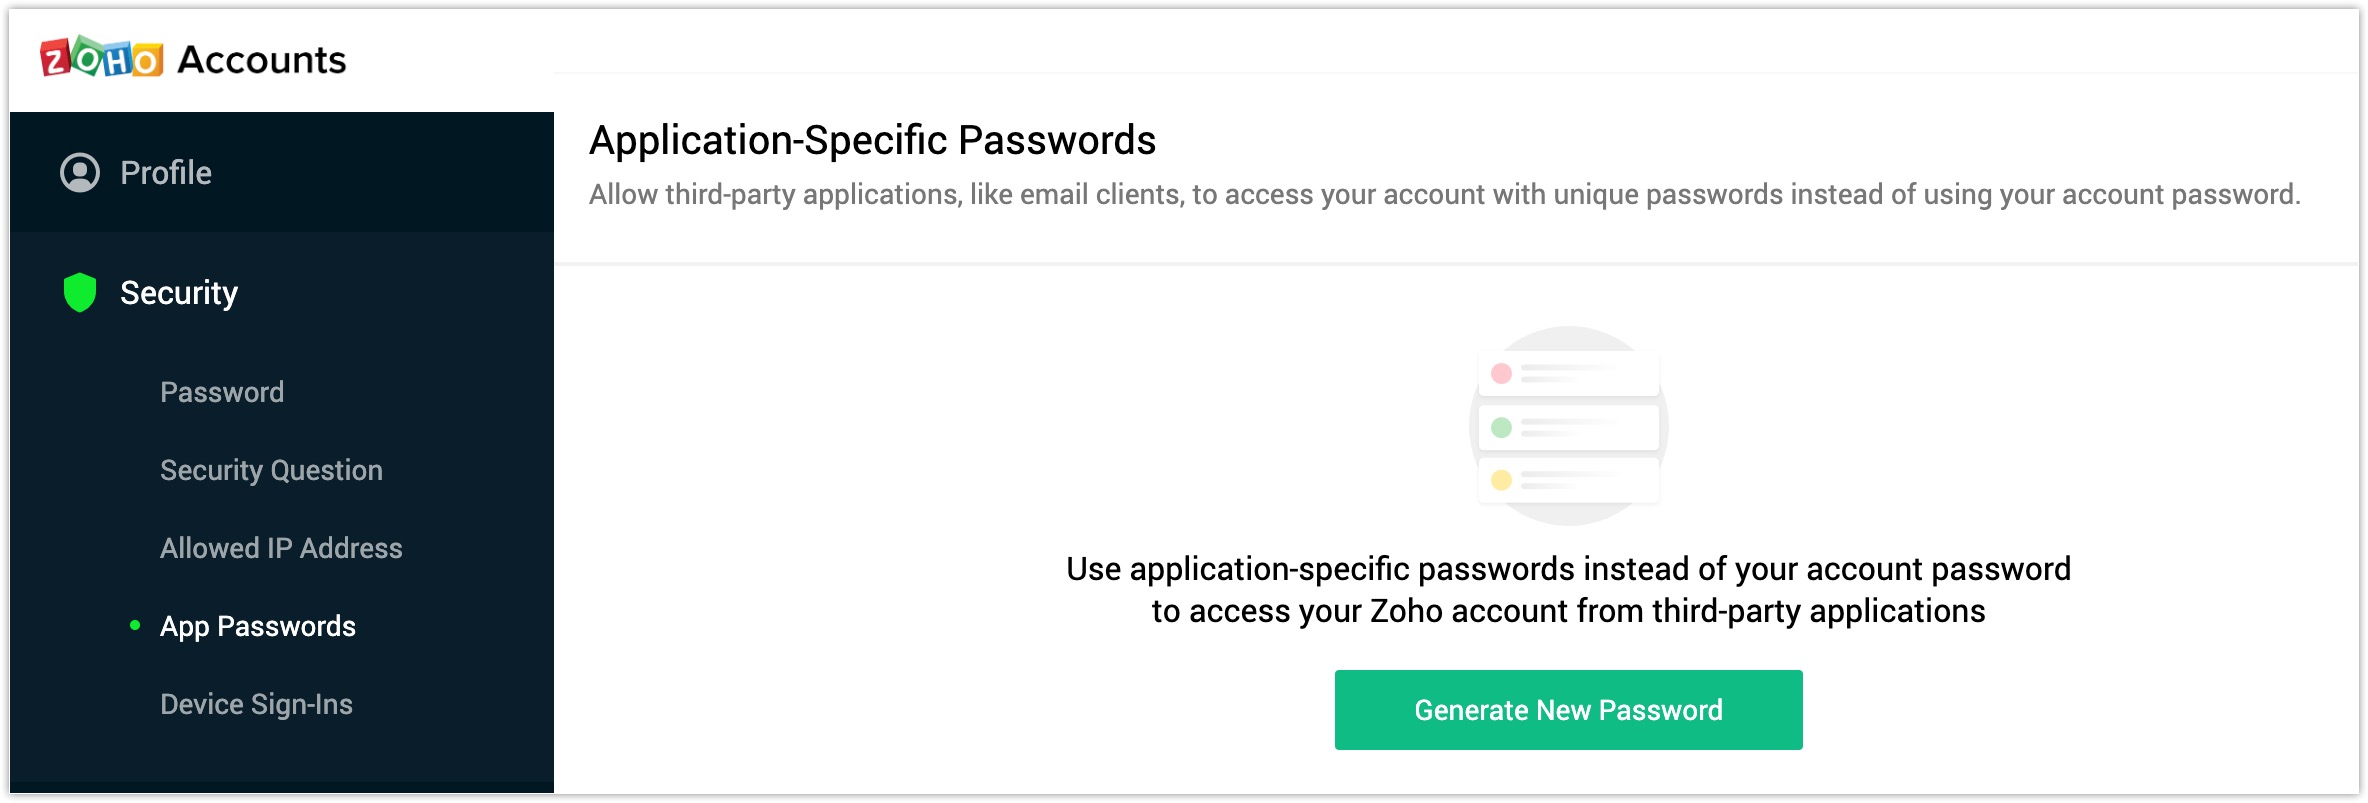
- Copy the application-specific password >> paste it into the software field.
Backup of iCloud IMAP mailbox
Read all the setting and troubleshooting steps before taking a backup of iCloud mailbox.
Generate App Specific Password
Login to your Apple ID and generate specific password for your iCloud backup.
- Sign in your Apple ID account page with the credential
- Go to security section and hit on Generate Password
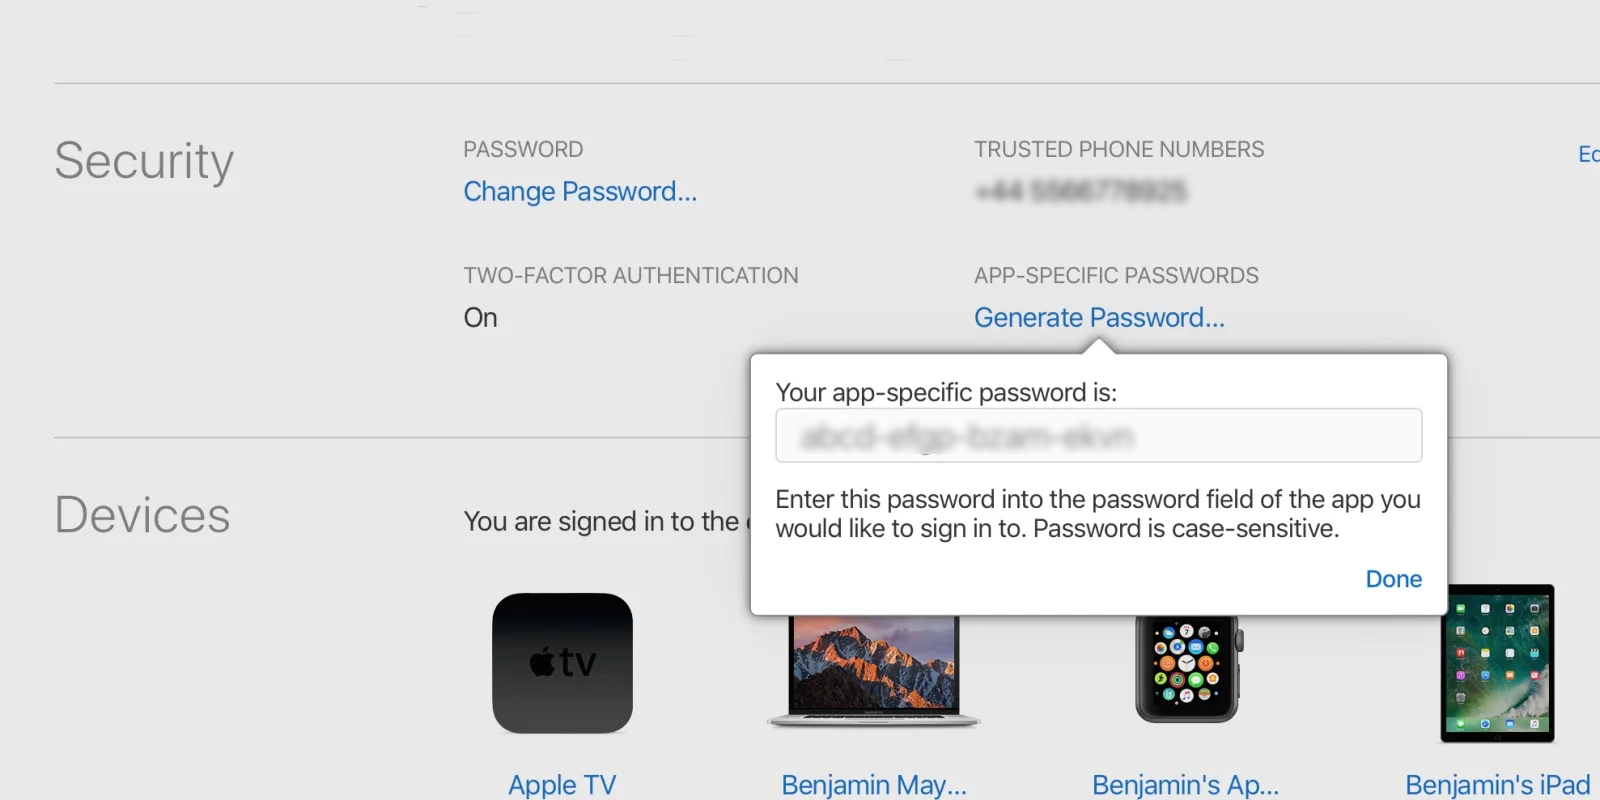
- Name a lable for the password so that you can memorize it.
- Once the specific password is created, copy and simply paste it in software password field.
AT&T IMAP Backup
Check all setting and troubleshooting steps before backing up AT&T email client backup
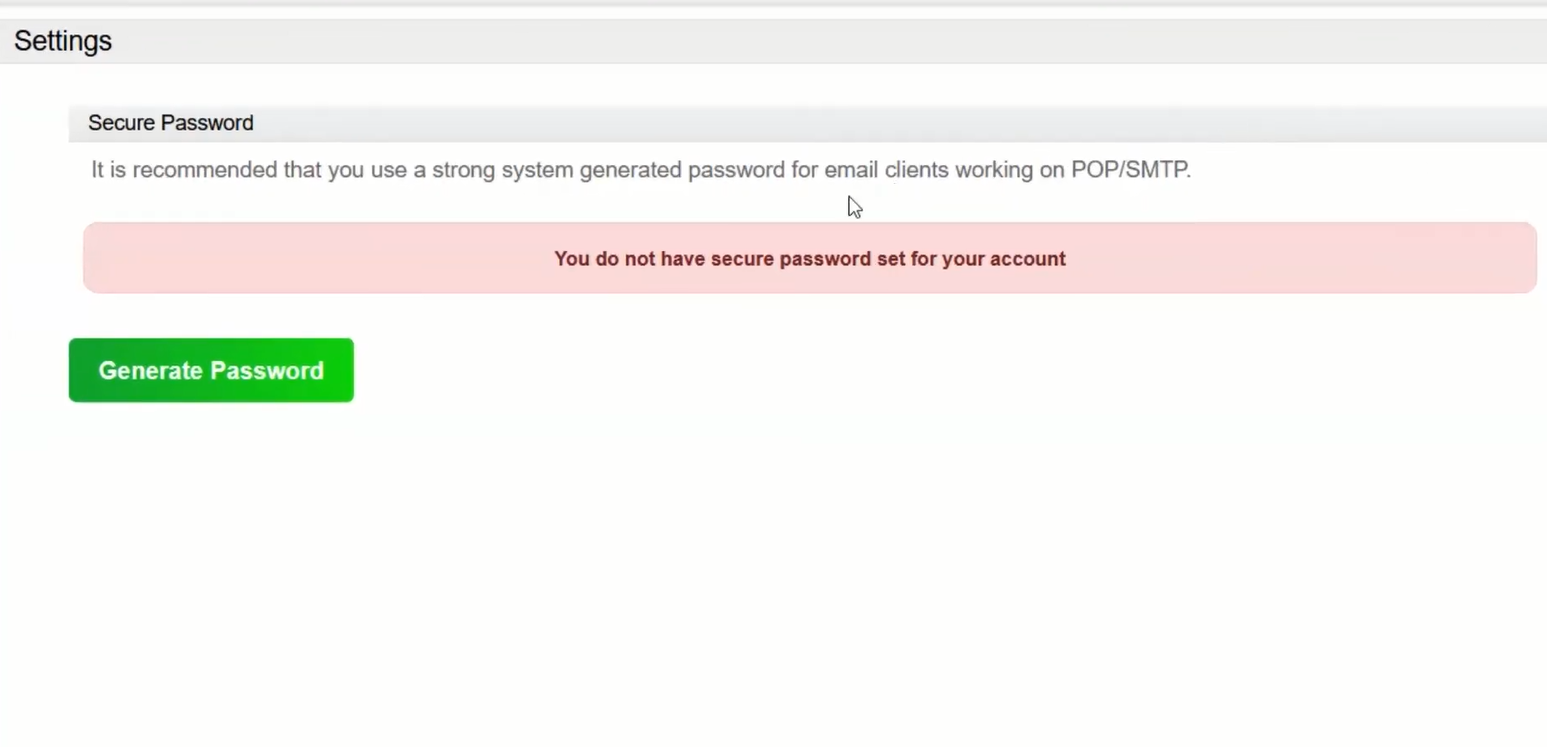
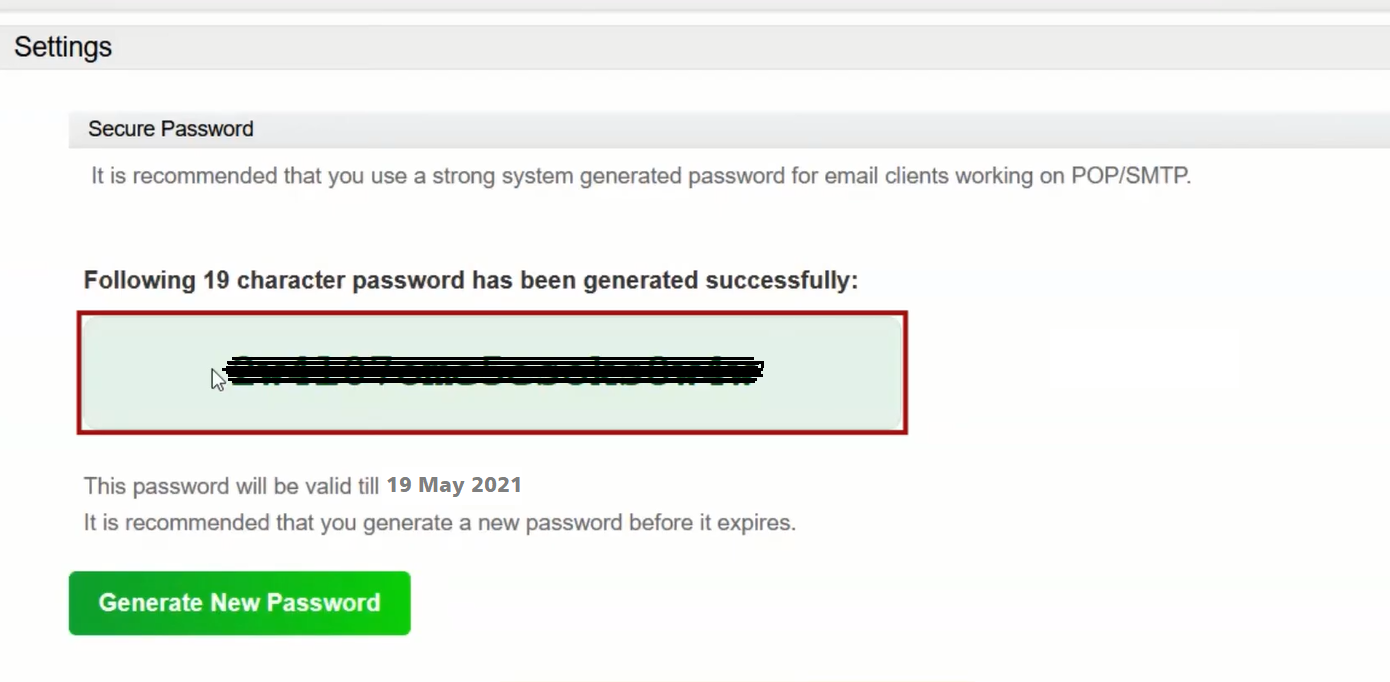
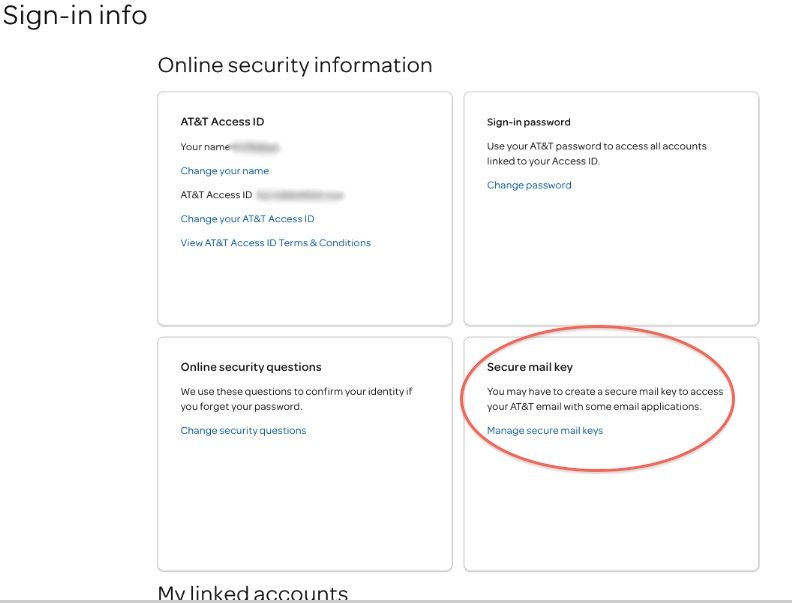
Generate Secure Mail key in AT&T
- It’s easy to create a secure mail key from your mobile device, tablet, or computer. Have your User ID and password ready to sign in to myAT&T.
- Login your AT&T email account with any alternative domain: @ameritech.net, @att.net, @pacbell.net, @prodigy.net, @sbcglobal.net, @snet.net, etc.
- Go to Profile >> Sign-in info
- Select your email account
- Go to "Secure mail key" window and press "Manage secure mail keys".
- Select your email address >> click on "Add secure mail key" then name it to recognize it somehow.
- Select "Create secure mail key" >> press "Copy secure mail key to clipboard"
- Hit on OK button and paste the password in the software window.