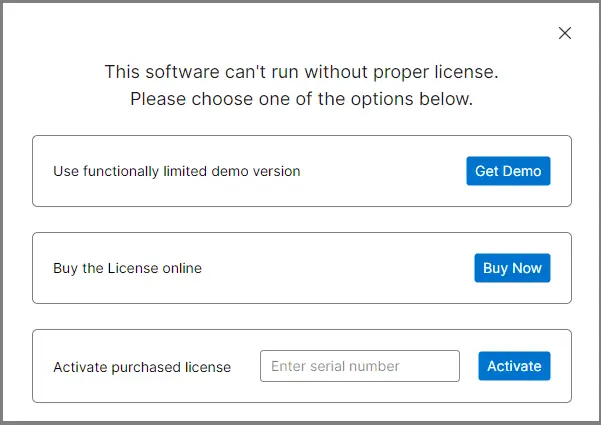
Step 1: First, download and launch the PST to Gmail migration tool on your system. Click on the 'Get Demo' or Activate (if a license is available) button. The tool will restart automatically.
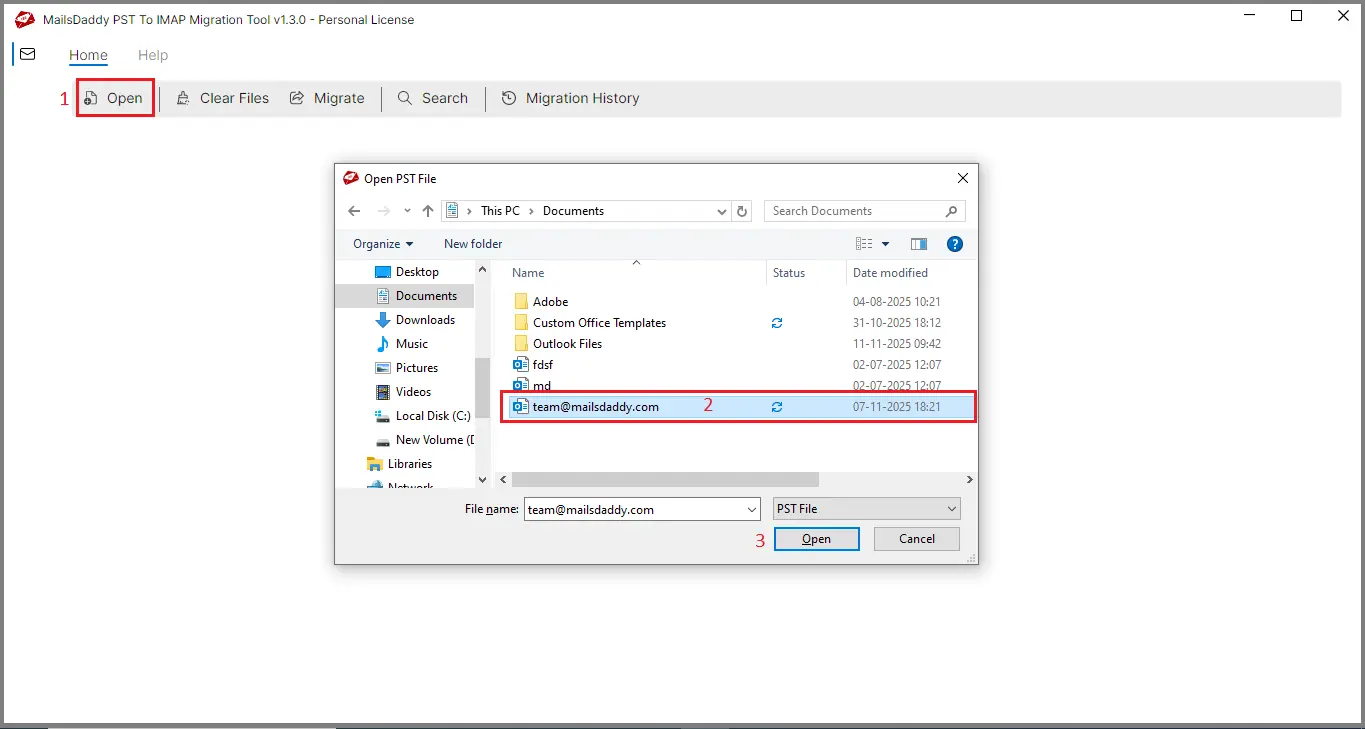
Step 2: Click on Open and browse the PST file that you want to upload to the Gmail account.
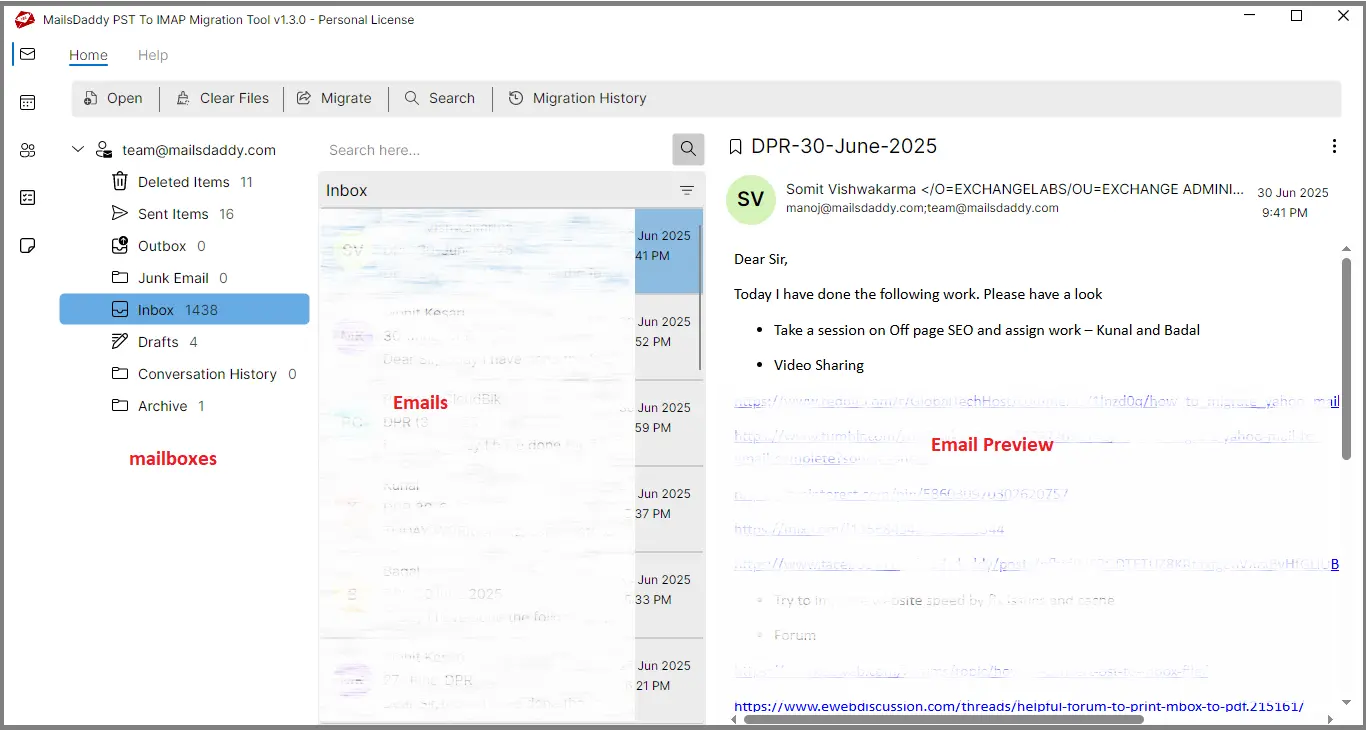
Step 3: The software will scan the PST file and show complete PST file content in the preview section.
Step 4: Go to the Migration tab and choose all or selected folders from the left panel.
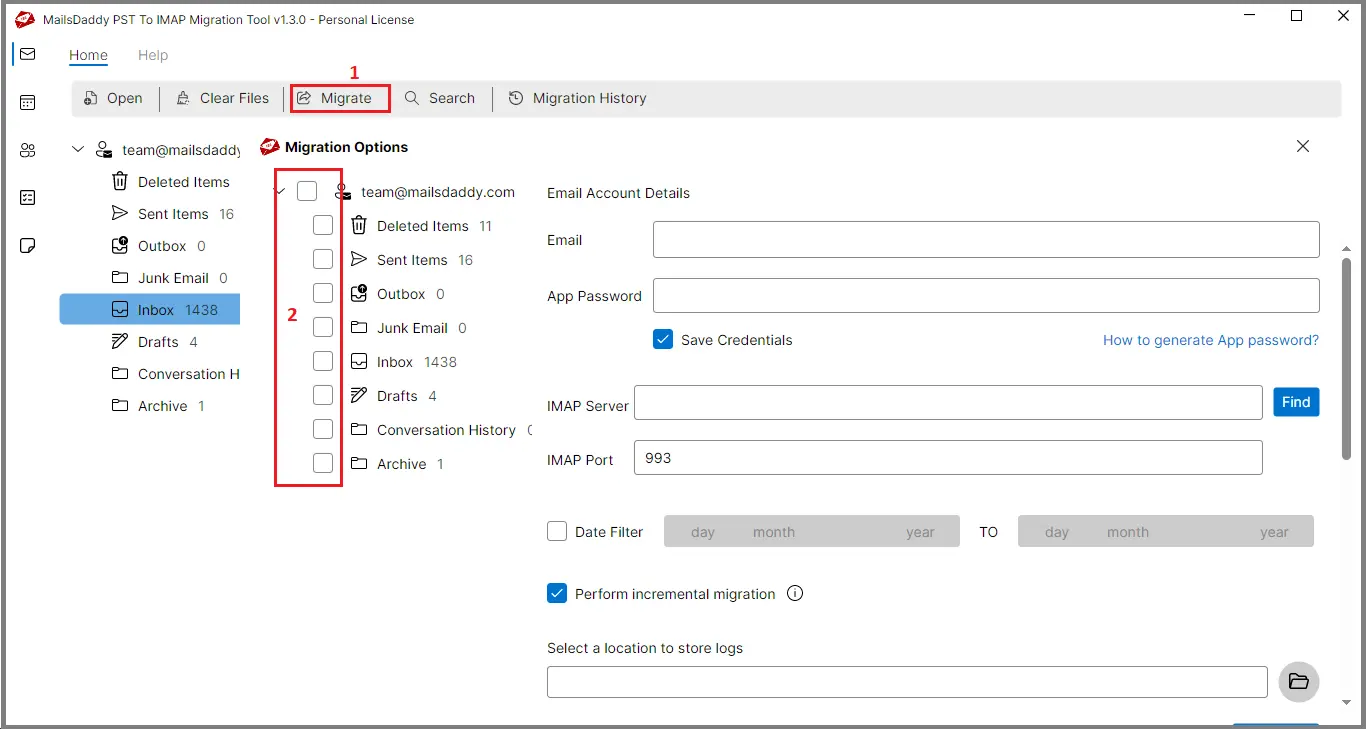
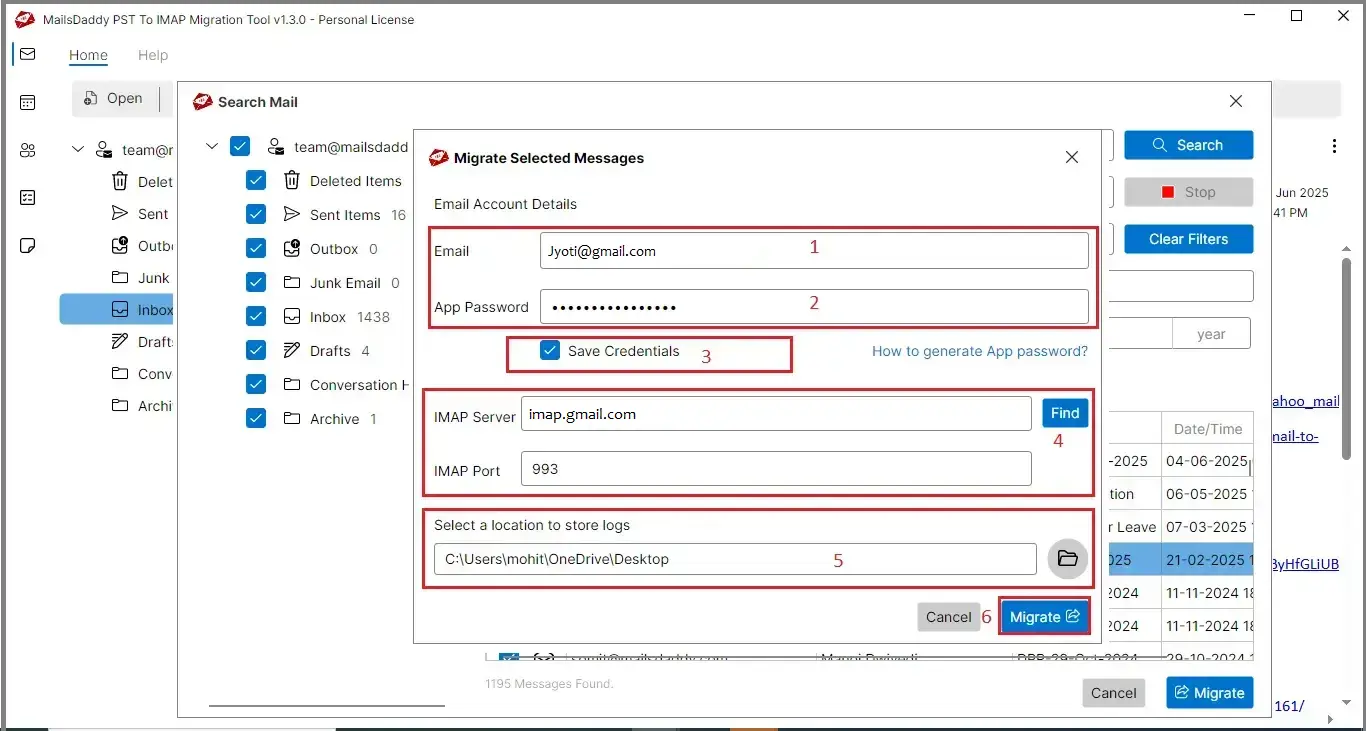
Step 5: Enter your Gmail address and App Password. If you don't know the app password or need help generating one, click on How to Generate App Password.
Step 6: If you want to Save your login detail for future migrations, enable this option; otherwise, keep it disabled.
Step 7: The software automatically detects the Gmail details. If server details don't appear, click on Find.
Step 8: If you want to export emails from a specific range, use the Date filter option; otherwise, ignore this option.
Step 9: Turn on the 'Perform Incremental Migration' option if you want the software to skip duplicate emails already available on the Gmail account. Enable this only if necessary.
Step 10: Click on the Browse icon to choose where you want to save the log report file.
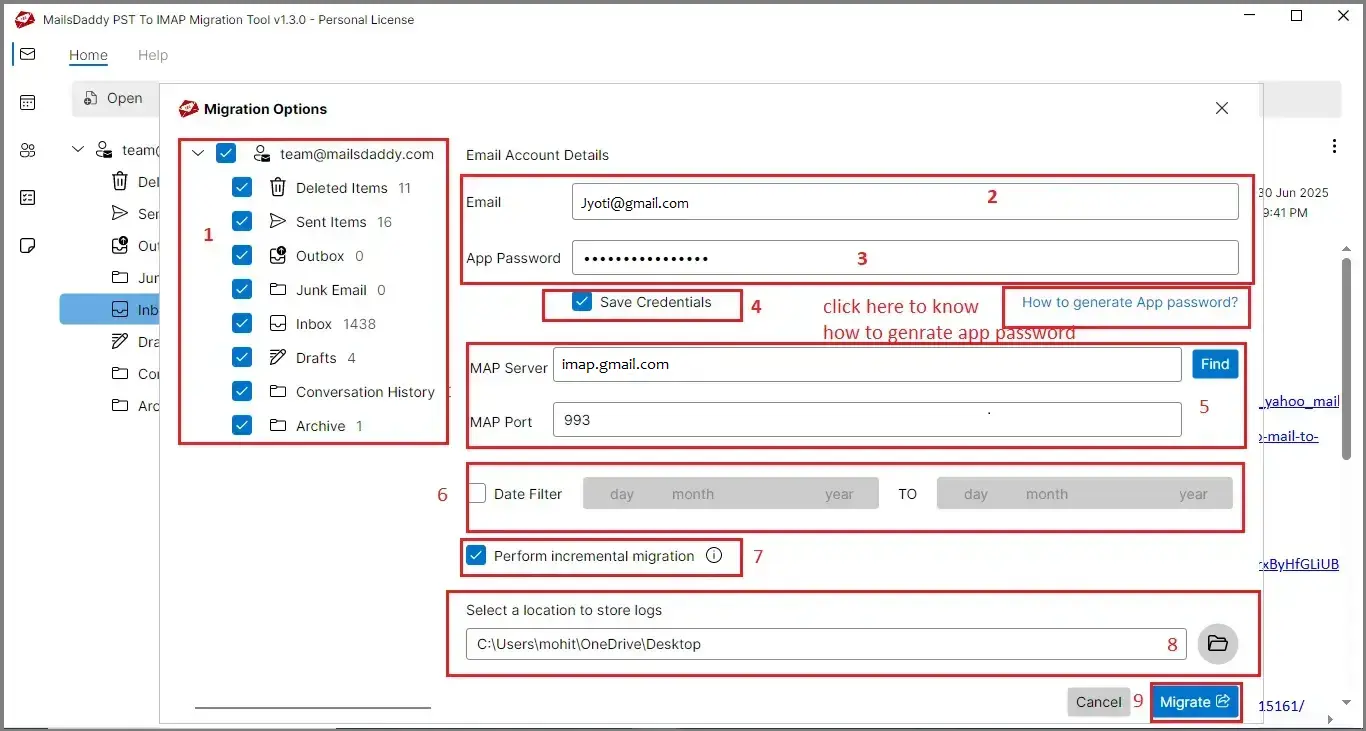
Step 11: Finally, click the Migrate button to begin the migration. Wait until the process finishes successfully.
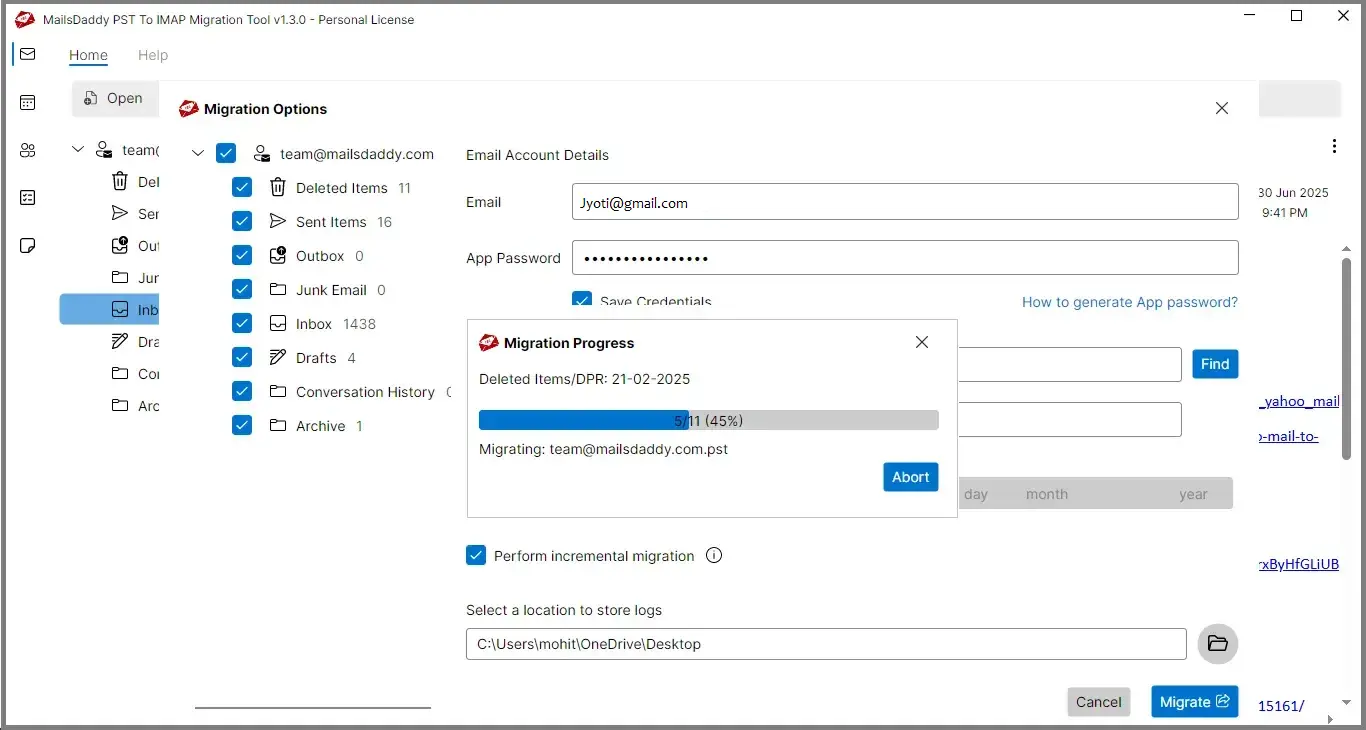
This will show you all the required data, but you must have a valid license to export.
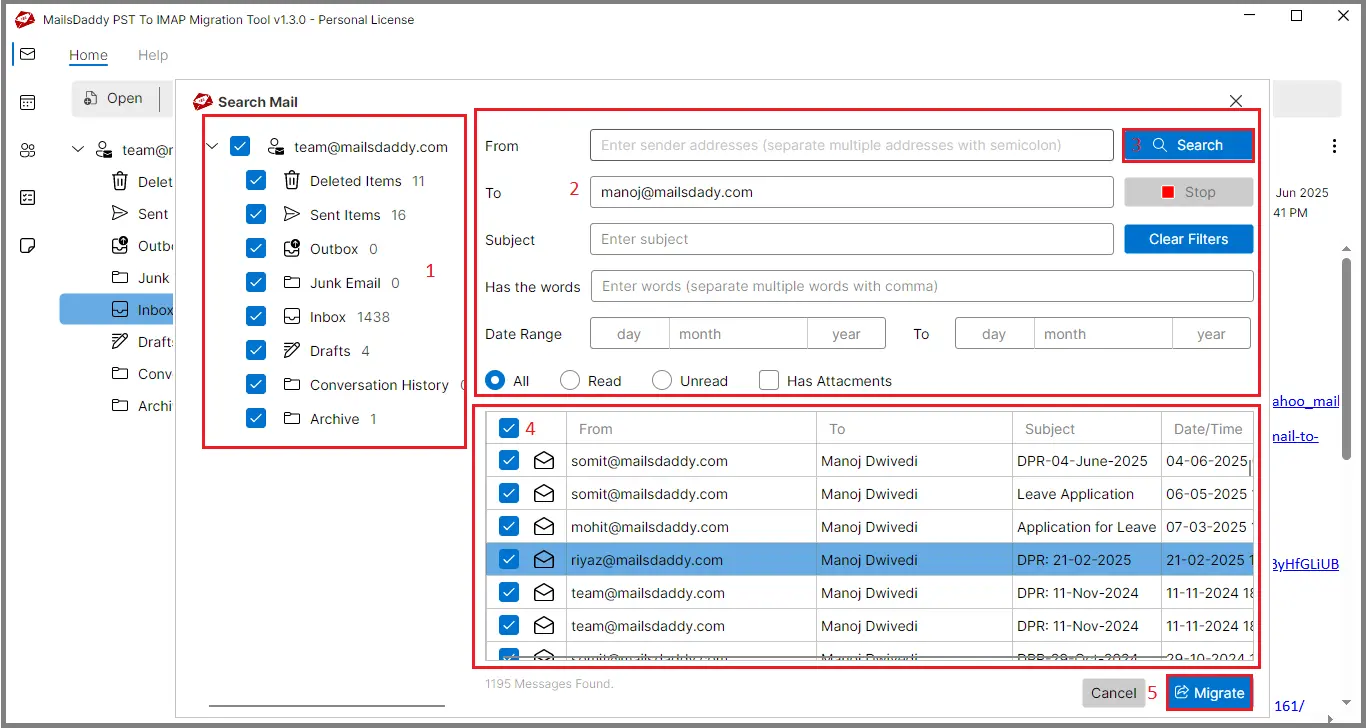
Step 1: If you want to migrate any specific data from PST to Gmail, click on the Search tab.
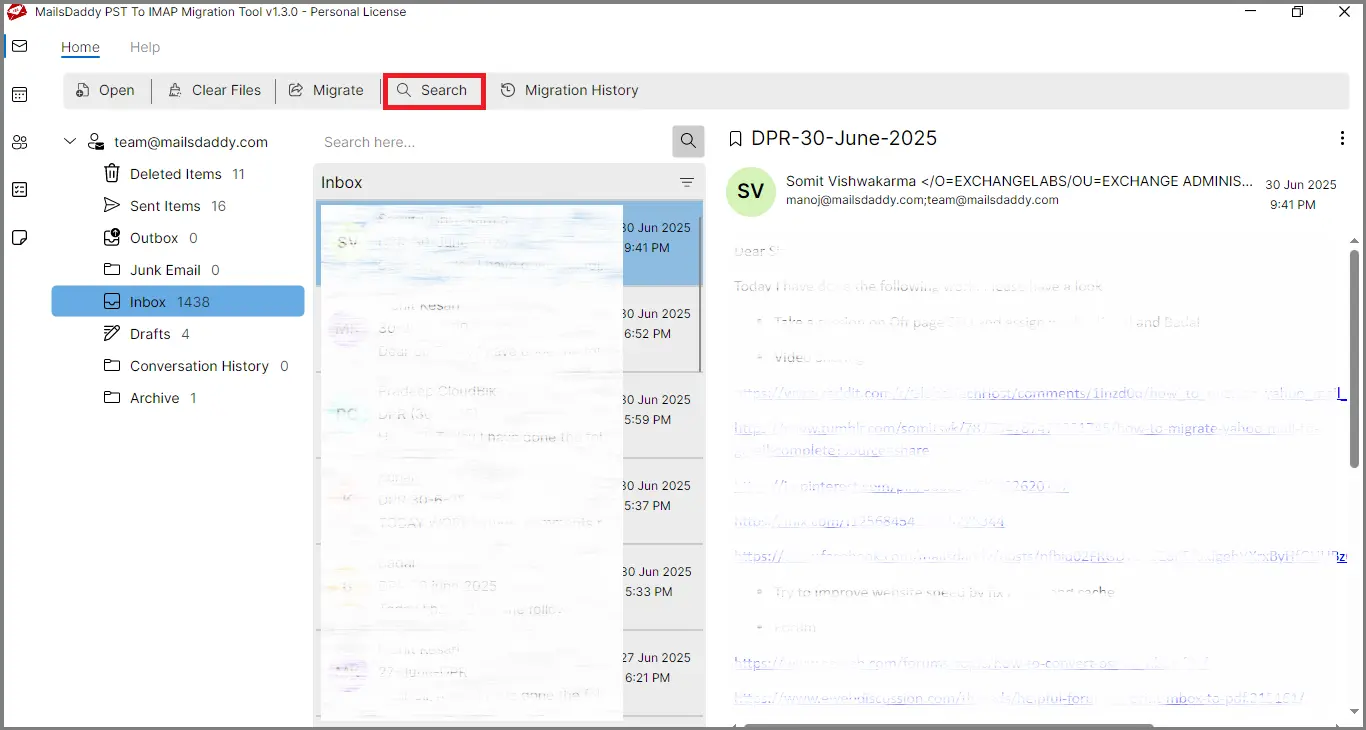
Step 2: Select the folders you want to search in. Apply the Filter option (from, to, subject, date range, and other) as per your need and click on search.
Step 3: You can get all the filtered emails below. Double-click on any email to preview it.
Step 4: Choose the emails you want to export and click on the Migrate button. .
Step 5: Enter the Gmail login details and verify the server details. Set the log file location and click on Migrate button to begin the migration.
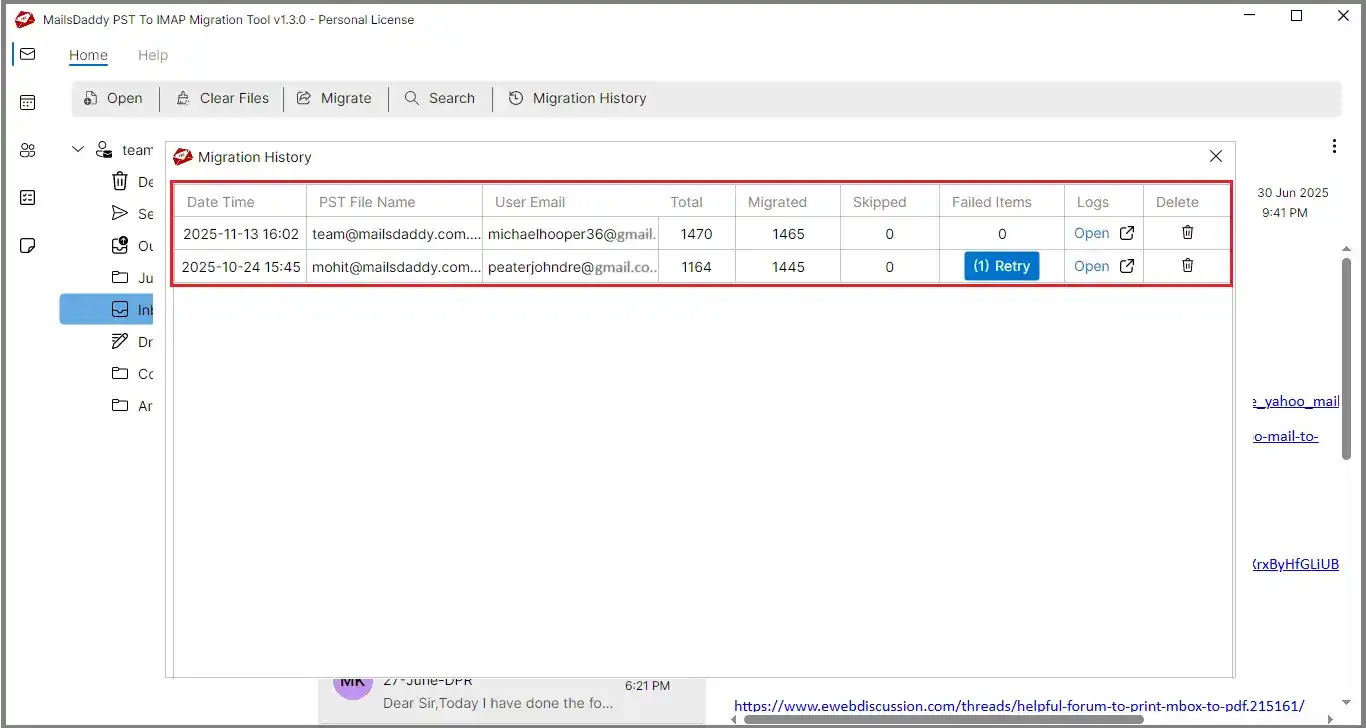
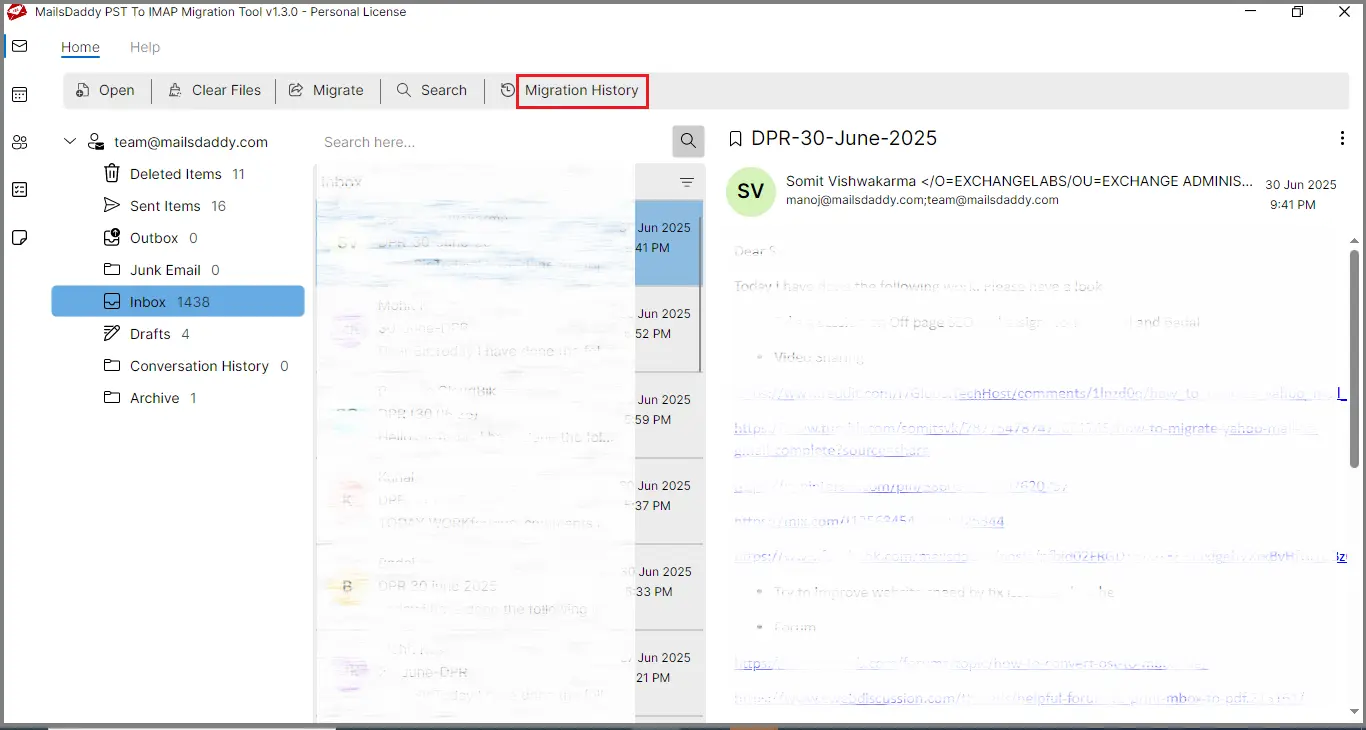
Step 1: After that migration process is complete, you can check the status of email migration under the Migration History tab. Here you will get: Migration start time, PST file name, Gmail account, Total email count, Migrated emails, Skipped items, and Failed item details.
Step 2: If any emails did not migrate, click on the Retry button. Verify all Gmail login details and other information and then start the migration again.