PST to Office 365 Migration Tool
How to Import PST Data into Exchange Online with Impersonation?
This step by step guidance will help you understand how to import PST data into Exchange Online with Impersonation. By using this option you will able to perform migration of multiple mailboxes without requiring their passwords. In order to use Impersonate Export Option users must have ApplicationImpersonation rights and Full Access to the Admin Account. Check how to provide ApplicationImpersonation & Full Access to O365 mailboxes.
Follow the given below instructions for using Impersonation Export feature and import multiple PST files in a few click.
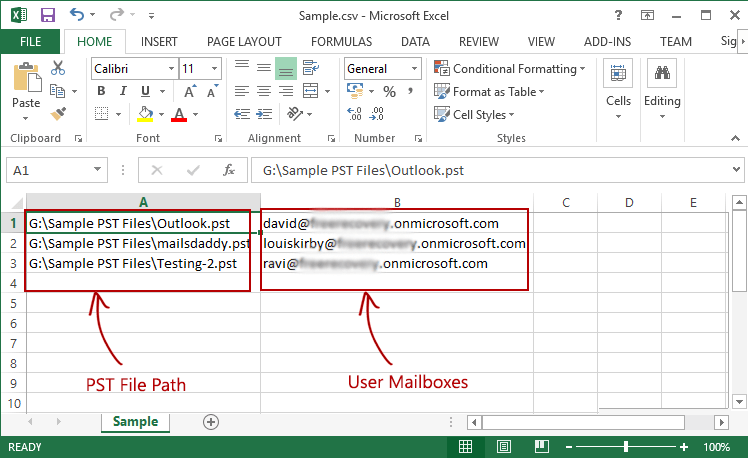
Step 1: In the very first step, create a CSV file which contains PST file Path and Office365 user mailbox where you want to import PST file data as shown in following screenshot.
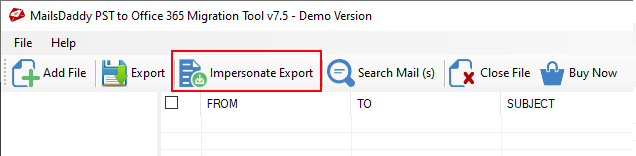
Step 2: Now launch MailsDaddy PST to Office 365 migration tool and click on Impersonation Export button.
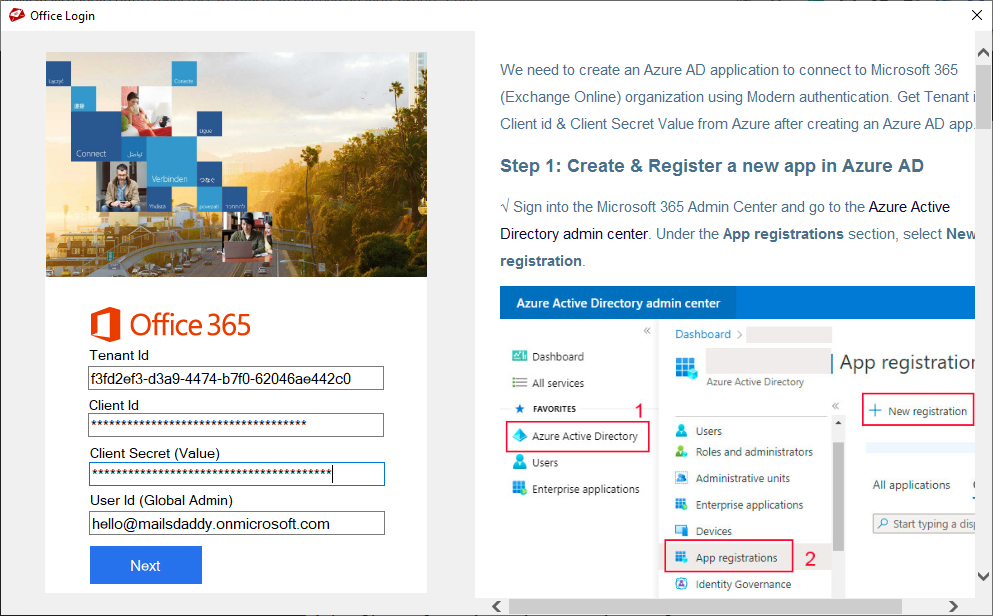
Step 3: In the next step, provide Office 365 admin login credentials and click on Login button
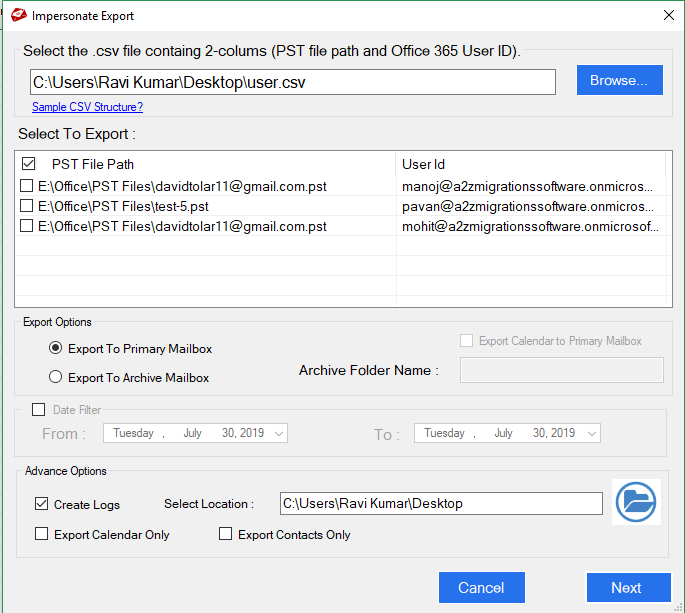
Step 4: Another screen will pop-ups on window. Just click on the browse button and select CSV file you have created for this Import job. Also select required option from Export options and click on the Next button.
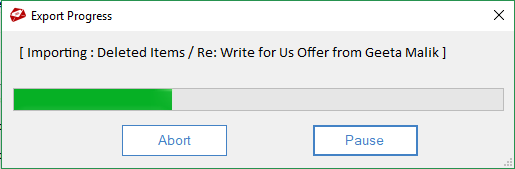
Step 5: The software will import selected PST files into their corresponding Exchange Online mailboxes. You can check the status through progress bar.
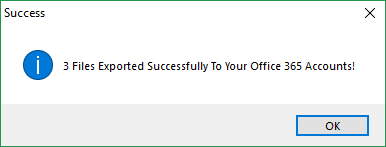
Step 6: Let the process to be finished and thus you will get PST file data imported successfully into your Exchange Online mailboxes.