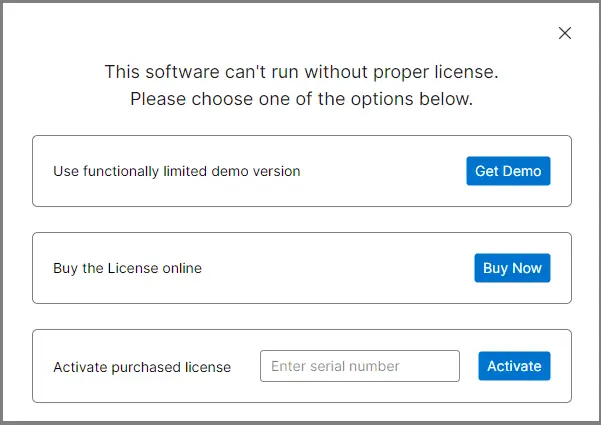
Step 1: Download and install the software from the official MailsDaddy website. Open it and either select “Get Demo” or enter your license key and click “Activate.” The tool will restart automatically after activation.
Step 2: Click the “Open” button, browse your system, and select the Outlook PST file you want to import PST to Zoho Mail

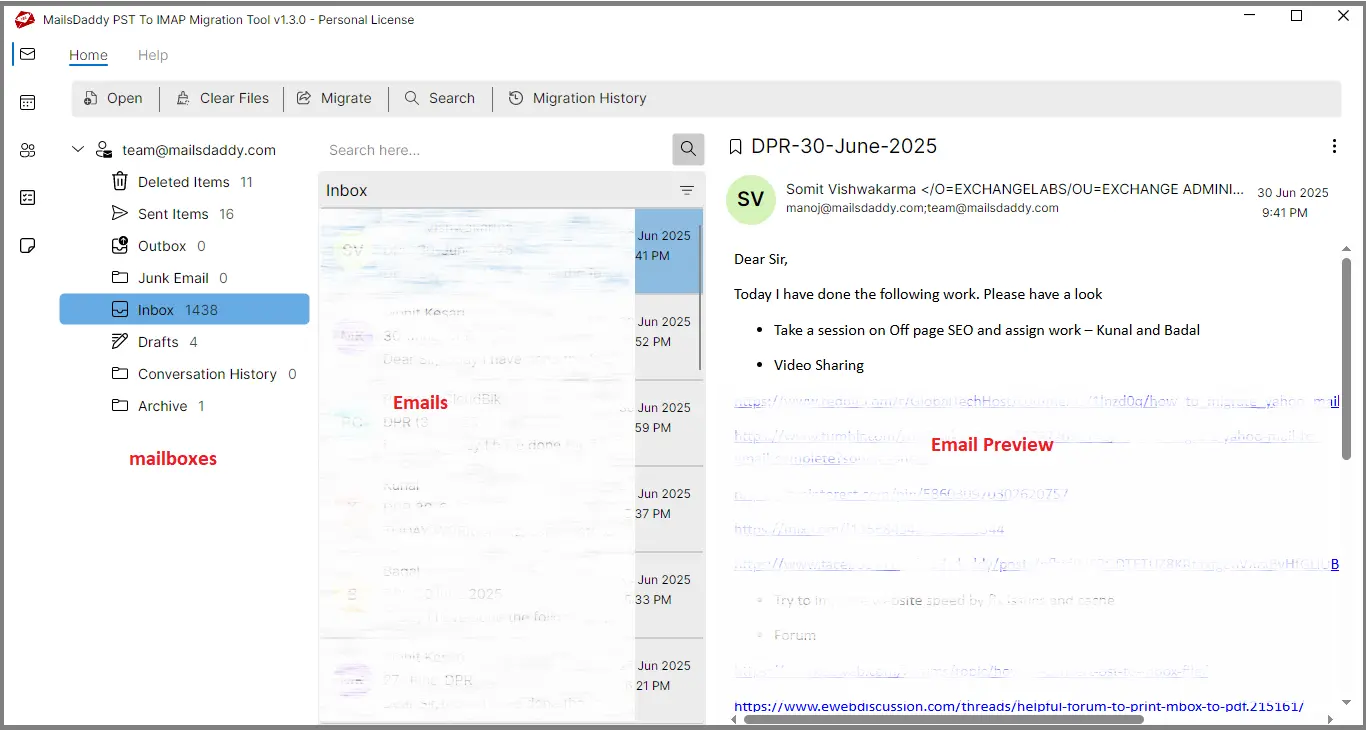
Step 3: The tool will now scan the PST file and display a complete preview of all mailboxes, emails, and items.
Step 4: Click the “Migrate” button, then select either all folders or specific folders from the left panel to migrate outlook PST file to Zoho Mail.
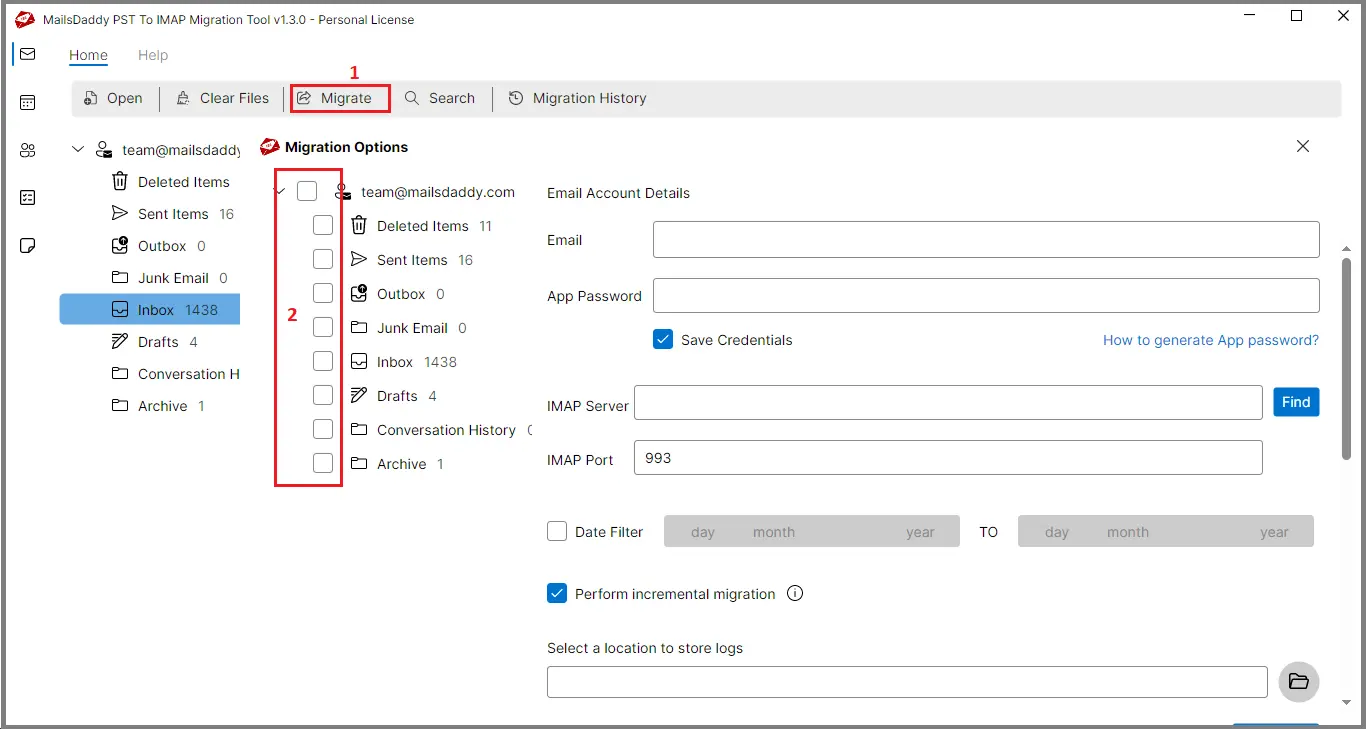
Step 5: Enter your email address and App Password. If you’re not sure how to generate an app password, click on How to generate App Password.
Step 6: . Enable Save Credentials if you want the tool to remember your login details for future migrations; otherwise, keep it turned off. The tool will auto-detect your IMAP server details. If the server name doesn’t appear, click Find to fetch it manually. You can also use the Date Filter option if you want to migrate emails within a specific date range. If not required, leave it unchecked.
Step 7: Enable Perform Incremental Migration to skip duplicate emails during migration. Turn this on only if you want to avoid transfierring the same emails again.
Step 8: Click on the browse button to choose the path of the log file where you want to save.
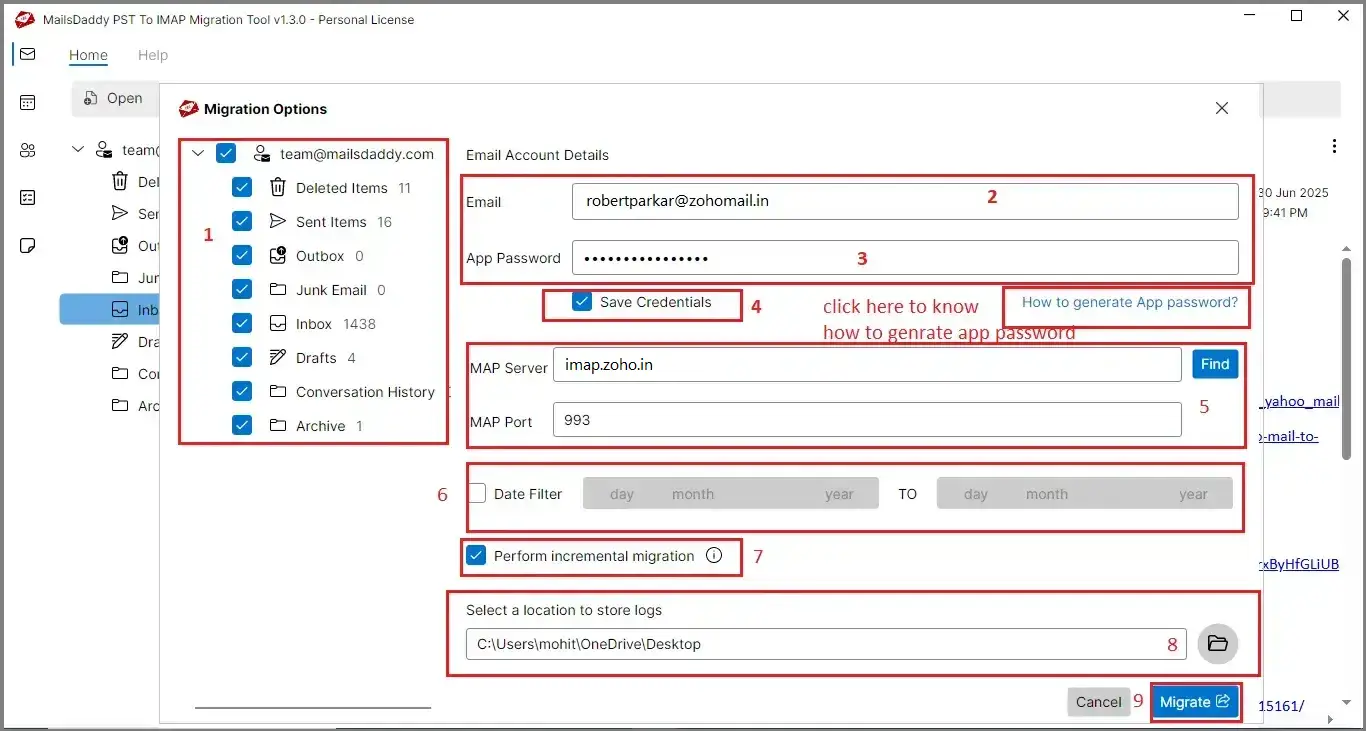
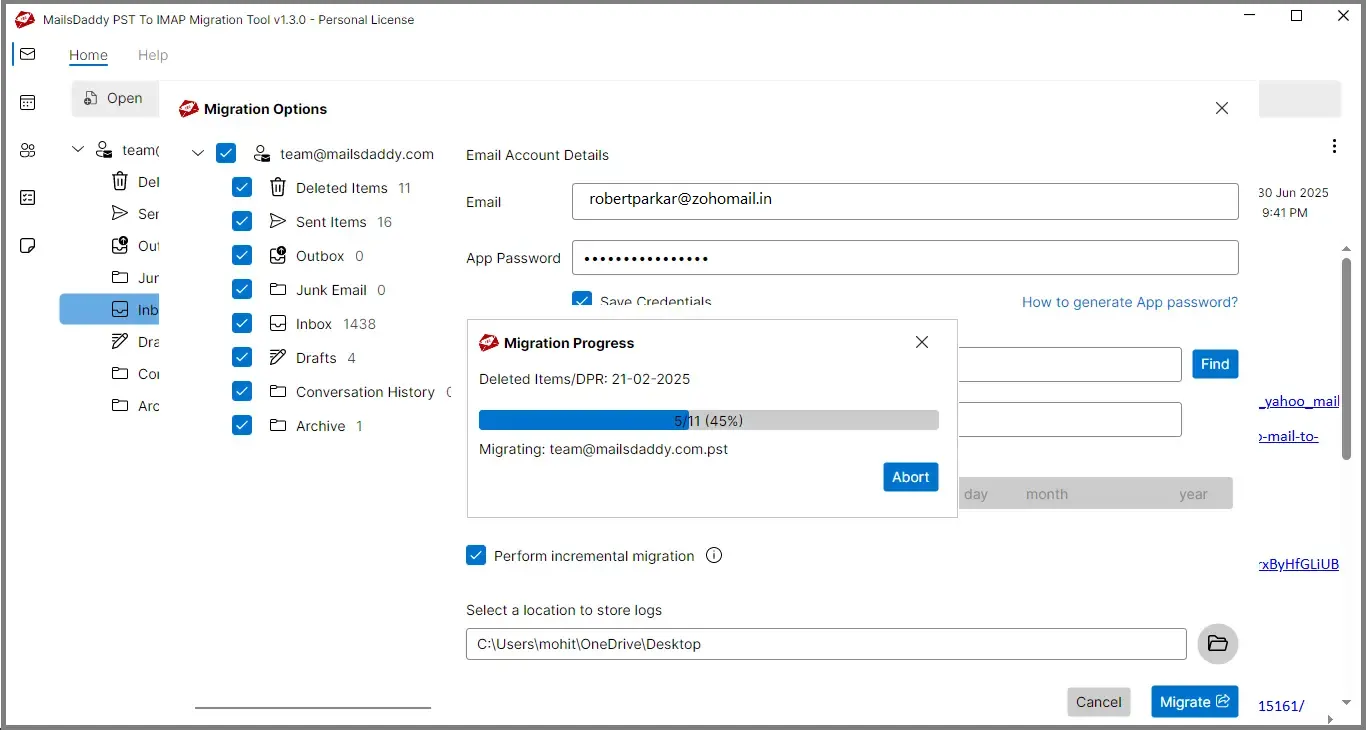
Step 9: Now, click on the “Migrate” button to start the migration process or transfer PST mailbox to Zoho Mail and wait for the process to complete.
Required Data Migration: (This section displays all filtered data, but a valid license is needed to migrate the filtered items.)
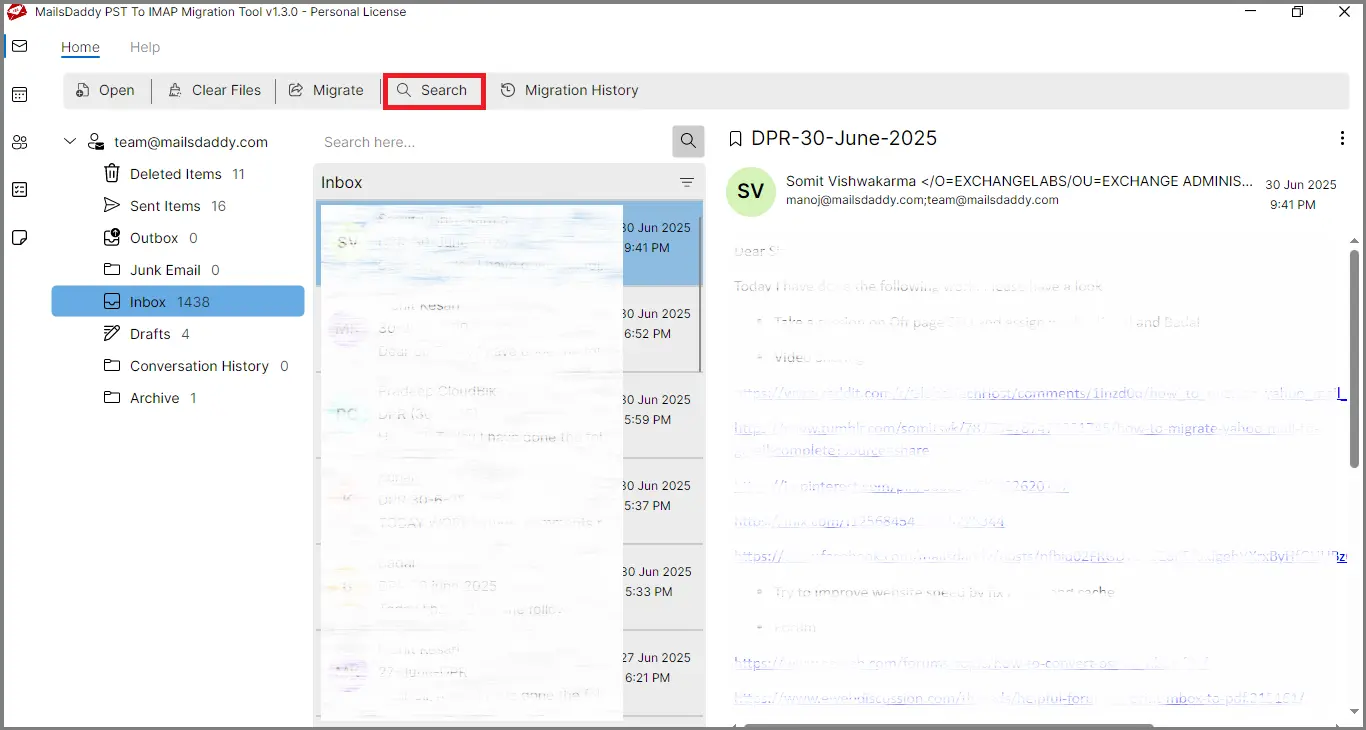
Step 1: To import only particular emails or items, click on the “Search” button.
Step 2: Now, on the left bar menu, select the specific or all folders and use the various filter options to filter out the data like From, To, Subject, Has the words, Date range, and others as you want, and click on the search option.
Step 3: After the filter-out, you can now see the Emails are shown. to preview the email, double-click on it.
Step 4: Now select the emails by clicking on the check-box button and continue with the migrate button.
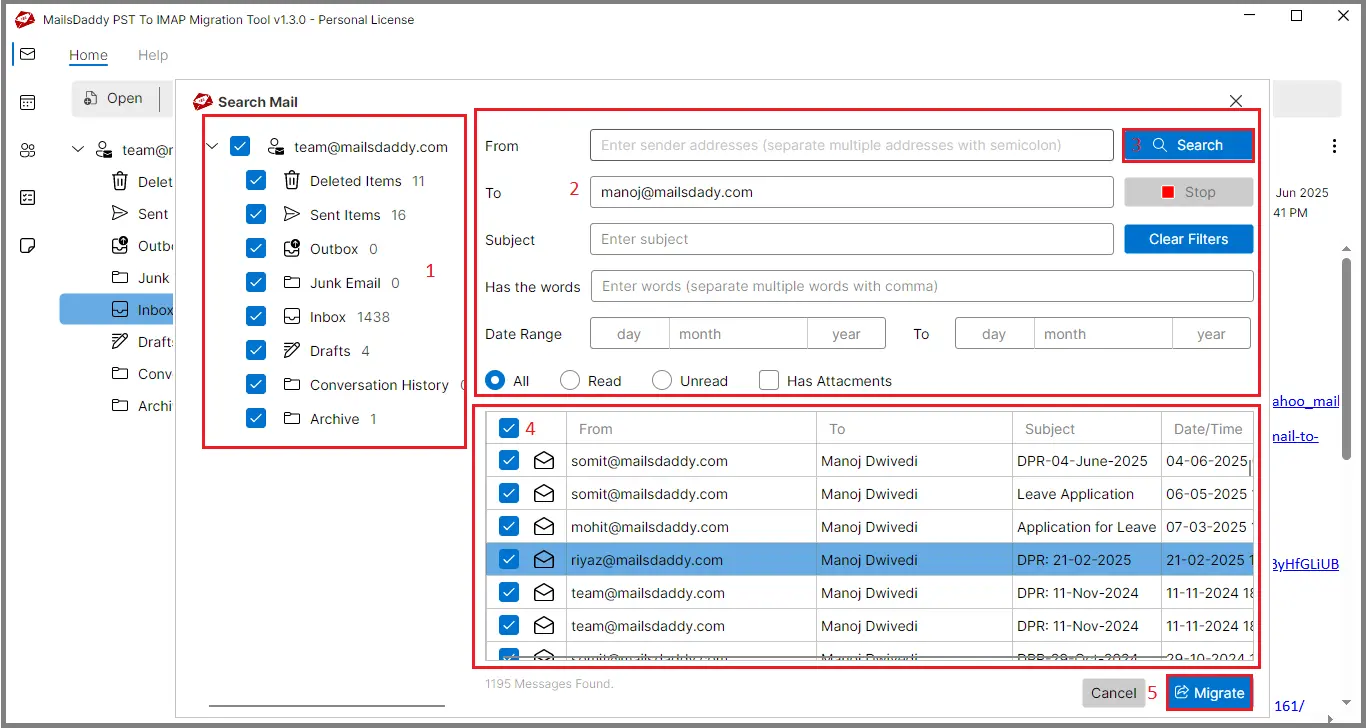
Step 5: Enter your account credentials, review the server details, choose a location to save the log file, and then click “Migration” to begin the process.

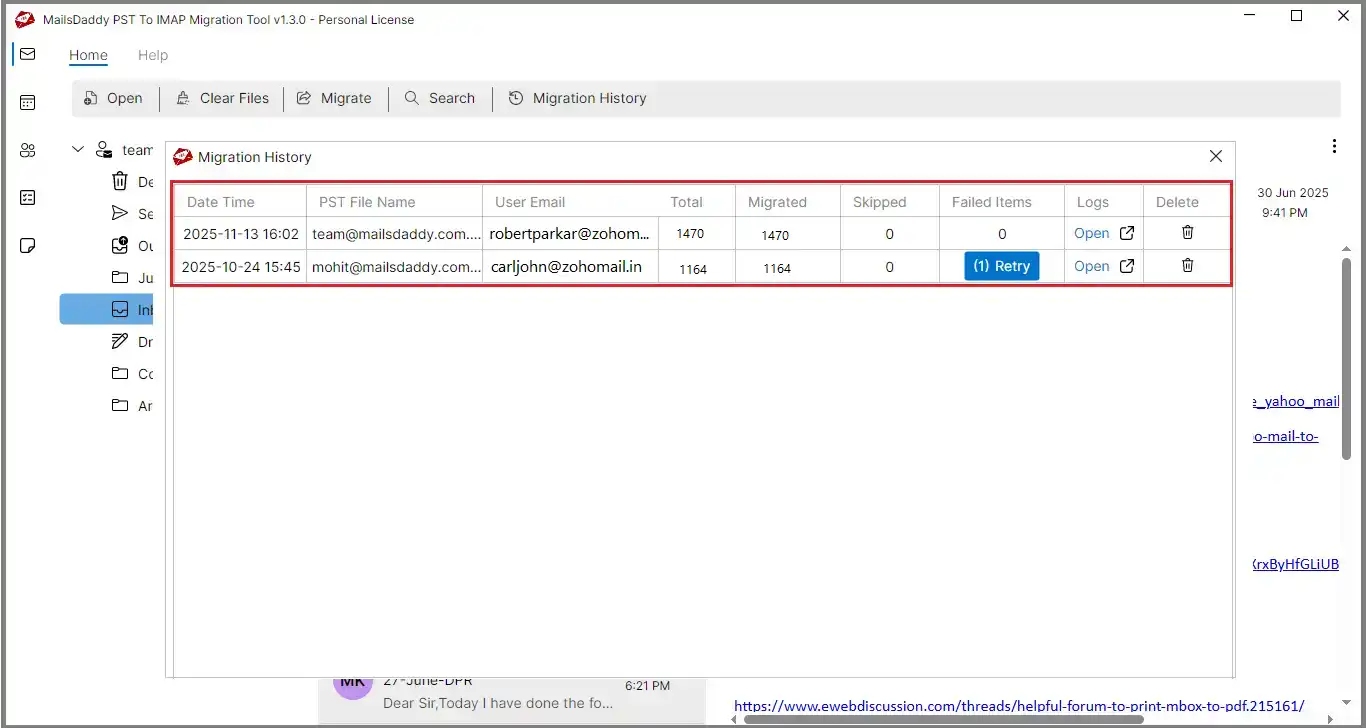
Step 1: Once the migration is complete, you can review the results by opening the “Migration History” tab. It displays key details such as the start time, PST file name, IMAP account used, total messages, migrated items, skipped emails, and any items that failed to transfer.
Step 2: If any emails fail to migrate, click the Retry button. Recheck your credentials and other settings, then click “Migrate” again to attempt the process once more.