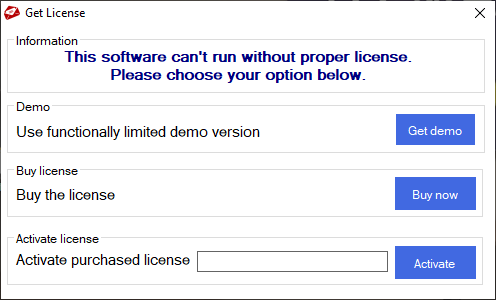
Step 1: Download and install (Installation Guide) the MailsDaddy Zimbra Converter tool in the local machine. After that launch the Zimbra converter tool and click on the Get Demo button if you don't have a valid license key.
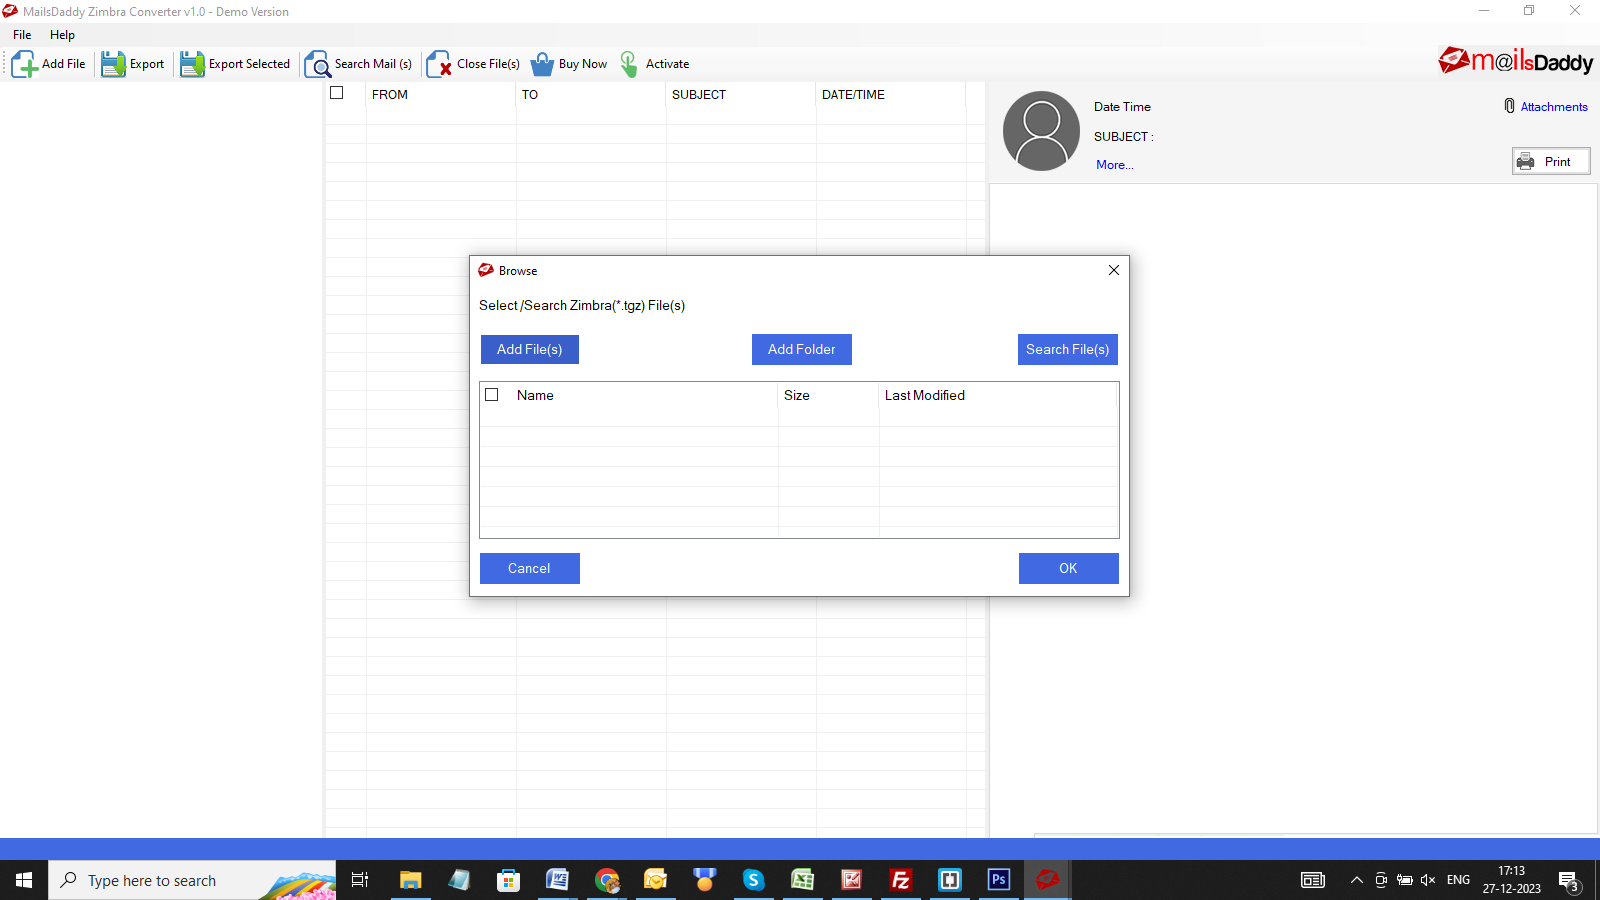
Step 2: From the first appeared screen in your Window, click on Add file button to add TGZ files.

Step 3: Here you get three options to add Zimbra TGZ file.
After loading TGZ files, check the boxes corresponding to the Zimbra data files and click on the Ok button.
Note: For Bulk Migration, you can load multiple tgz file at once.
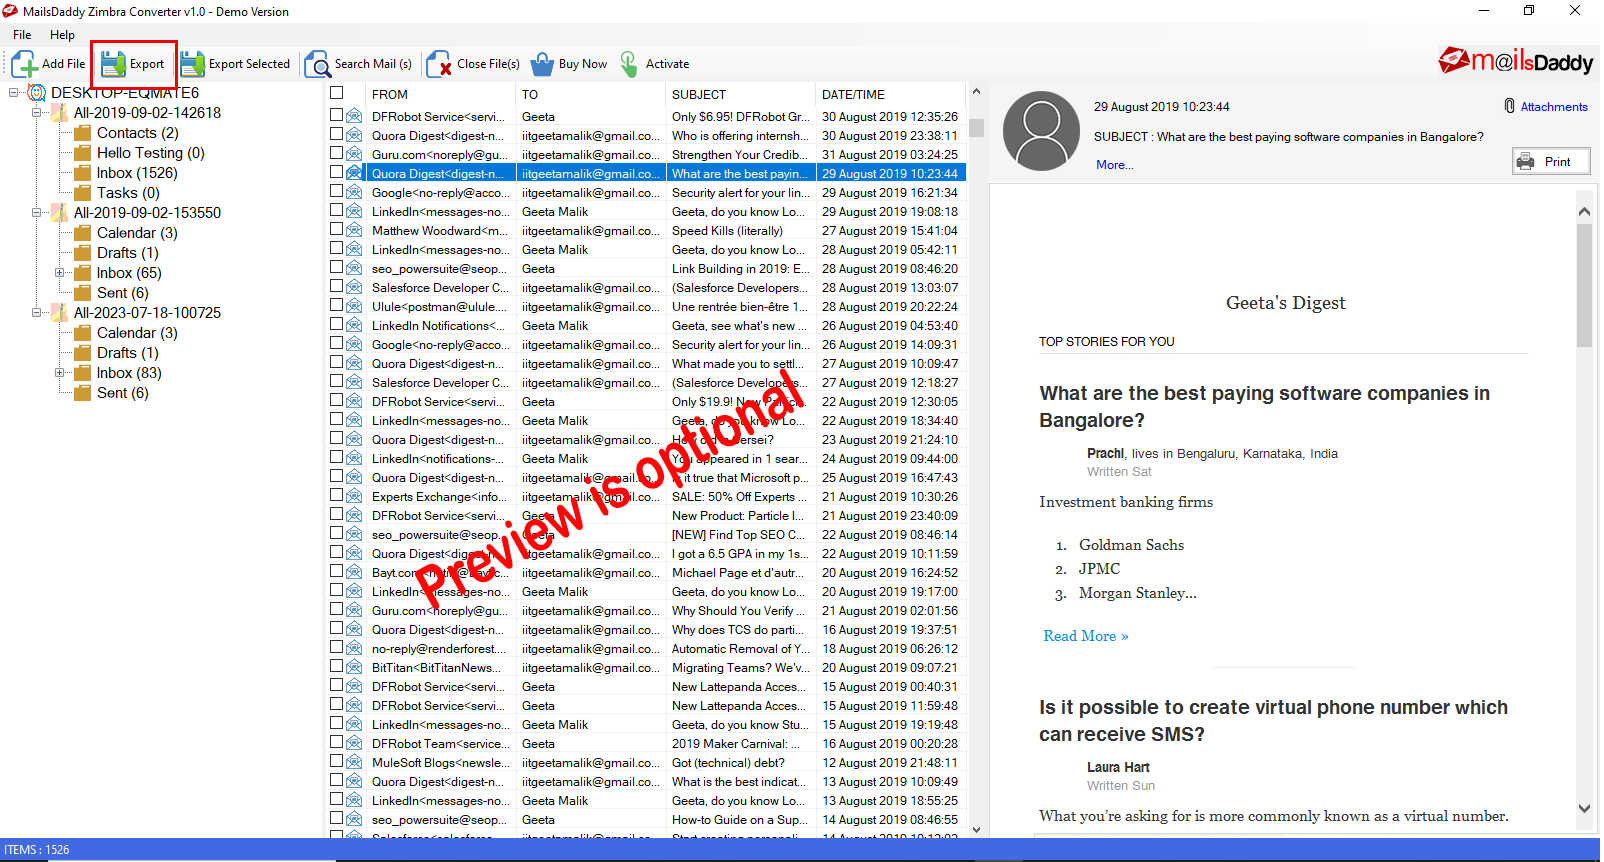
Step 4: From the next appeared Window, you can see the folder structure (optional) and preview of Emails (optional). Now click on the Export button.
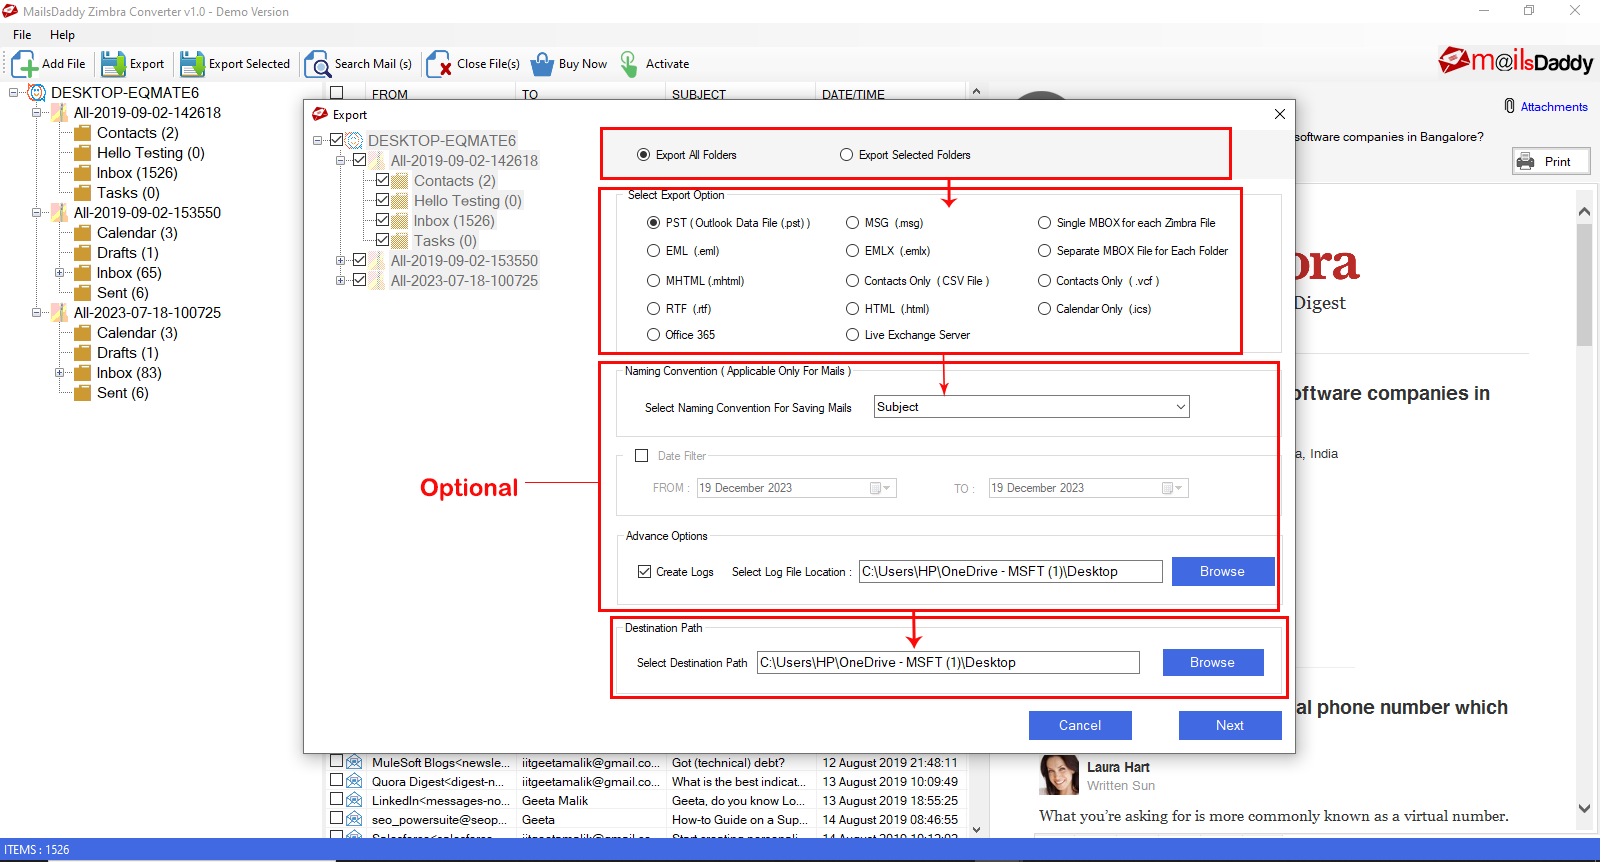
Step 5: From the Export Window, click on the PST (Outlook data file .pst) option >> apply Date filter (Optional) >> save a Log file saving location (optional). In the last provide a file saving destination path to store the PST file in the local machine and click on the Next button
Step 6: From the Export to PST Window, select the Single PST or Separate PST option as per requirements. Split the PST files if you have large TGZ mailbox file and click on Export button.

Step 7: Click on the Export button and wait until the process complete. After completing the process, click on the OK button.

Read our blog to make sure how to open or import PST file in MS Outlook.
To avail the benefits of Office 365 platform we highly recommend you to follow the below steps to migrate Zimbra mailbox to Office 365 or Microsoft 365 account.
NOTE: Zimbra to Office 365 Migration is available only for Business License and Enterprise License users. For Personal License, it will be disabled.
Step 1: Download and launch the MailsDaddy Zimbra TGZ Converter tool and run the software. From the Get License Window click on Get Demo option if you don't have a license key.
Step 2: From the first appeared Window, hit on the Add file button
Step 3: After clicking, you can easily browse and load Zimbra mailbox into the software.
Step 4: Once the mailbox is loaded, you will able to see the preview of the email, contact, calendar etc with the folder structure. Hit the Export button to start batch migration from Zimbra to Office 365.
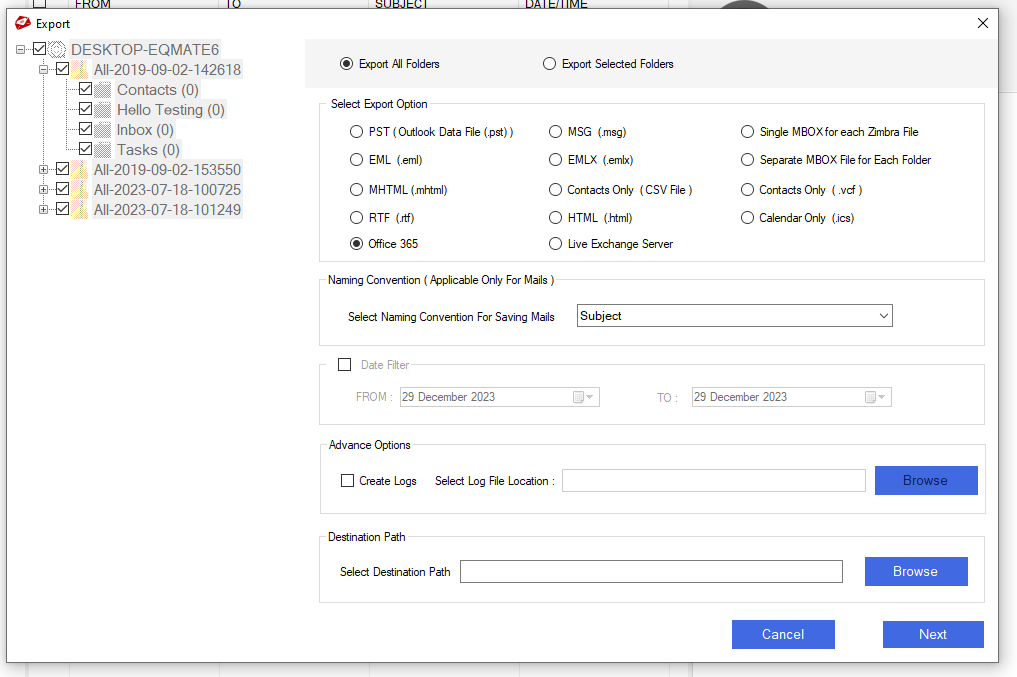
Step 5: From the Export Window select the Office 365 option >> Provide Naming Convention (Optional) >> Apply Date filter (Optional). Provide a log file saving location and click on the Next button.
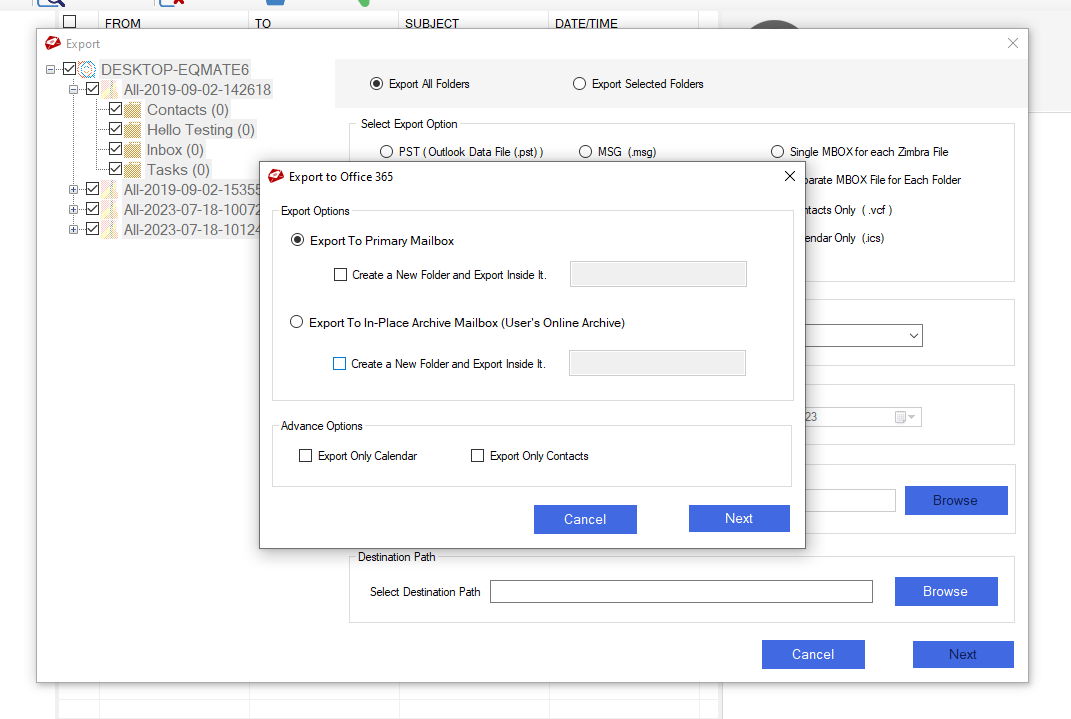
Step 6: In Office 365 Export Window select any export option "Primary and In-place archive" and if you want to convert your Zimbra Calendar and Contacts (Optional) then choose advanced options.
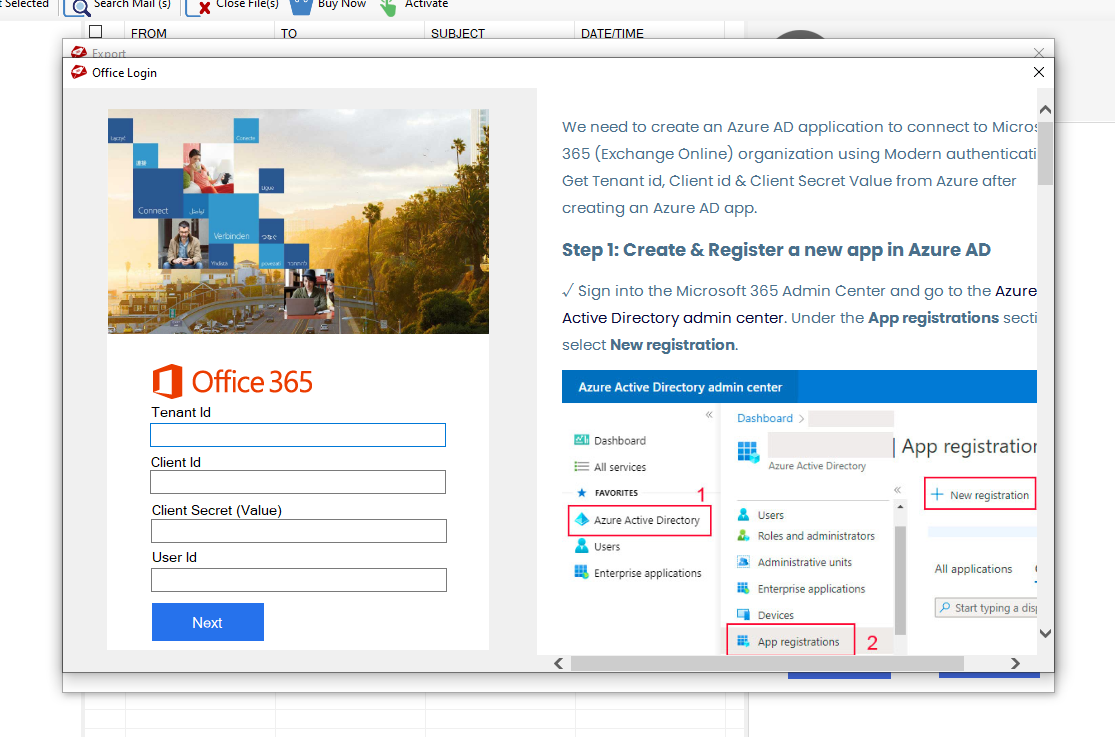
Step 7: Type Office 365 login credentials to sign-in in M365 account. Wait until the process completes then click on the Ok button.
Export your Zimbra TGZ data to Exchange Server without losing a single elements. To do so you need to follow below instruction as mentioned-
NOTE: The Zimbra to Live Exchange conversion option is available only for Business License and Enterprise License users. For Personal License users, this option is disabled.
Step 1: Get the tool form its official website and install it in Windows supported machine.. From the Get License Window click on Get Demo option if you don't have a license key.

Step 2: After launching the Zimbra to Exchange converter tool, click on the Add file button to load mailbox.
Step 3: Choose an option to load the Zimbra mailbox into the software.
Step 4: Now you can see the preview of the individual selected email and examine the complete folder hierarchy. After examining the emails, click on the Export button.
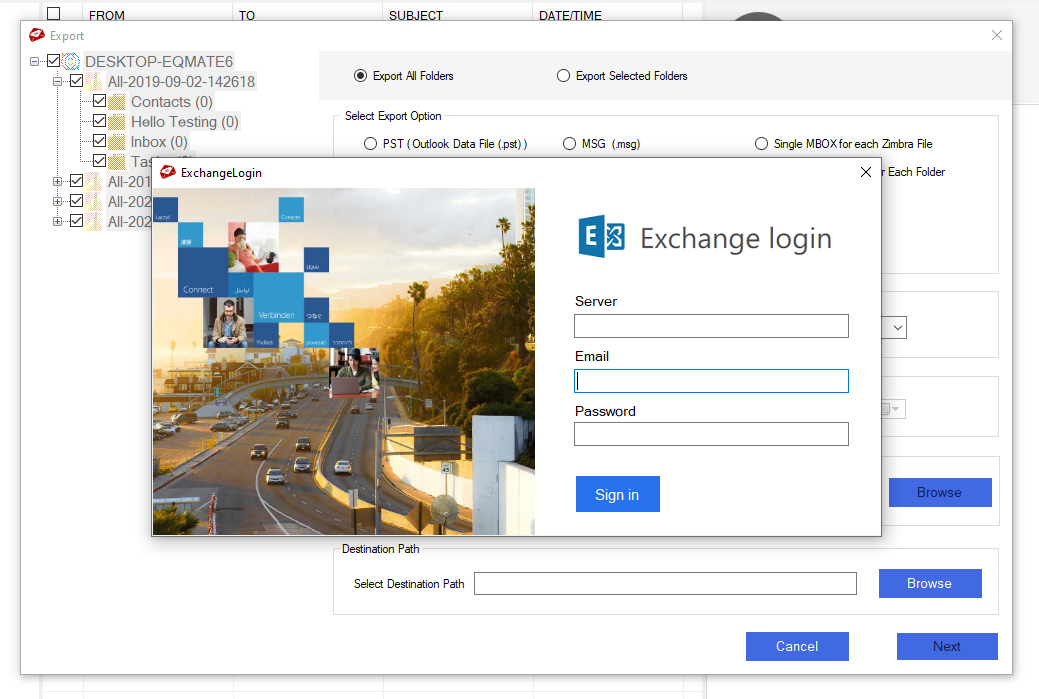
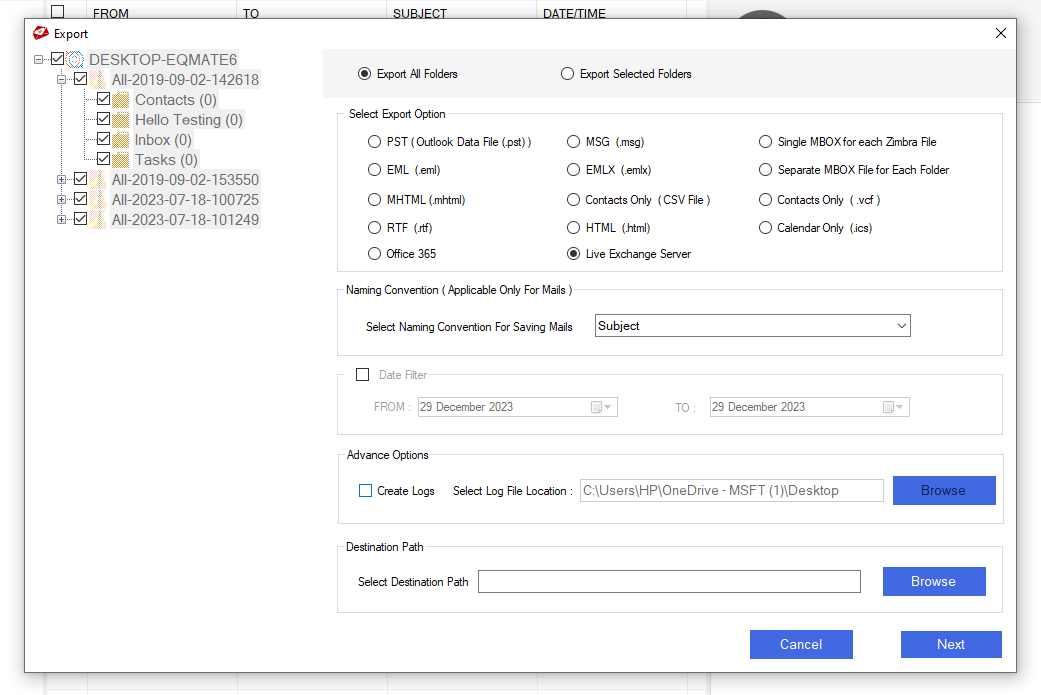
Step 5: From the Export Window select Live Exchange Server option to export the Zimbra data. Naming convention and Date filter range (optional). Suggest the log file saving location (if required) and click on the Next button.
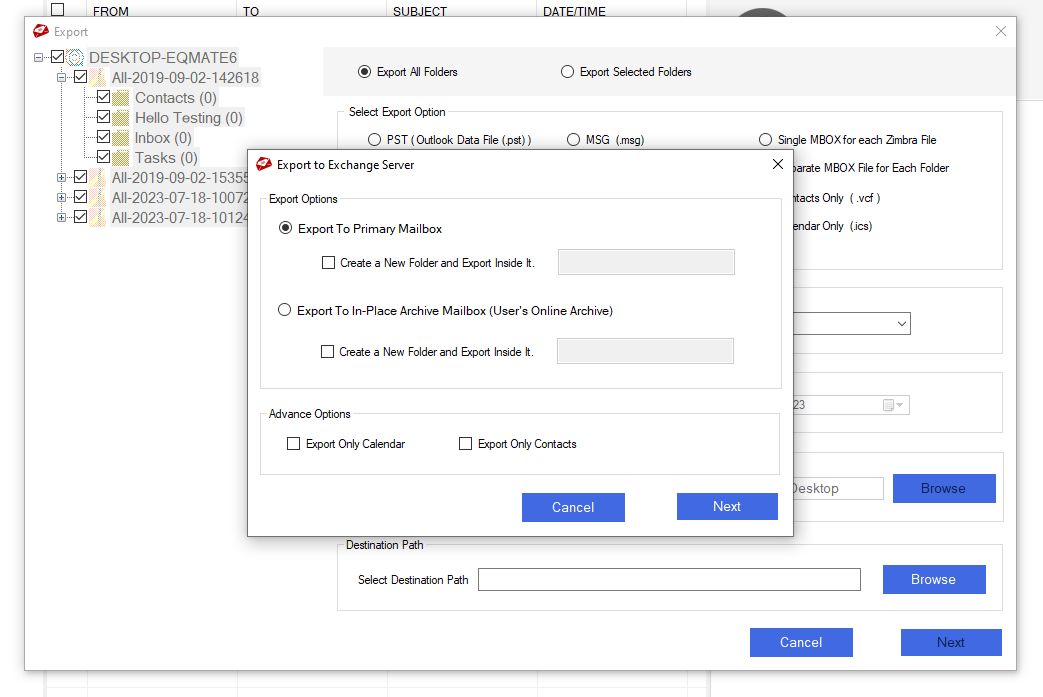
Step 6: In Export to Exchange Server Window, select the export option "Primary and In-place archive" >> choose an option from the advanced option (if required) >> click on the Next button
Step 7: Provide Server Name and user login credentials to sign-in in the Exchange Server account and wait until the conversion process finishes and then click on the Ok button.